Supplies for Calligraphy
Hello my sweet Paper and Mixed Media Crafters. It’s Rebecca E. Parsons, back with another in depth look at the tools of our trade. This time we will discover and explore Supplies for Calligraphy! At this moment, Calligraphy is seeing a resurgence of interest due to Journaling and especially Bible Journaling. You will learn all about the tools and materials used in by traditional calligraphers for elegant writing.
What is Calligraphy?
Simply stated, calligraphy is the art of elegant, decorative handwriting. It is best described as a written form of a visual art created by writing letters by using a pen, brush, or some other writing instrument. Calligraphy uses a particular style of letters known as scripts or hands. In this instance, the word script refers to handwritten characters versus printed. The most common writing instrument used is a pen with a pointed metal nib from which ink is applied to a writing surface. Applying more pressure produces thicker lines and less pressure creates thinner lines. The pressure applied spreads apart the left and right halves (called tines) of the nib, producing more ink flow.
The History of Calligraphy Tools
Calligraphy dates back to approximately 2400 BC. Egyptian and Greek scrolls along with Chinese brush calligraphy date to this era. The Chinese brushes were made with animal hair tied to a piece of bamboo or wood, and were very flexible. This is considered to have been a very significant invention as the same basic instrument is still used today. Romans carved calligraphy into stone monuments around 1 AD with chisels. Calligraphic Quill pens were used for manuscripts, first written in Britain and the Middle East around 700 AD. Before the term calligraphy was used, which was approximately 400 years ago, this form of written art was known as ‘beautiful writing’ or ‘elegant writing’. In the 1870s Duncan MacKinnon and Alonzo T. Cross created what is called a Stylographic pen with a hollow, tubular nib and a wire acting as a valve. This is the precursor of modern day pens!
Why Calligraphy is an Art and a Craft
I like to think of Calligraphy as mark making with a personal flair. For me it is both an art and a craft. This artistic part of writing involves applying varied pressure with the pen to produce thick or thin lines in a single stroke. Typically the downstroke is thick and the upstroke is thin. The craft part is that there are certain tools used in specific way a to create angles, which form letters. You can actually design letterforms once you learn the basics. This means that, with practice, you can learn to be a Master craftsman.
Calligraphy vs. Lettering
I would be remiss if I didn’t talk a little about this. These terms are often used interchangeably, but they do have different meanings. Calligraphy refers to the art of writing letters whereas lettering involves the designing and illustration (drawing of) letters. Calligraphy is more spontaneous since one script is used at a time. Conversely, lettering requires more thought relating to design decisions as individual letters are created and the outcome can vary from one letter to another. Therefore, calligraphy is considered to be a form of art and within the Art category with lettering being a form of design and therefore in the Design category. We may have a future post about Lettering.
Tools Used in Calligraphy
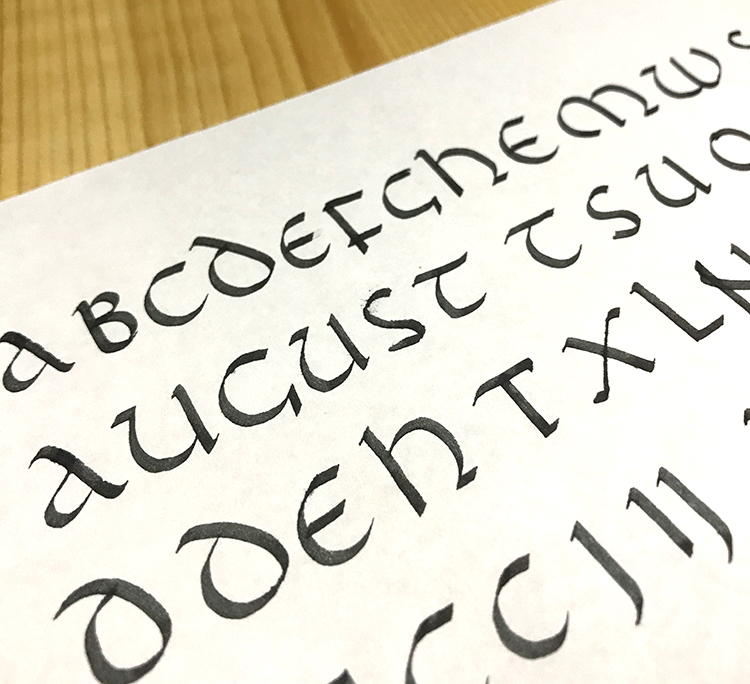
Letterforms changed or evolved because of the tool. Romans carved calligraphy into stone monuments around 1 AD. The shapes of letters were very square because of the tool used to create them – a chisel. These square letters are known as The Roman Alphabet or Imperial Capital. Then came Papyrus scrolls, parchment, and vellum for Calligraphic style manuscripts. The letter shapes became more rounded because of the way the quill pen marked these animal skin materials. These were known as Uncials. We will learn about both below.
What Do I Need to Get Started
The tools used by today’s calligrapher are fairly straightforward. To begin your journey into this art you will need:
- A Dip Pen with nib attached
- Non-waterproof Ink – any usable liquid of any color
- Page or Writing Surface. (e.g., paper, vellum, a wall, signpost, etc.)
- A Board to hold the paper
Pens
There are two types of pens which are standard instruments used by calligraphers. There are also several types of brush pens specifically designed for calligraphy as well.
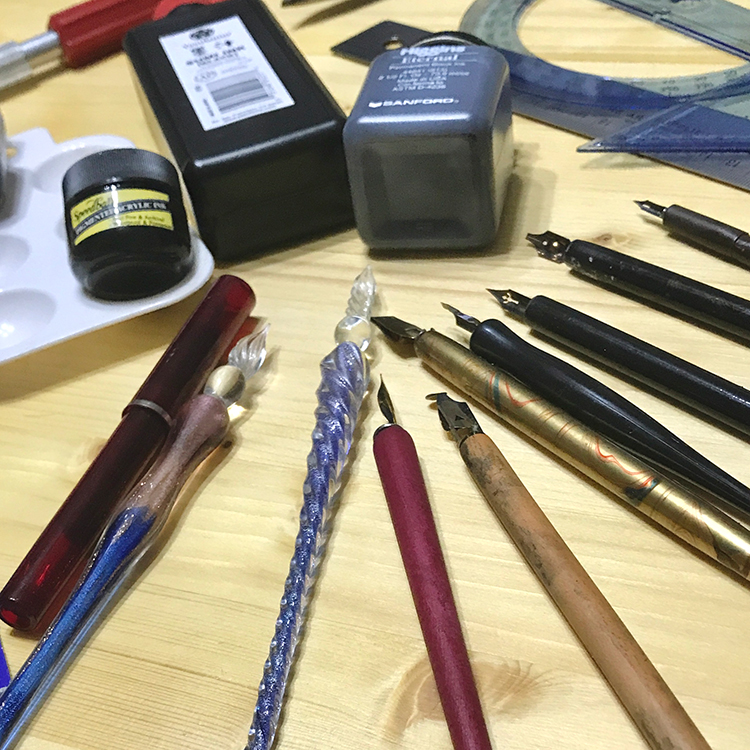
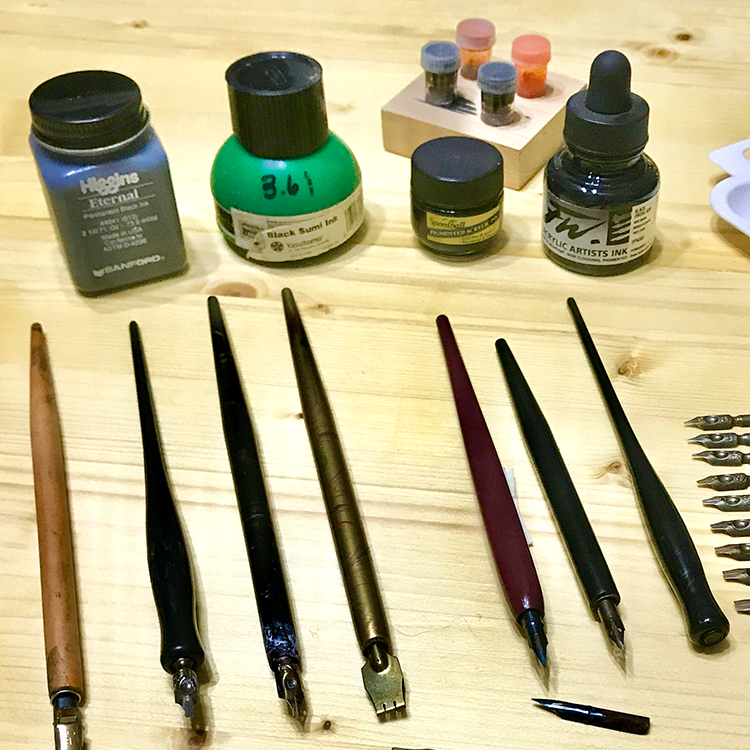
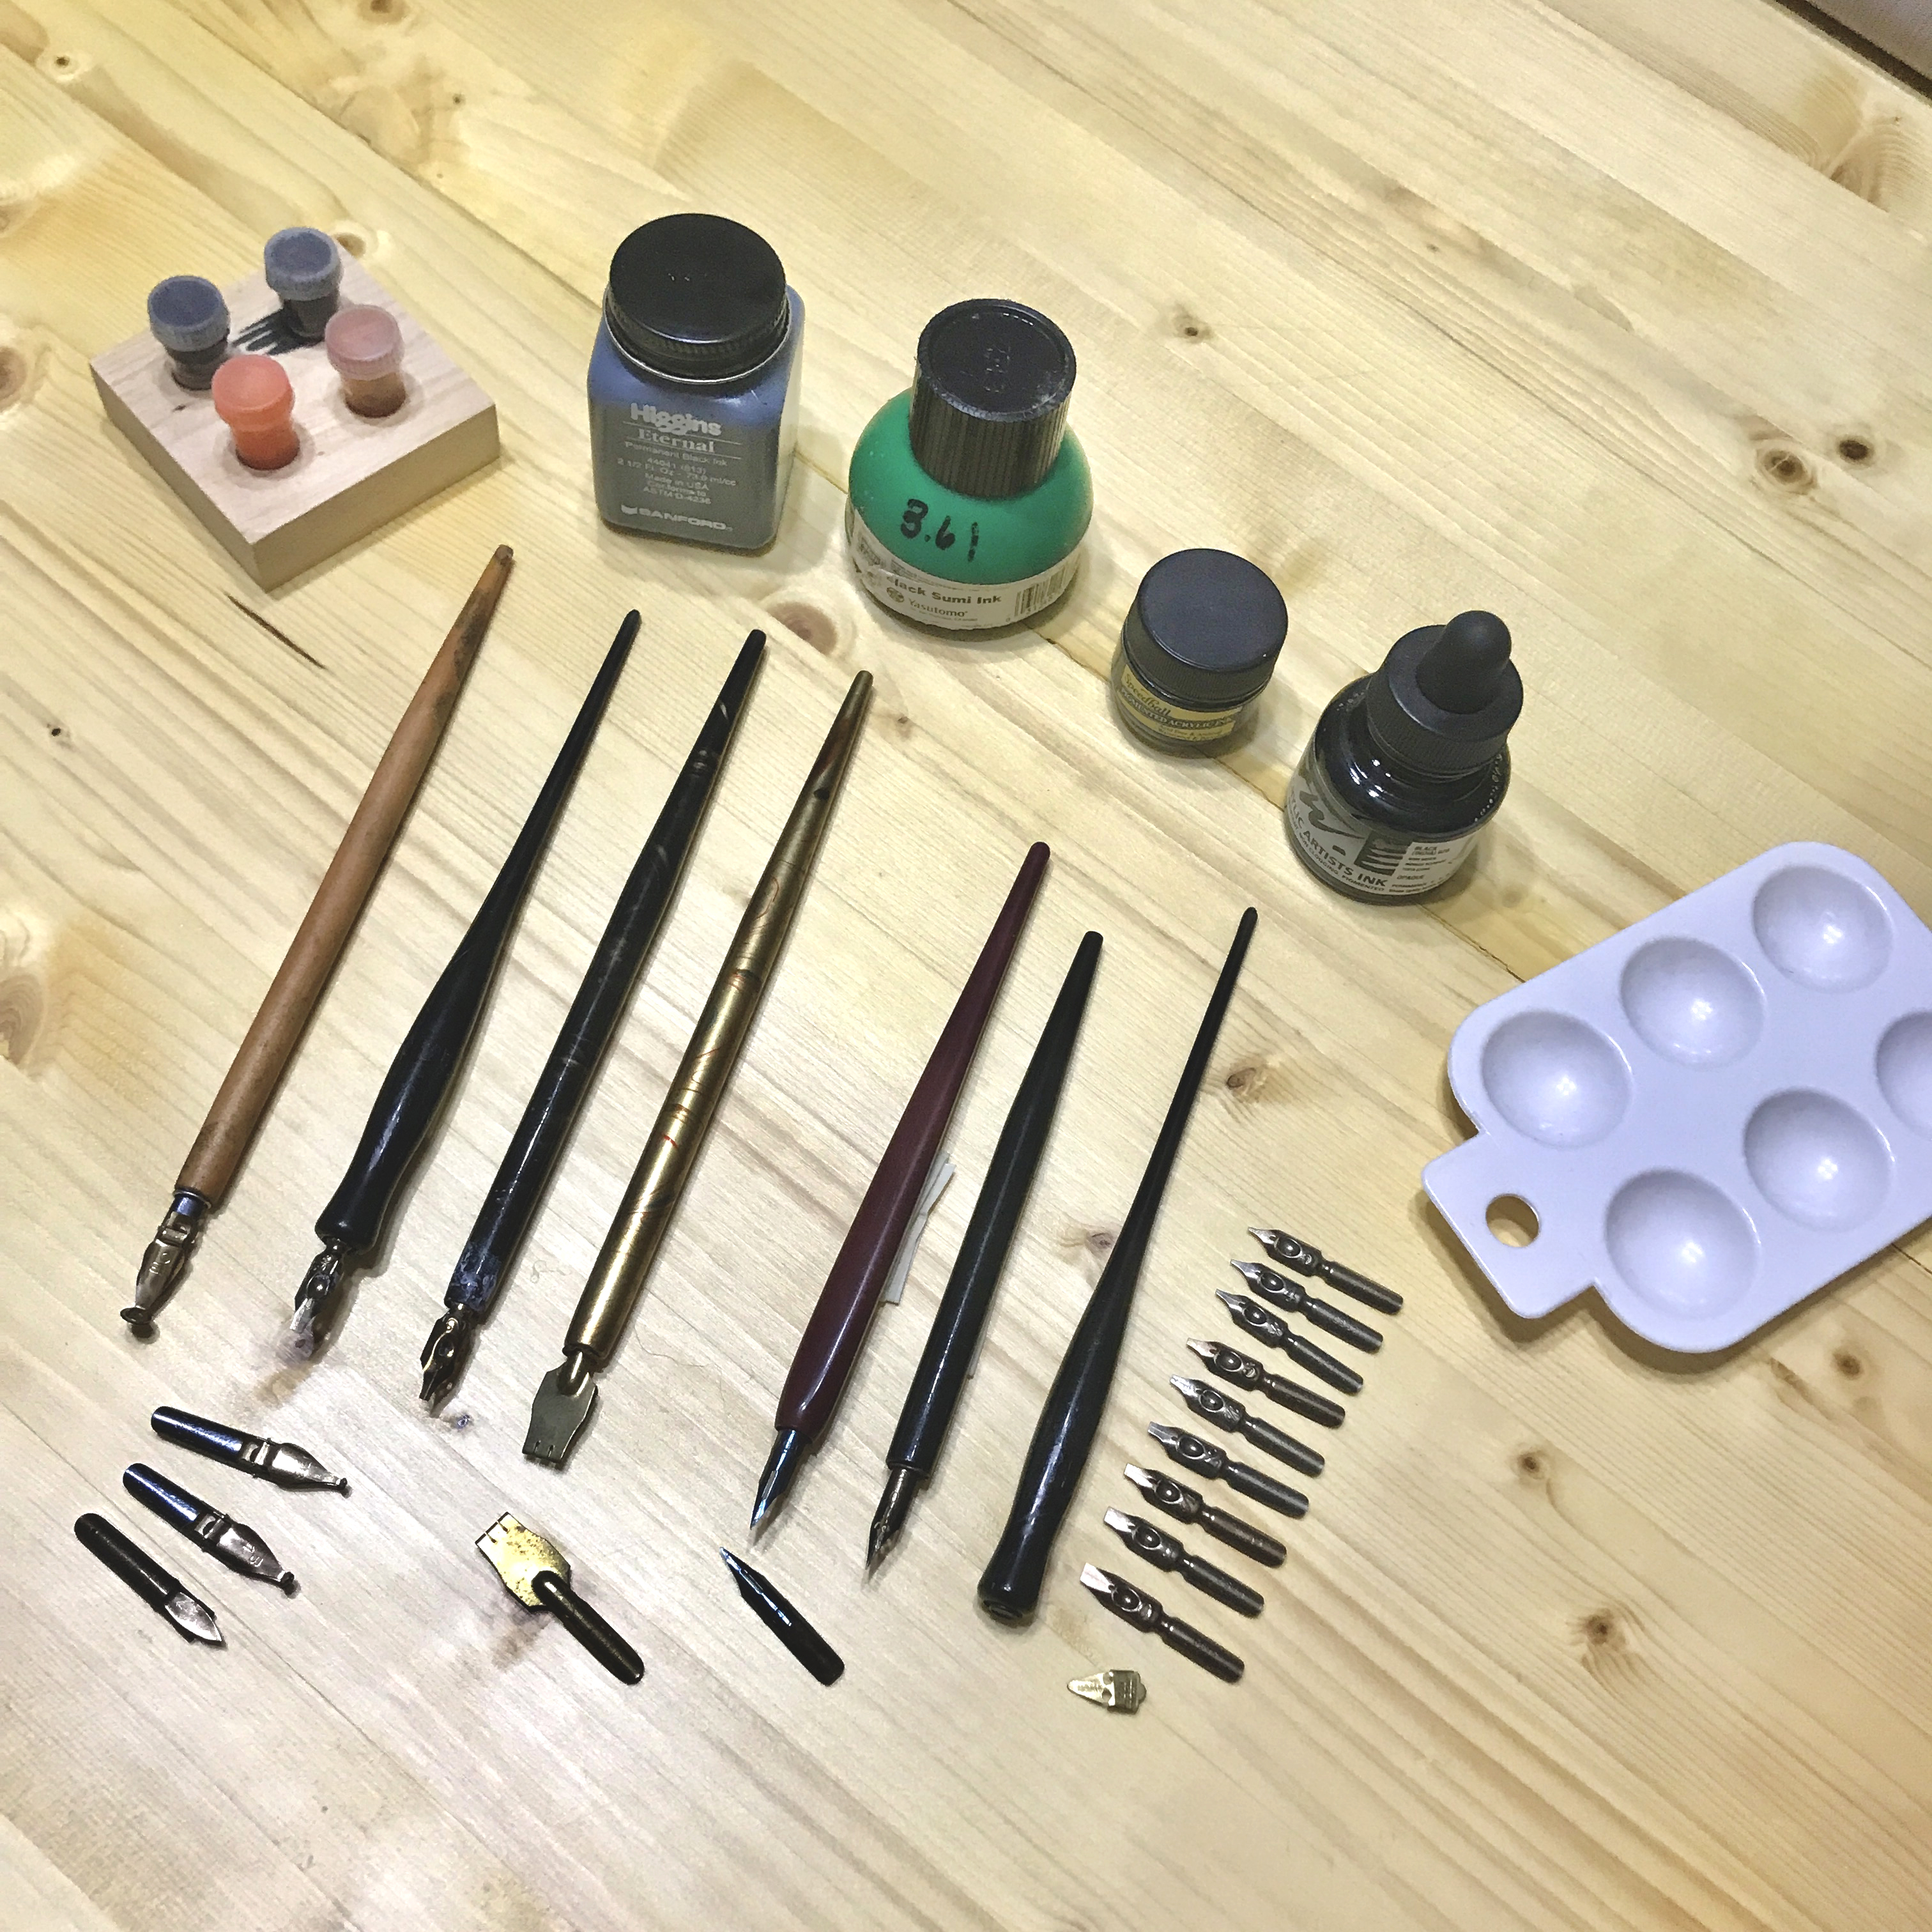
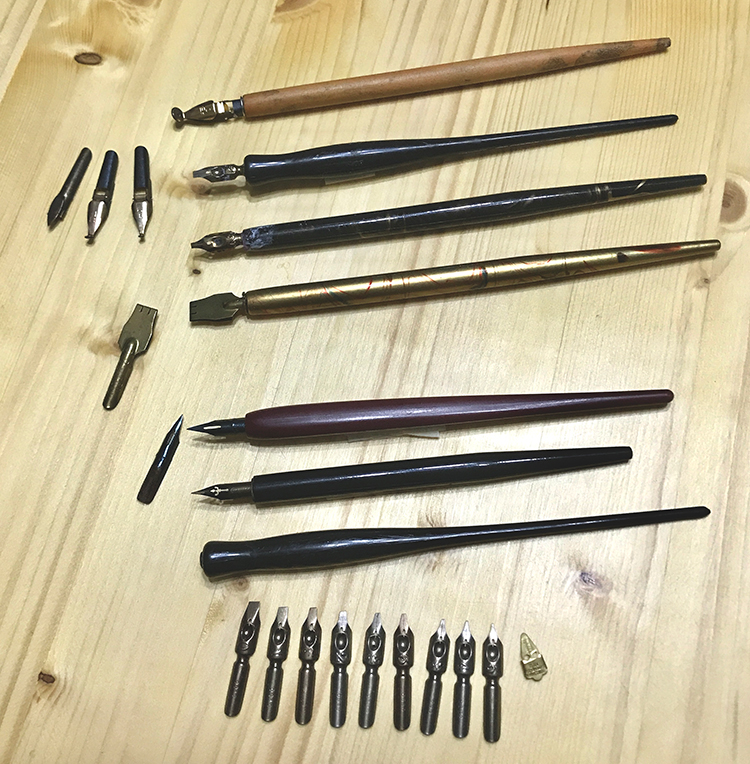
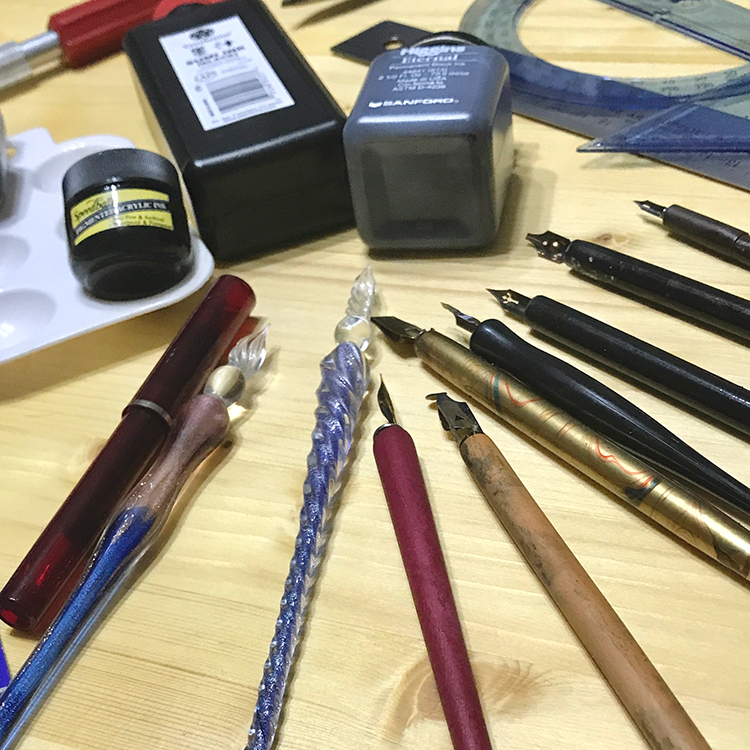
Dip Pens – Pens that use pointed or broad-edged chiseled (square cut) nibs and are dipped into an ink bottle are the common types still used today for Traditional styles of calligraphy. Dip style pens continue to be preferred by most professional calligraphers. There are three parts of these pens – the pen-holder, the nib, and the reservoir. The parts are fairly inexpensive and easily replaceable. ‘Straight Dip’ pens are modern versions that use interchangeable nibs as seen below.
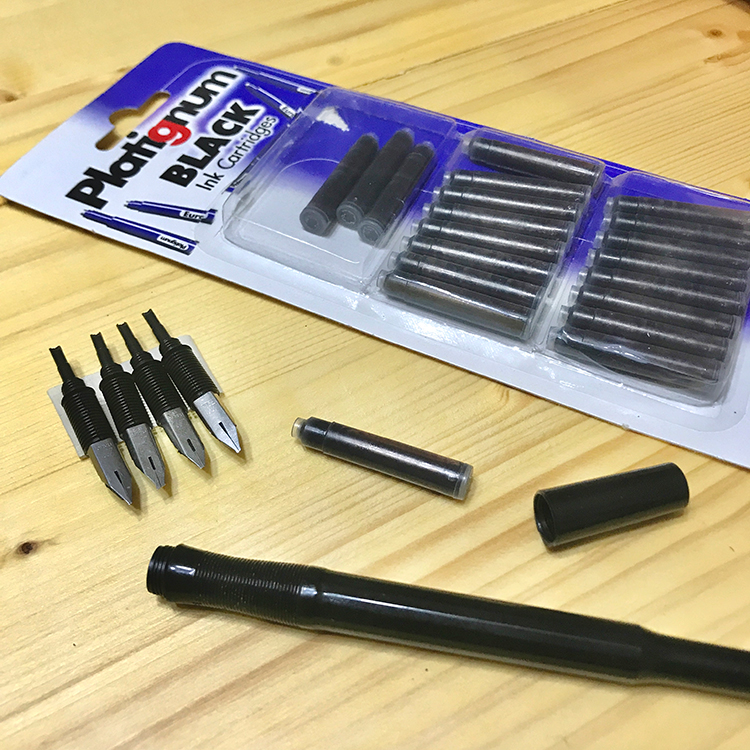
Calligraphy Cartridge Pens – Pens holders with ink cartridges are also called Calligraphy pens. The nibs screw into the pen holder. The set below displaying replaceable cartridges is a good starter set.
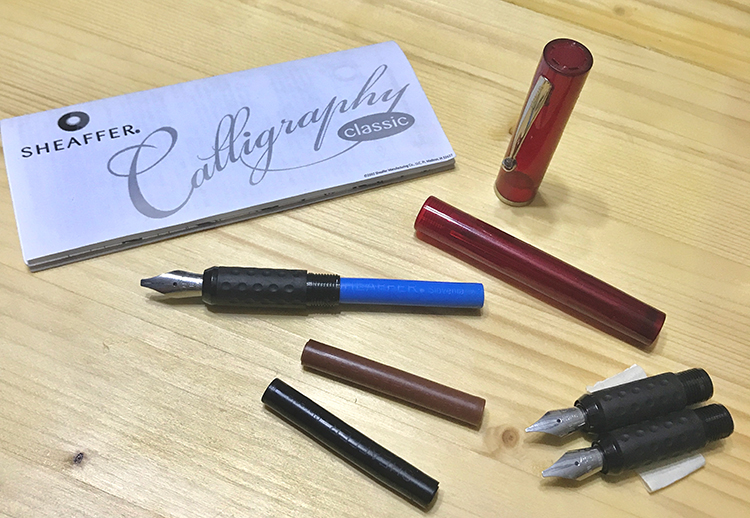
Calligraphy Style Fountain Pens – Pens with ink reservoirs and/or cartridges are sometimes called Calligraphy pens. Some of these are disposable while others can either be refilled with ink or offer disposable cartridges. Modern pens like these are popular because there is a good selection of interchangeable nibs available, making it easy to move from one style to another. Below is a good beginner set.
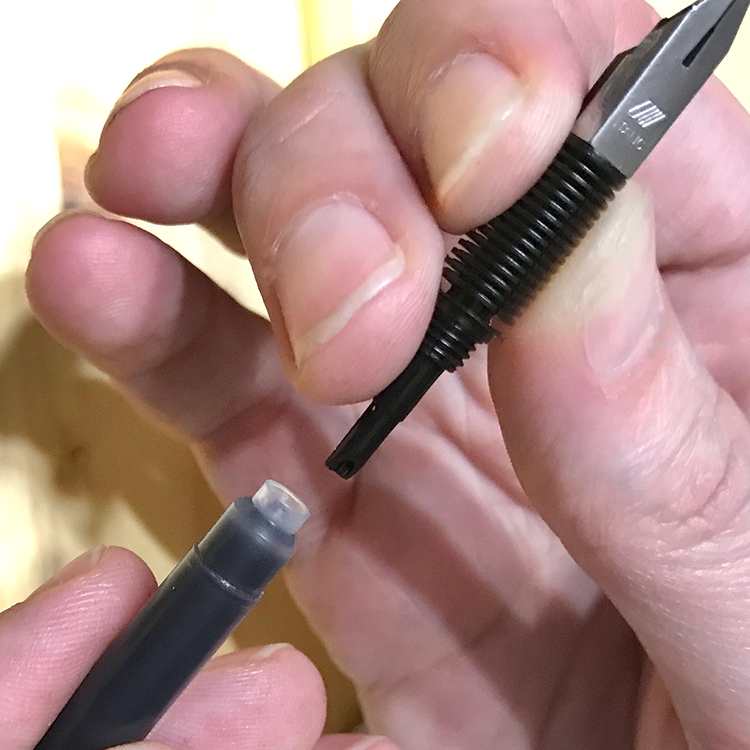
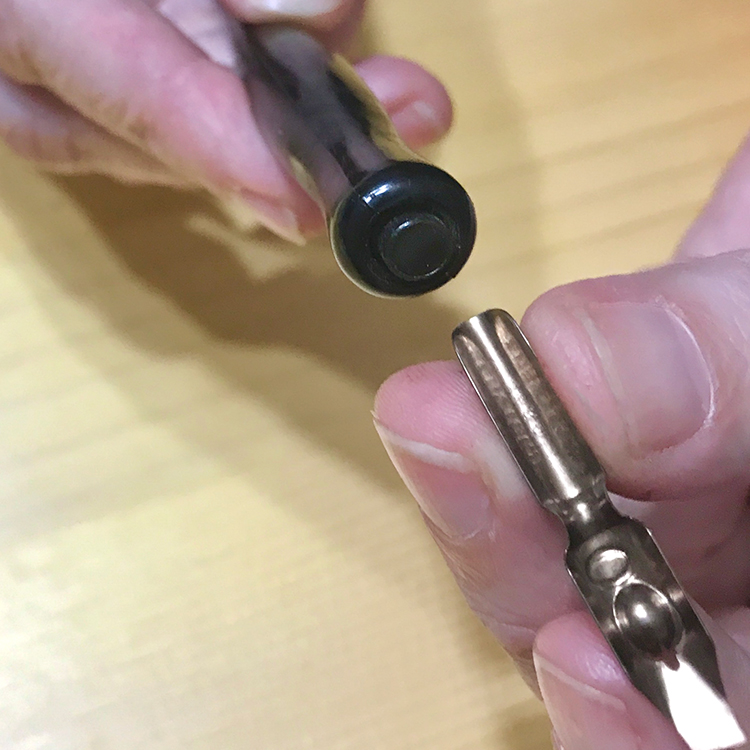
Push the nib into the cartridge before inserting it into the pen holder.
Optional Mark Making Tools
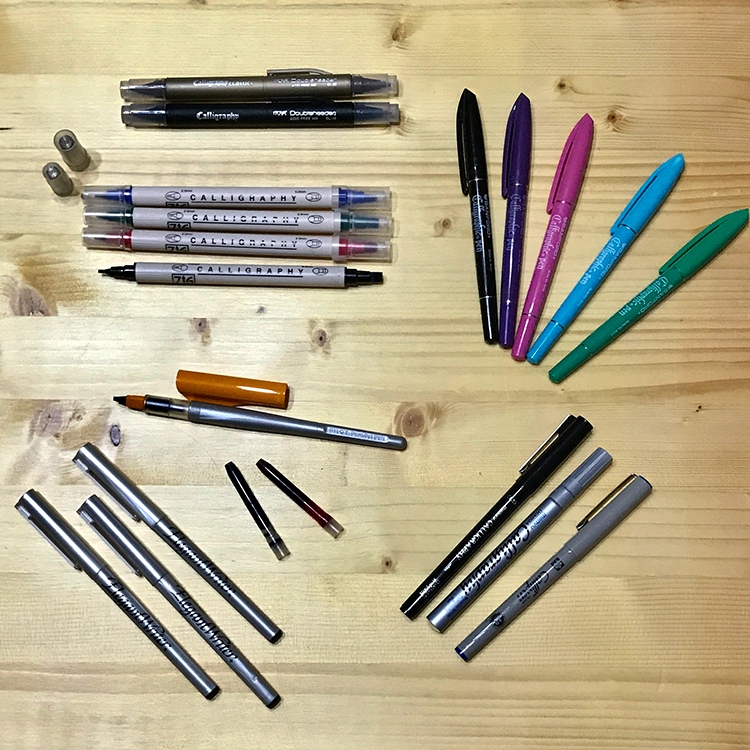
Brush Pens are great for beginners as they are easy to use and offer many colors. Typically dual ended, they are easy to find and great for practice. These are generally felt tip pens, available in pigmented (non-waterproof) and waterproof ink. NOTE: High quality paper is recommended for Brush pens since water-based inks can spread or bleed through less expensive papers.
Flat Paint Brushes are also an option with watercolors. A little more difficult to learn, this tool is fun to play with and comes in many sizes. When using a brush for calligraphy it is normally for Modern calligraphy projects, not Traditional. NOTE: High quality paper is recommended for brushes as well since water-based inks can spread or bleed through.
Parallel Pens are a favorite of mine and great for beginners. It is a cartridge pen that comes in several sizes. There are many colors of cartridge inks available.
Pen Nibs
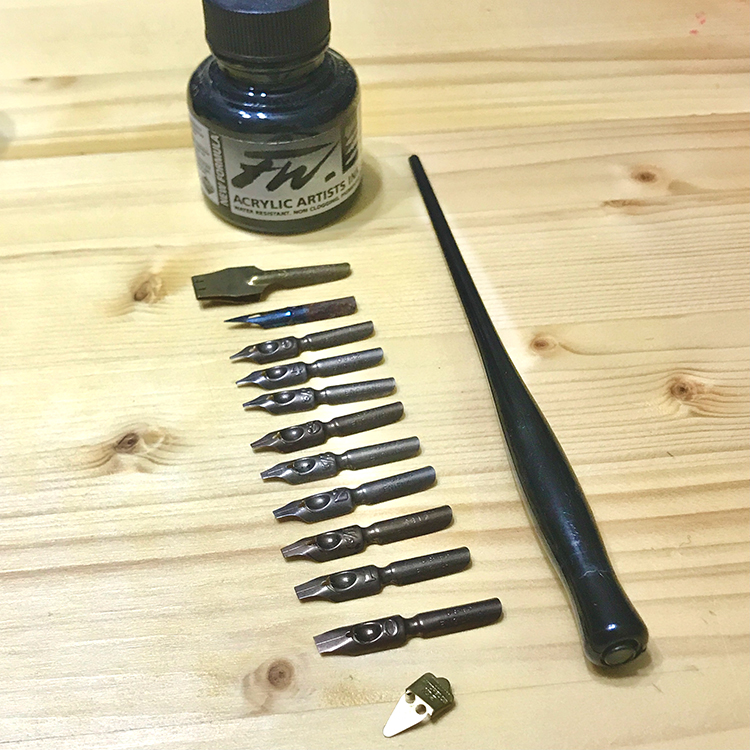
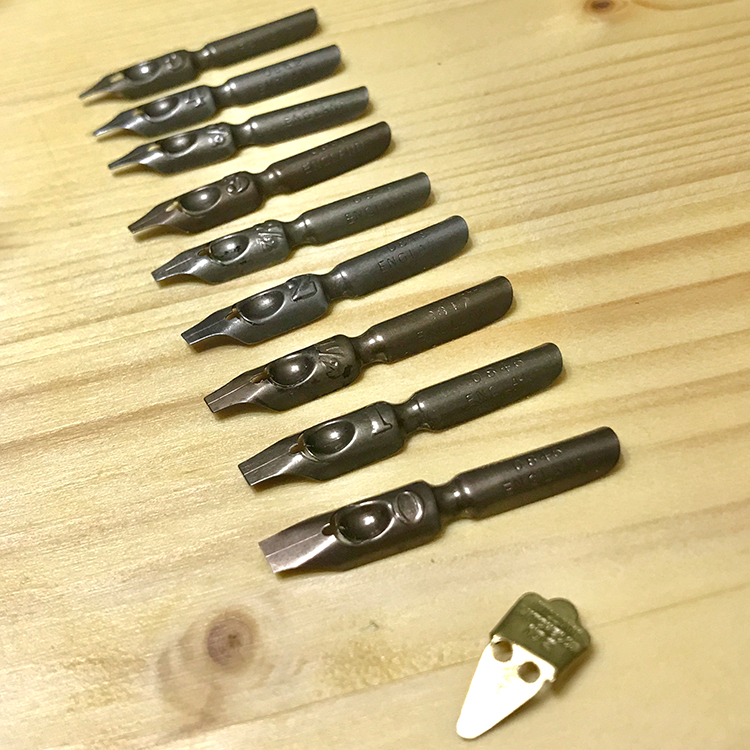
What are nibs? They are metal tips or pen points that hold the ink so you can design letters. There are hundreds, possibly thousands, of nibs available. Each has a specific shape, which produces a different type of line. They are made for Italic, Script, Copperplate, et al. Nibs come in 10 widths. There are also left handed nibs! Even wide ones for posters and large format work. Once again, I recommend trying a variety to see what suits your hand and your style. I have my favorites and you will also. Each has a different feel and reacts differently to the surface. I could write an entire post about nibs as there is so much to learn. Below you see several nibs and a reservoir in front.
Types of Nibs
There are two nib categories – Edged Nibs and Pointed Nibs. The style of lettering you want create will determine which type of nib you will use.
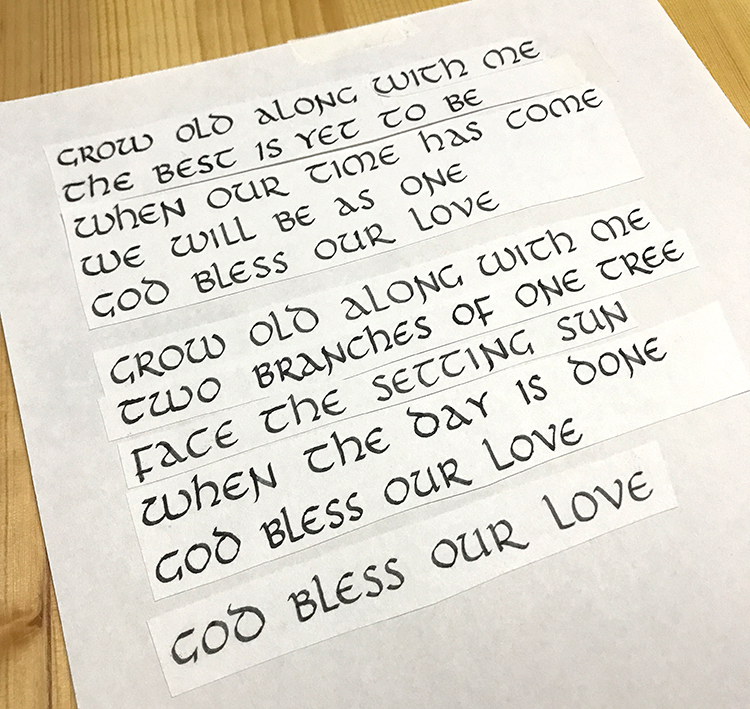
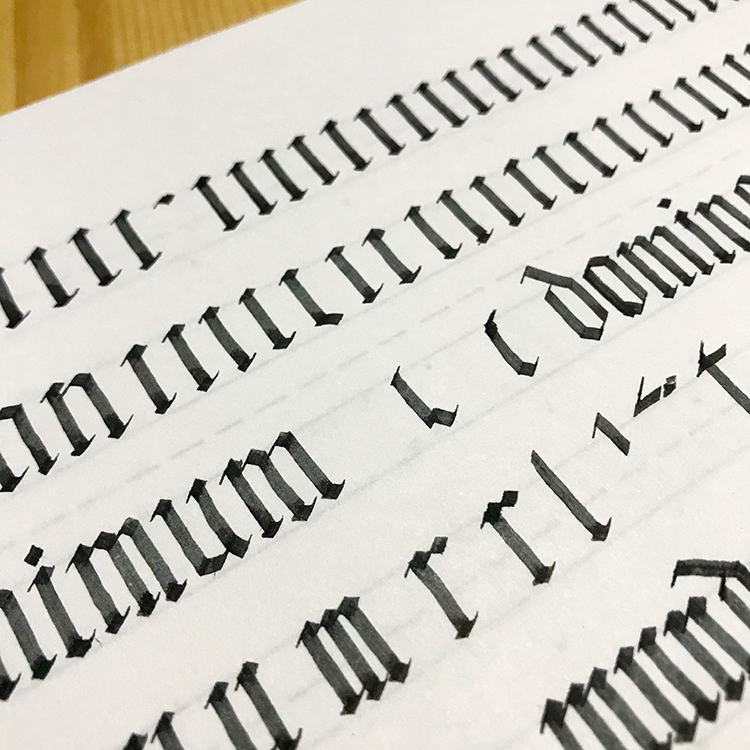
Edged nibs have a straight or flat broad edge. The edge varies in width. Usually the wider the nib the bigger the writing will be. Edged nibs are used for Roman Capitals, Foundational Hand, Italics, Gothic, and Uncials. Edged nibs are usually cut straight across for right handed calligraphers. Nibs are also available cut left-oblique to help left-handed writers hold the nib at the correct angle. Some of the easiest edged nibs to find are called Speedball ‘C’ Style nibs. Some of these are cut right-oblique for lefties! Popular square-cut nibs are the Leonardt Round Hand, William Mitchell Round Hand, Chronicle, and Brause Bandzug ones.
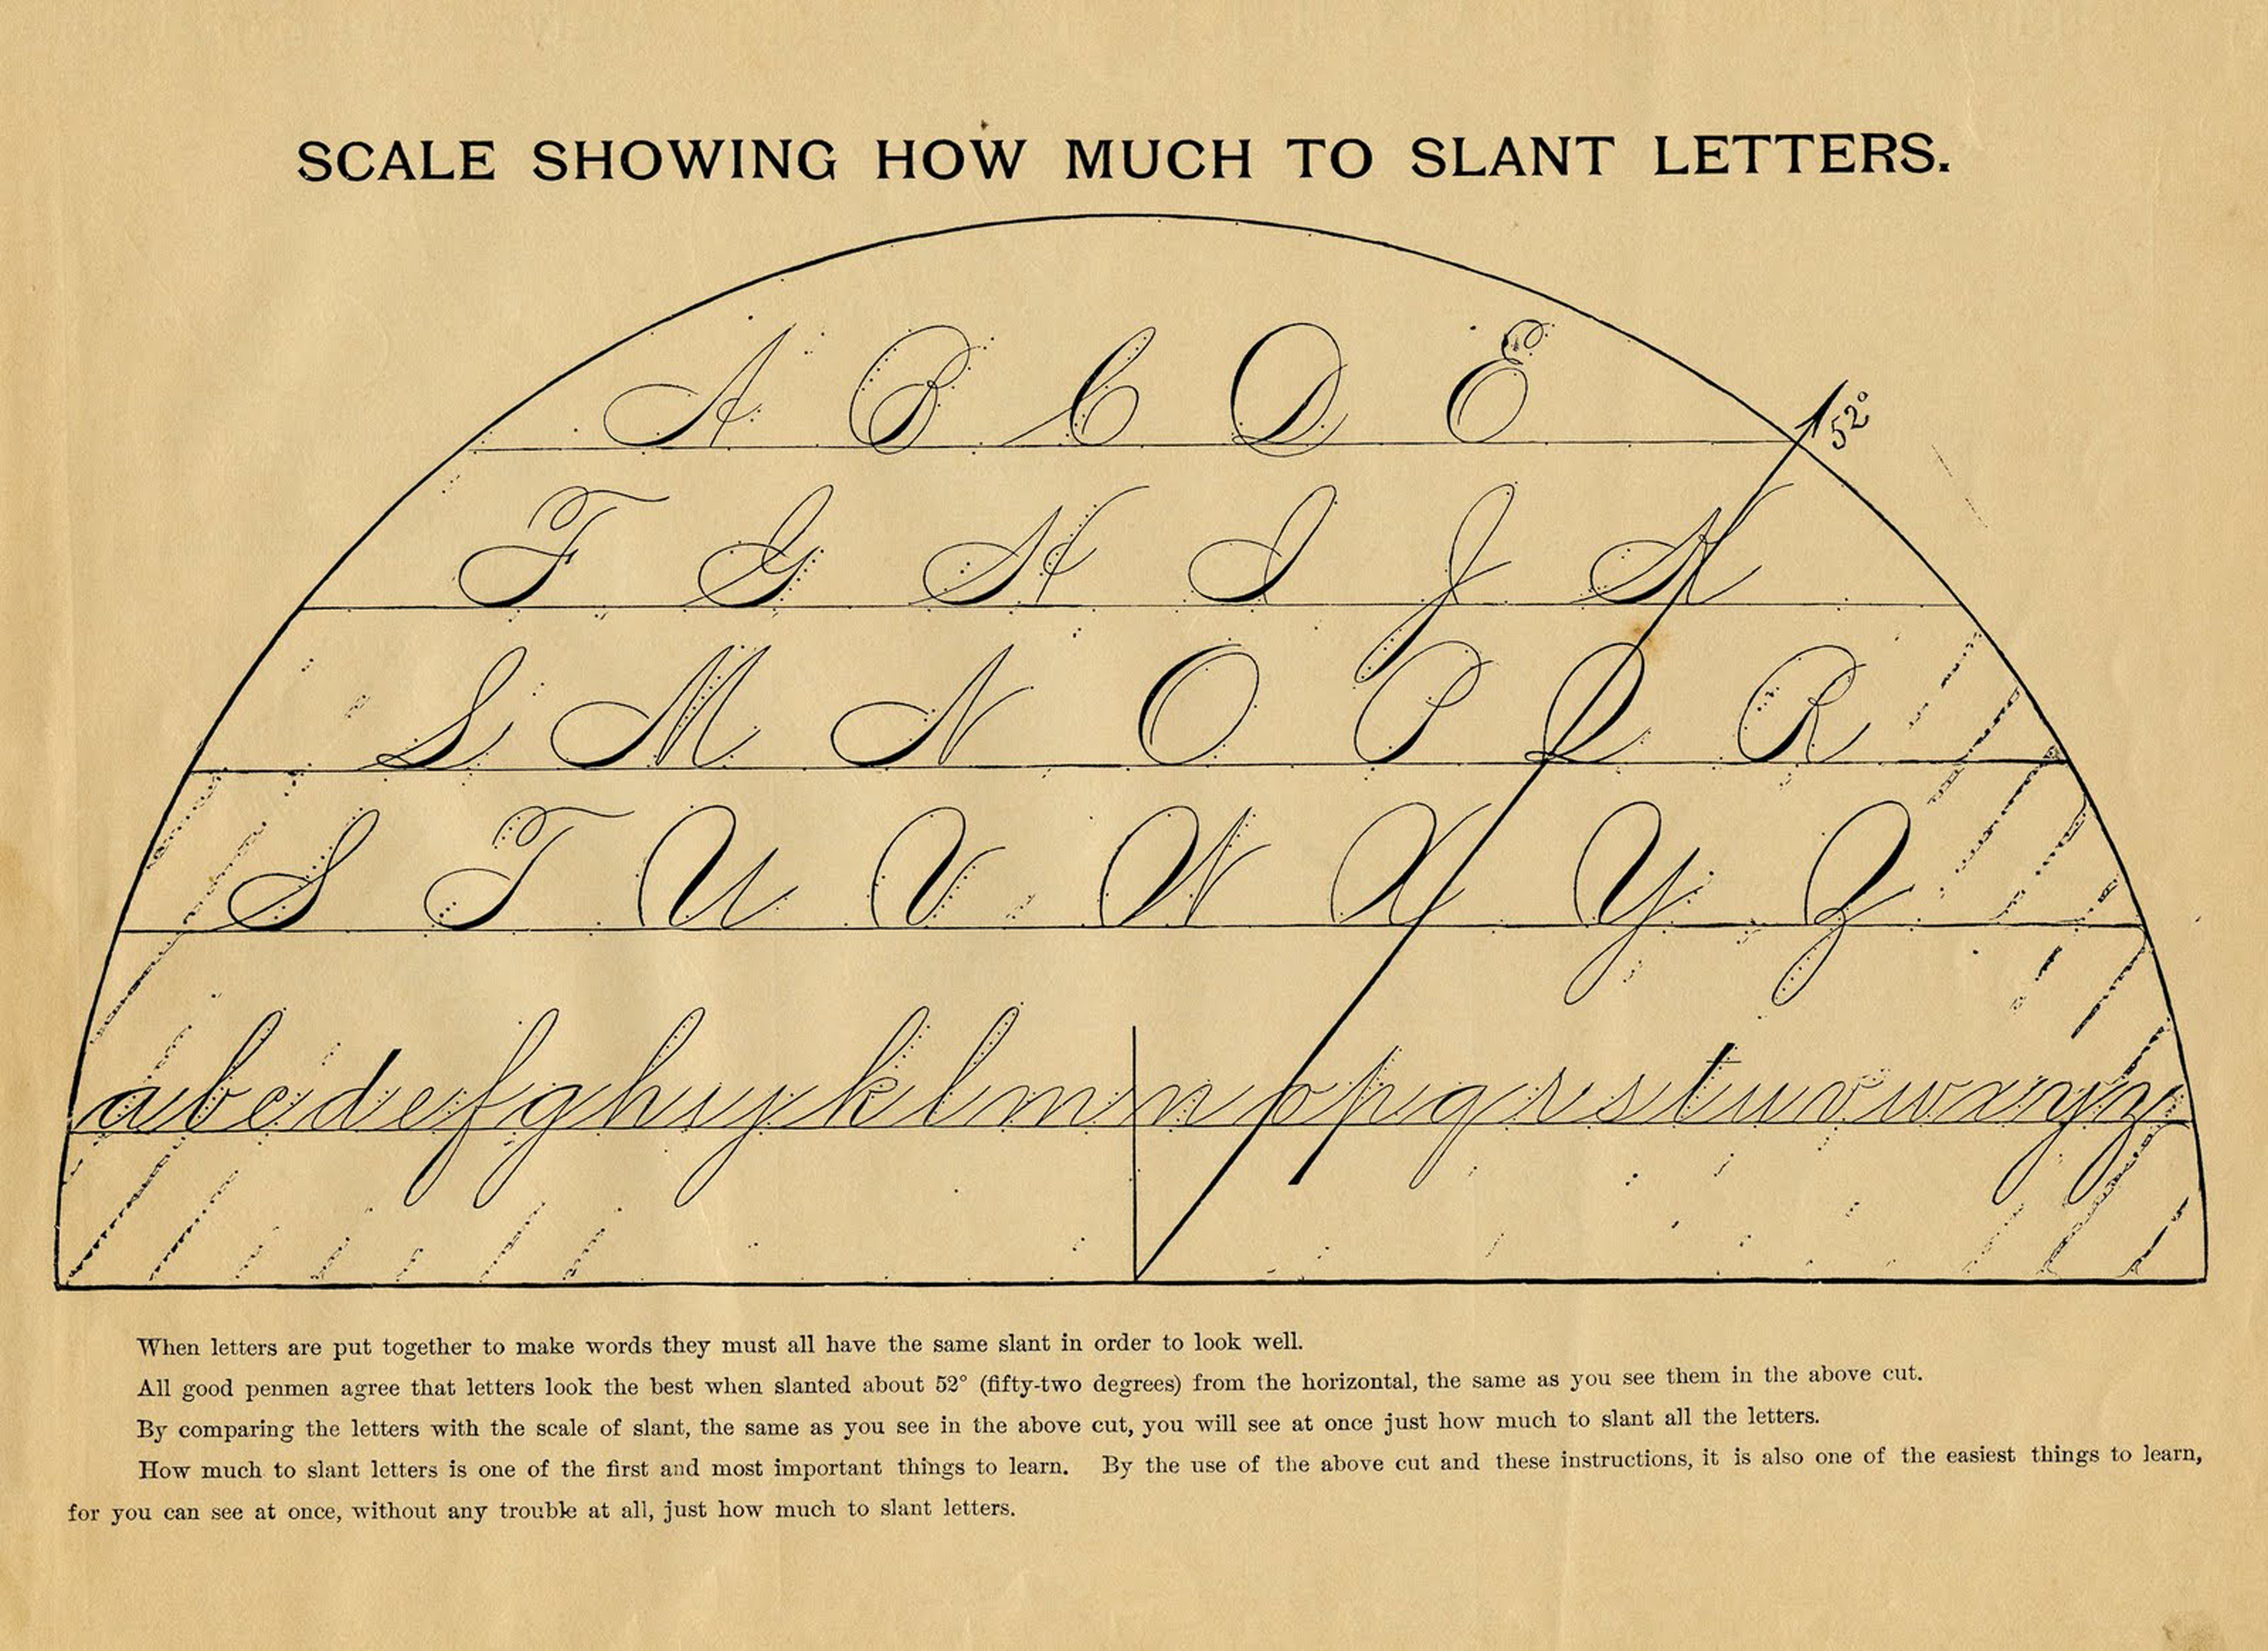
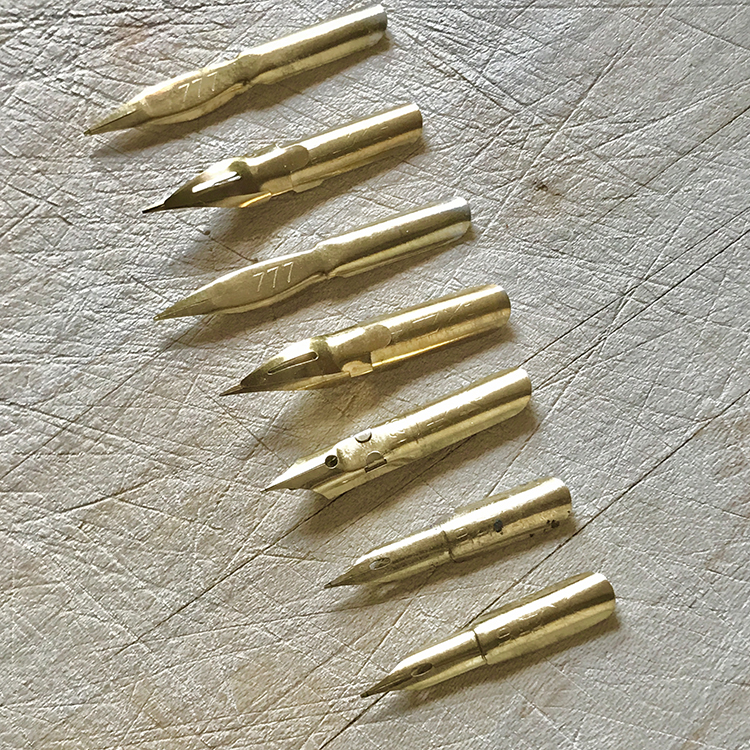
Pointed nibs have a pointed tip! Pointed nibs are used for Copperplate and Spencerian hands of calligraphy along with Ornamental Penmanship. To become proficient at writing Copperplate calligraphy it takes much practice and patience, as this method involves the artistry of ‘Flourishing.’ The term refers to the embellishment of letters by creating fancy extra curves and loops. You select them base on flexibility and how thick the point is. More flexible nibs create thicker lines when pressure is applied. The thickness determines the width of the line without pressure applied. The most popular nib for Copperplate and Spencerian are the Leonardt Principal EF and William Mitchell nibs. Luckily, there are sets sold for just these two hands.
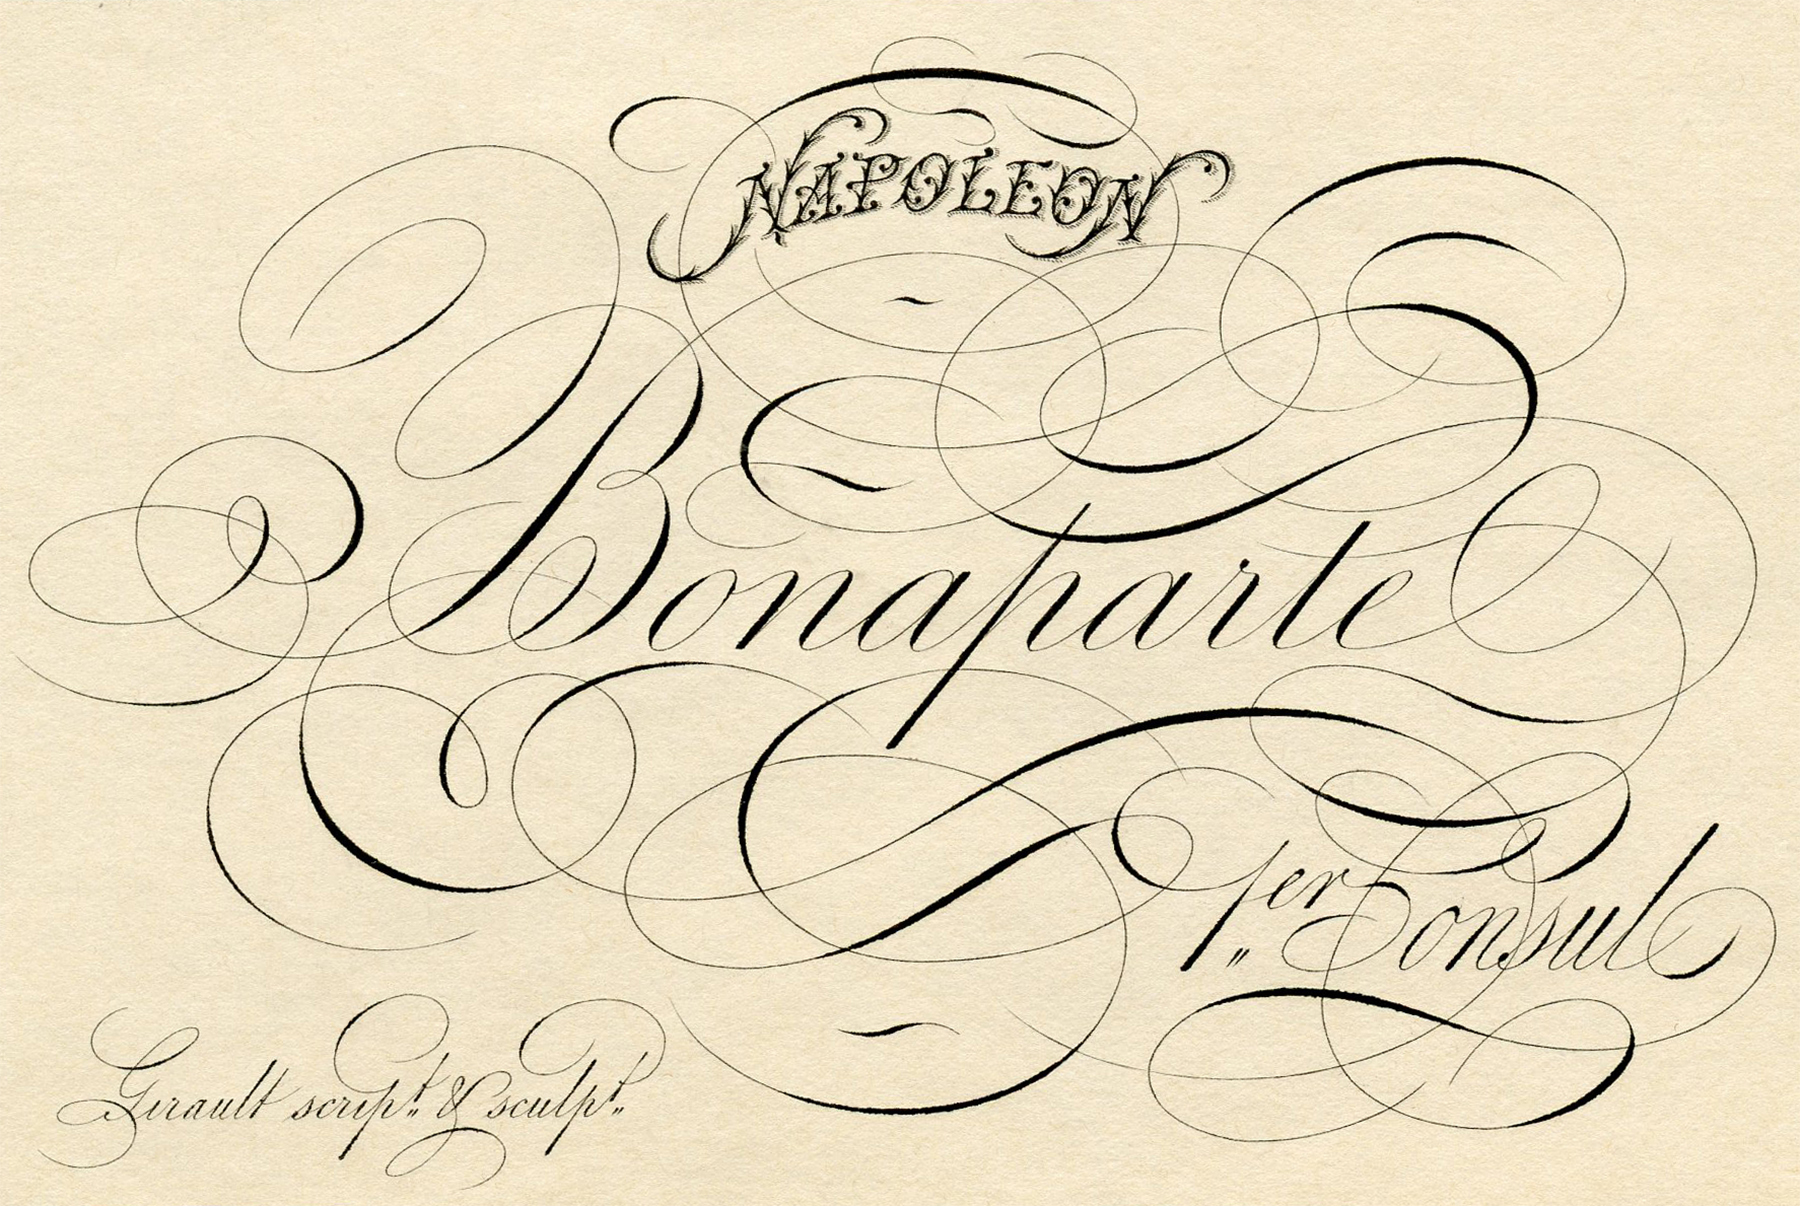
Geometric curves and loops with names like ‘swashes,’ swirls,’ and ‘curls’ are examples, providing more decorative ‘eye-catching’ additions to letters. The term commonly used for these embellishments is `Spencerian Flourishes’ since it was first incorporated into the Spencerian script. The Coca Cola and Ford Motor logos use Spencerian script letters. Below is an example from our ephemera.
Assembling the Pens
The wide end of the pen holder has a circular groove that holds the nib. Slide the long tongue of the nib into the groove. It can be placed anywhere on the circle. Push it gently into the groove to seat the nib.
Care of Pens and Nibs
NOTE: Do not leave your pens in the rinse water container! The nibs can rust and the wood of the holder can swell. Wash your pens and nibs carefully after each use. You can use an old, soft toothbrush to clean beneath the reservoir and the nibs. This is especially important when using acrylic inks!
Inks and Liquid Media
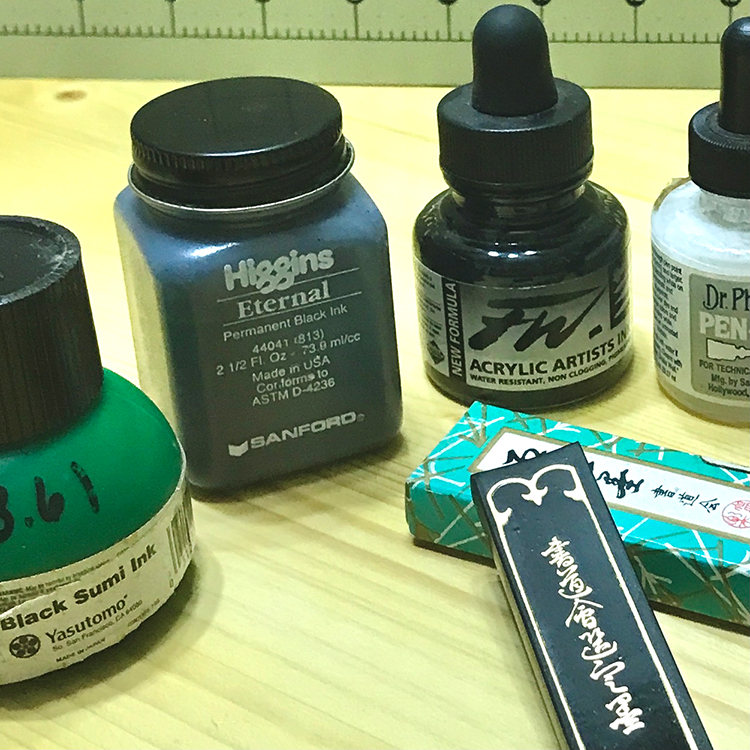
There are two basic forms of inks that are used in calligraphy. These include those that are waterproof and those that are non-waterproof. Most are made with a pigment and binder of some sort. I encourage experimentation because my favorites may not turn out to be yours. Try a lot of inks as you learn.
Non-waterproof are those which are used in pens that already contain ink in a reservoir or a dip pen. They are the preferred ink of calligraphers. These inks are necessarily thinner in order for them to flow smoothly from the reservoir onto the writing surface. They will not clog your pen.
Waterproof Inks are designed primarily for pens that are dipped into an ink bottle. These inks are thicker and therefore hold in place well so that they don’t ‘bleed’ off of the pen’s nib. Acrylics, Walnut, Sumi, and India inks are examples. Although small brushes can be used, this can be challenging, and water needs to be added in most cases for thinning.
- Acrylic Ink is made with liquid plastic, and is available in numerous pretty colors. Walnut ink is made with crushed walnut husks. The smooth and velvety Sumi ink and highly pigmented black India ink are both made with soot, which is a byproduct of incomplete burning of organic matter. A binder is actually not needed for these two inks. Sumi typically is an intense bluish black or reddish black in color and India ink historically has been black, although other colors are available. Importantly, all inks designed for dip pens tend to be completely waterproof and permanent once they have fully dried.
Cartridges are for the Fountain type pens and come in a multitude of colors. Some pens have specific sizes of cartridges, so make sure you buy one that fits your pen. Some cartridges are refillable and others are pre-filled and replaceable.
Non-Liquid Media
Color and Black and White media are used in calligraphy.
- Designer’s Gouache is an opaque paint that comes in a tube. Look for the permanency rating on the back of the tube. This is important to ensure it will not fade in light.
- Walnut Ink crystals and powder are great because you can mix your own darkness level. It produces a rich sepia tone that we love.
- Watercolor is great when you want colorful letters. Buy the best brand you can afford.
Other Tools You Need
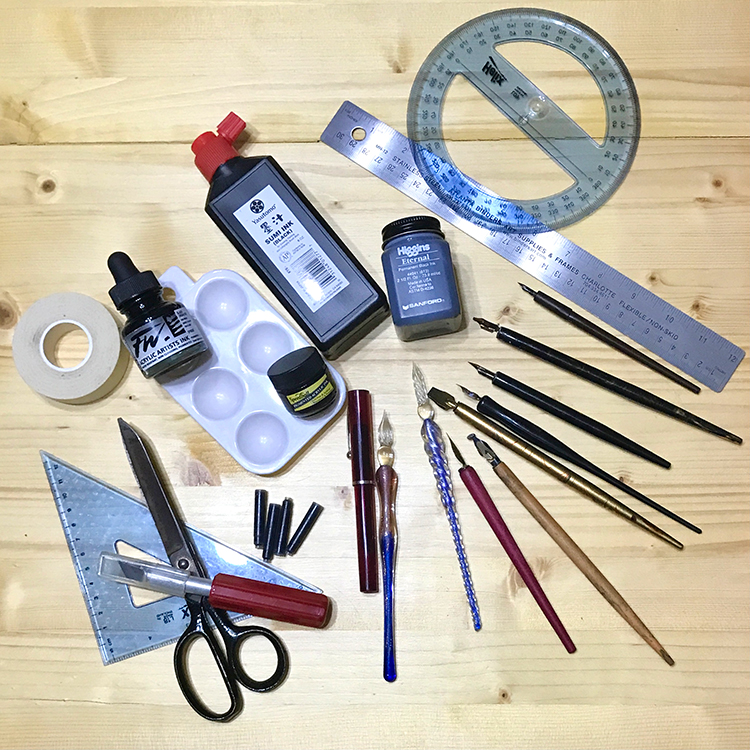
As you begin to work and practice, there are a few other tools you might need or want. You probably have several of them in your craft room already:
- Pencils – H or 2H
- Erasers
- T-Square, Rulers, Protractor, Circle Ruler
- Watercolor Masking Tape
- Tracing Paper
- Scissors
- Craft Knife
- Ink holder or plastic palette
- Pencil Sharpener
- Toothbrush
- Water containers
Nice to Have Tools
- Additional Nib Holders
- Additional Nibs
- Light Box
- Watercolor
- Gouache – opaque watercolor
Pages or Surfaces
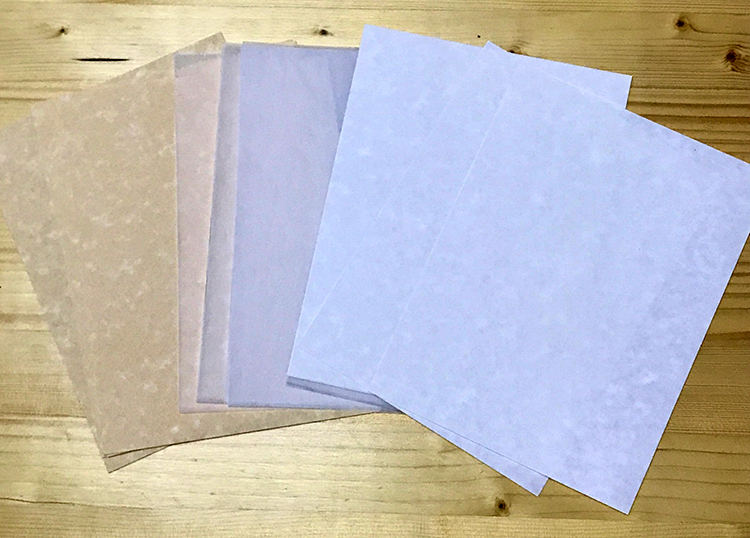
Now let’s find out what to write on! Looking at papers for your calligraphy can be confusing. There are so many choices. For beginners, I recommend Graph paper and Design Vellum or Tracing paper. I like 4 squares to an inch Graph paper. It has lines that give you structure as you draw strokes over and over again. Place the transparent vellum over the graph paper. Try out different papers and make marks. Note which you like best and save these for future reference.
Paper for Final Artwork
Good quality Watercolor paper is the best surface for most calligraphy. Hot Press Watercolor paper is preferred. 90 lb paper is great for beginners. This paper allows you to color the background as well. Handmade papers work well. You might try Bristol, Printmaking, Parchment, and Text Weight papers. Papers will need to be cut to size.
The Board or Easel
A sloping writing surface such as an adjustable easel can be helpful when writing in Traditional scripts like Spencerian and Copperplate when using a quill or pointed nibb pen dipped into an ink well. This is because when set at an angle, the ink flows more freely and prevents it from sticking together and forming blobs. Many calligraphers prefer to use a board, which they rest on the edge of a table to achieve the correct angle. Paper is taped to the board so it does not move.
Guide Sheets
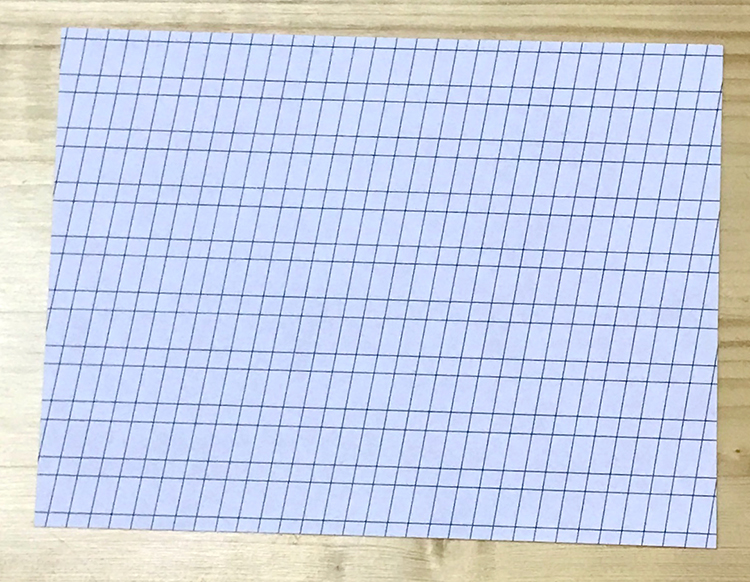
You will also need a practice guide sheet. These come in single sheets or notepads or you can create your own. There are Lowercase and Uppercase Practice pads for most of the script hands. Each hand has its own unique slant, angle, and ascenders and descenders. I prefer spiral bound books printed on high-quality practice paper with vellum sheets. Below is a generic grid sheet.
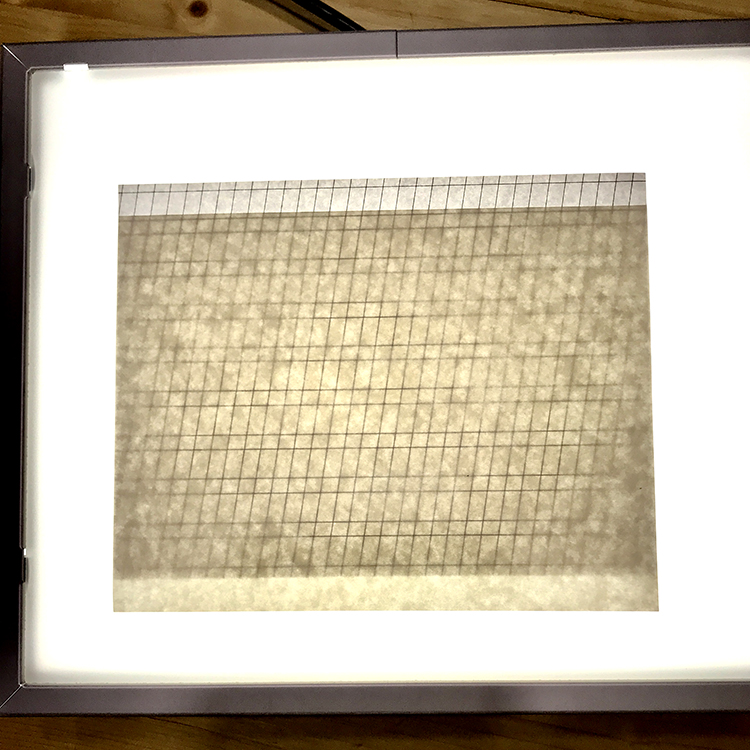
Below you see a light box used as a board for practice and final composition. The grid sheet is placed under the vellum so you can see the guide lines as you practice or create the final artwork.
How to Learn Calligraphy
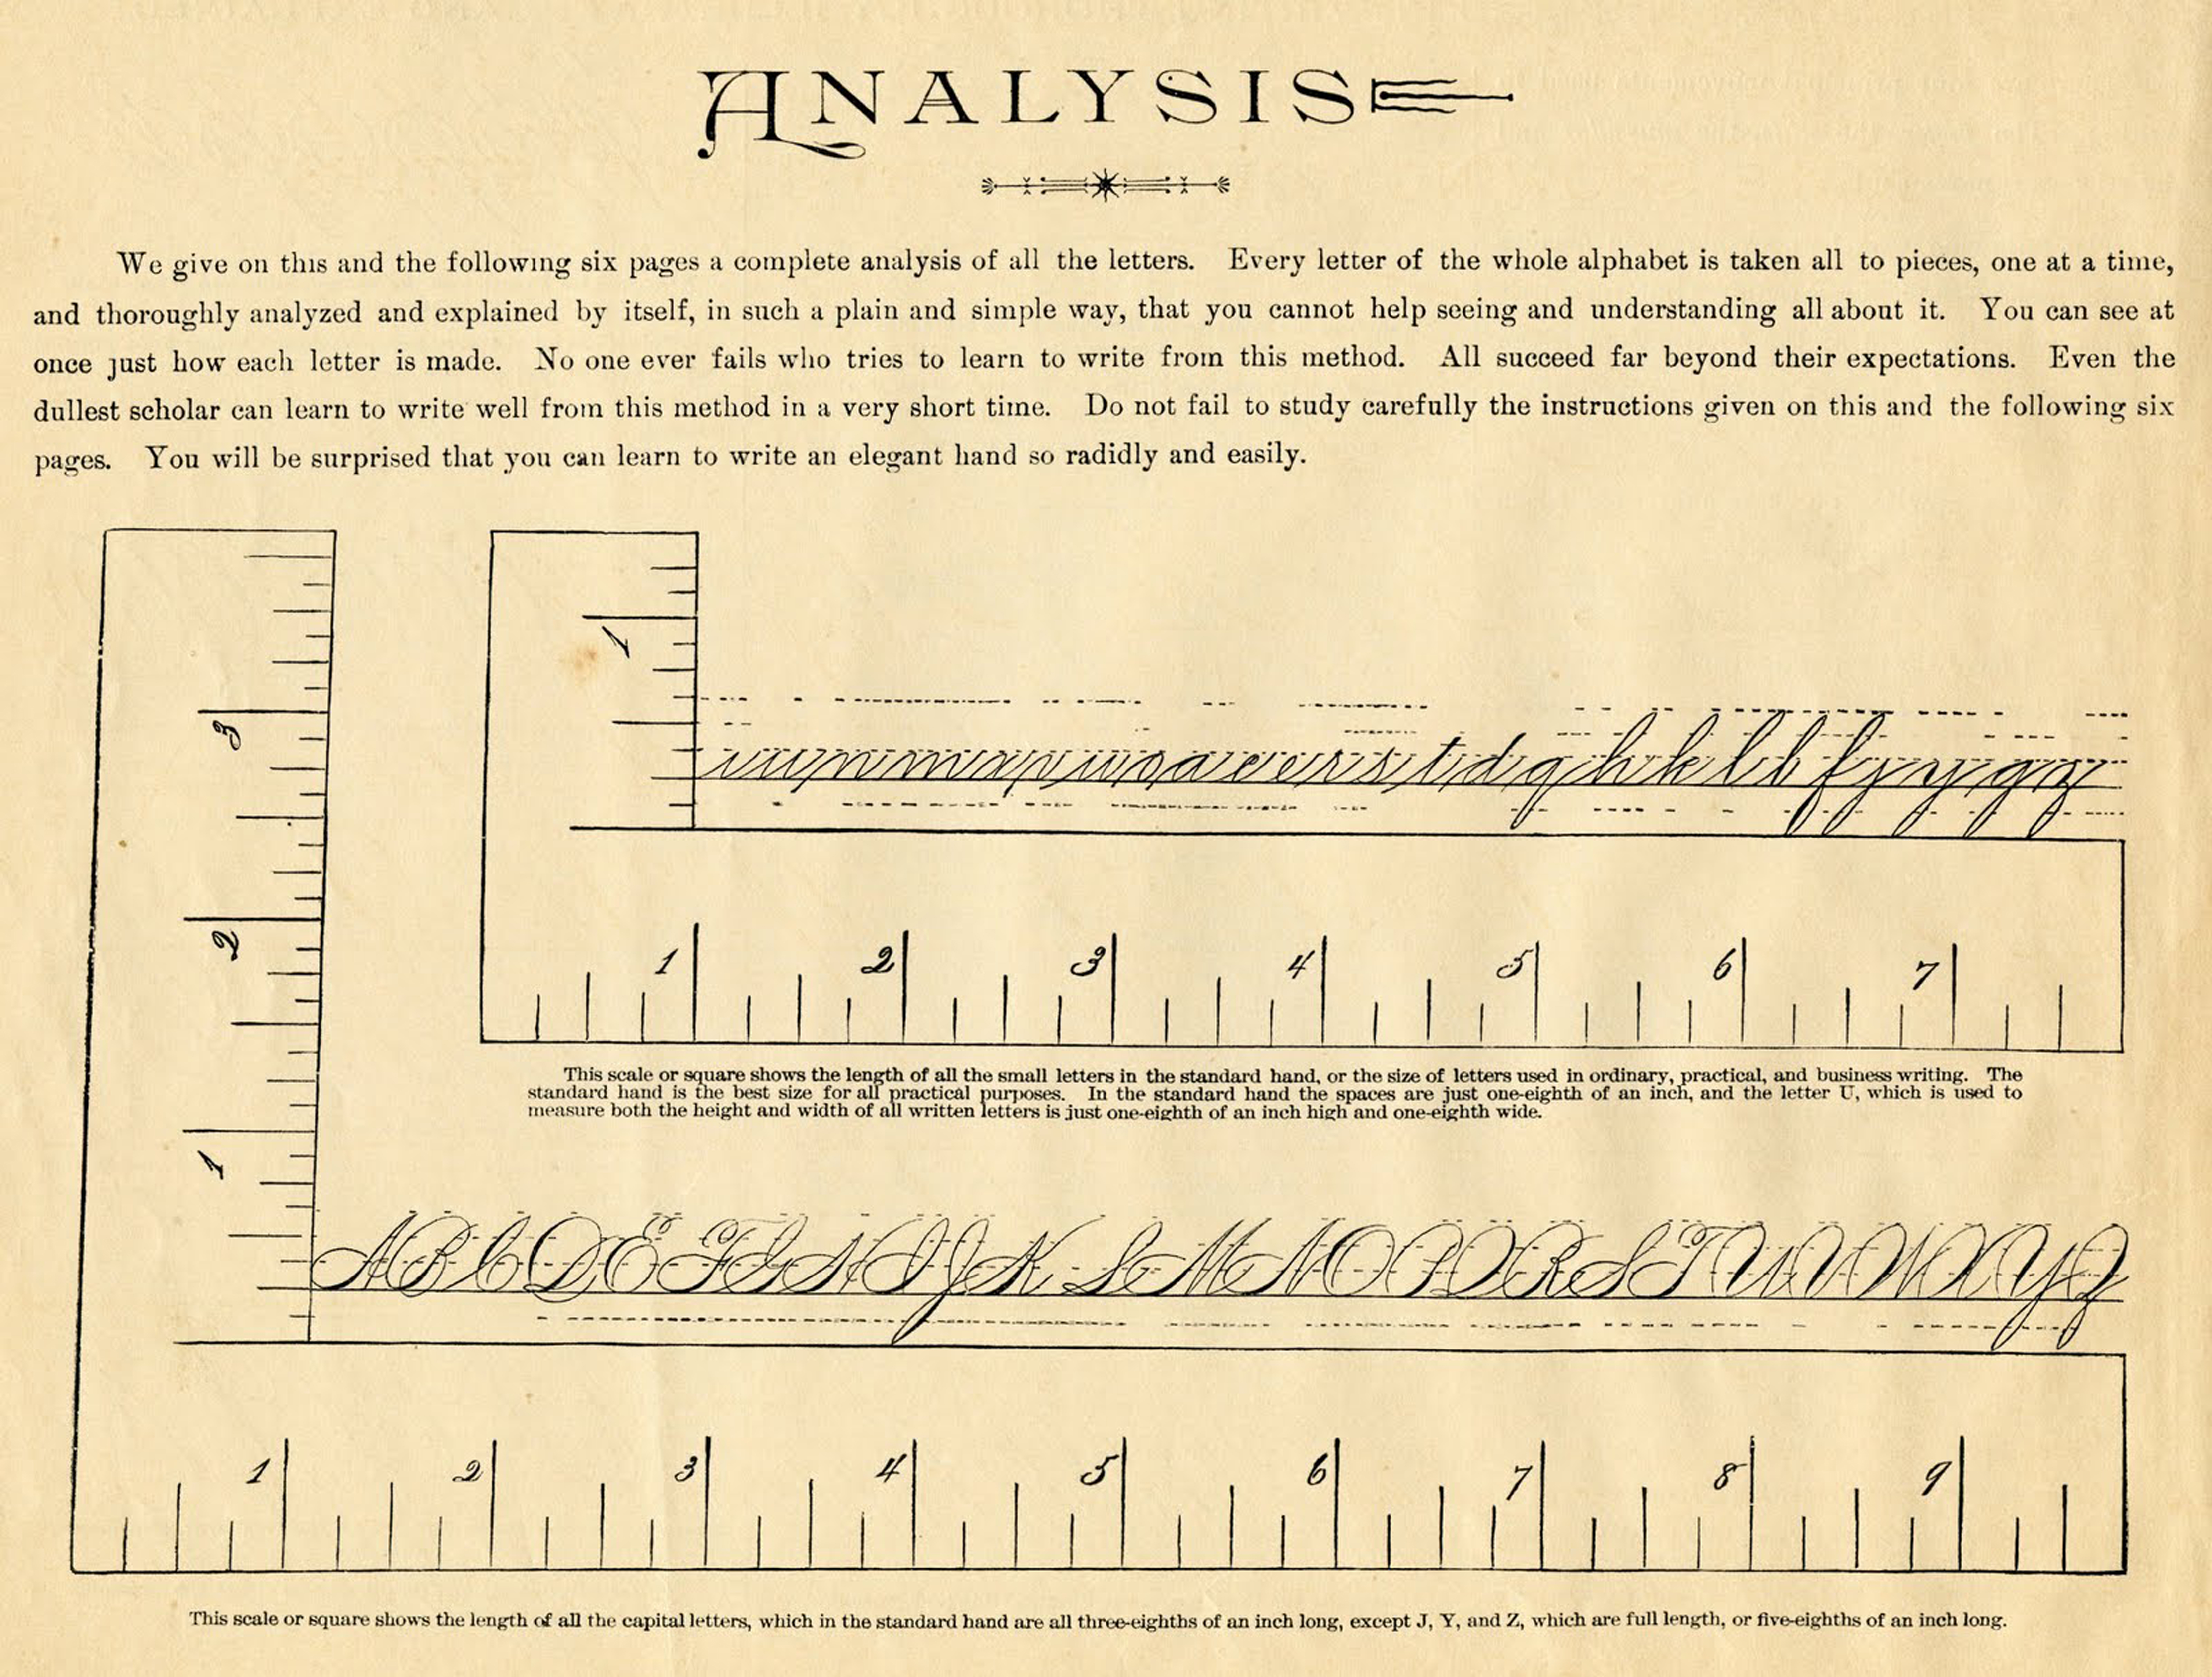
Calligraphy can be self taught, but it is not easy. It is my best suggestion to find a local Calligraphy teacher to learn from. You need a good foundation and knowledge of terms, tools, and materials, and how to hold the Calligraphy pen. Plus, there is nothing like watching a teacher create letterforms to gain solid skills. Below we see an example of a teaching practice sheet.
Can Calligraphy Pens be Used for Drawing?
I have been using Calligraphy pens to draw for many years. I recently bought two Glass pens that have become one of my favorite drawing tools. The smaller nibs work best for drawing. Play and experiment to find which you like best!
I hope that you had fun discovering the ins and outs of elegant writing with me in this Calligraphy Supplies – A Comprehensive Guide! I thank Casey Bagby for sharing images of her calligraphy with us. You might also want to check out this post about How to Clean Paintbrushes HERE. When I am not exploring with new and old Techniques for Mixed Media in my Graphics Fairy sandbox, I also create Photoshop Elements tutorials and craft project videos over on The Graphics Fairy Premium Membership site. You can find even more of my books, junk journals, mixed media art, classes, and whimsical shenanigans on Rebecca E Parsons Dot Com.



MK says
Great post, hope you will show us how to use parallel pens (for beginners.)
Karen Watson says
Thanks for your feedback MK!
Diana C. says
It would have been nice to mention that lefties cannot use the standard calligraphy pens …they require pens that are designed specifically for lefties. And a link to those pens would have been nice, too. Just saying!
Karen Watson says
Hi Diana, I’m so sorry you were disappointed with this post. I don’t think we realized that there were special pens for lefthanded people. We will try to do some research to update this post. Thank you for letting us know.
Laurie Foster says
Is there a way to save the calligraphy guide WITHOUT THE ADs? I thought I downloaded your guide and it actually ease a business plan template from one of your company ads! Don’t know about you but I find the ads extremely annoying and avoid the companies if I have a choice. I used to follow and read so many blogs until everyone started putting ads on them. I’m interested in your company not ads.
So for being so blunt.,
Karen Watson says
Hi Laurie, Late November and all of December are the busiest advertising months of the year. It’s when most bloggers earn the bulk of their income for the year, for all of their hard work for many months. Things will settle down in January, so you may want to wait until then to visit the blogs that you like. We do have an ad free site on our Premium Membership here https://members.thegraphicsfairy.com/ for a low monthly fee, which is great option for people that don’t like ads. We have lots of tutorials over there as well, by a wonderful team of instructors from all over the world. In order to maintain this blog, as a free site, we must incorporate ads. I’m so sorry for the inconvenience, but this site, and many others, just wouldn’t be possible without the ads to support them. To download any of the guides, or any of our other image freebies on this site, just click on the picture that you would like to save, and then click on it again with the button on the right side of your mouse. That will open a box that will allow you to save the image. I hope that helps!