Altered Book Ideas
Hello creative friends! I’m Diana from Dreams Factory and I’m happy to be joining you again with some Altered Book Ideas! This is a project I’ve been wanting to try for quite some time, a mixed media DIY Vintage French Altered Book Journal. This will give you so much room for further exploring, adding your personal touches, getting creative and making something truly unique. So let’s just call this the beginning of our own mixed media altered book beautiful experiment, shall we? We will be using supplies that you might already have in your stash, but also a few other ”nontraditional” materials. And we are just letting our creativity to guide us along the way!
Of course we will be needing a book for this project, so now it might be the perfect time to go check your shelves to try and find that PERFECT book that will hold this … and all your other future creations. Because I have a feeling that once you’ll start this project, there’s really no turning back, and you will only want to create more and more! Look for a book with hard covers, something that you are not using anymore, one that is ready for a new creative and exciting life!
Book tips: I had a really large book just laying around (and screaming for attention) so I decided to try out some altered book ideas, because I thought all that large surface would only mean more space to play and have fun with. The size of the book is a personal preference … this project is highly adaptable to your needs. You can even use children’s board books for your new works of art!
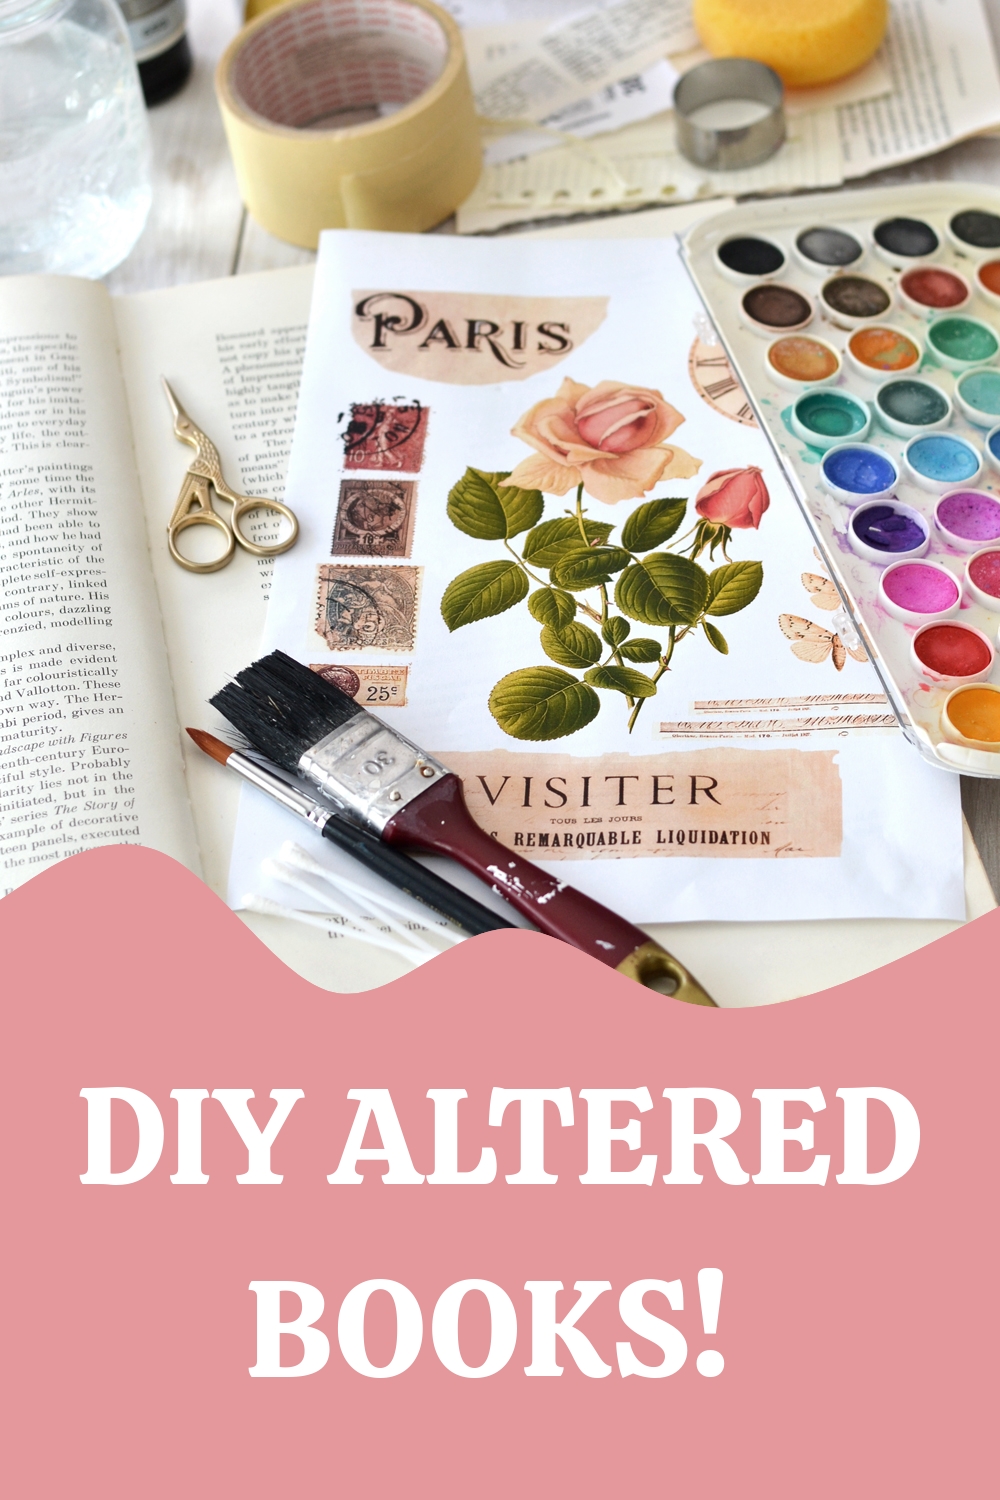
Speaking of highly adaptable … I created a beautiful French collage to use as the starting point in our venture. You will find it available in three different sizes, just download the pdf file on your computer and print page 1, 2 or 3 – according to your needs and the size of your book journal. I just love how the Graphics Fairy is such an inexhaustible place to look for amazing graphics, no matter where you are in your creative journey. There is always that special image that will trigger your creative self to start experimenting and creating a lovely little piece of art.
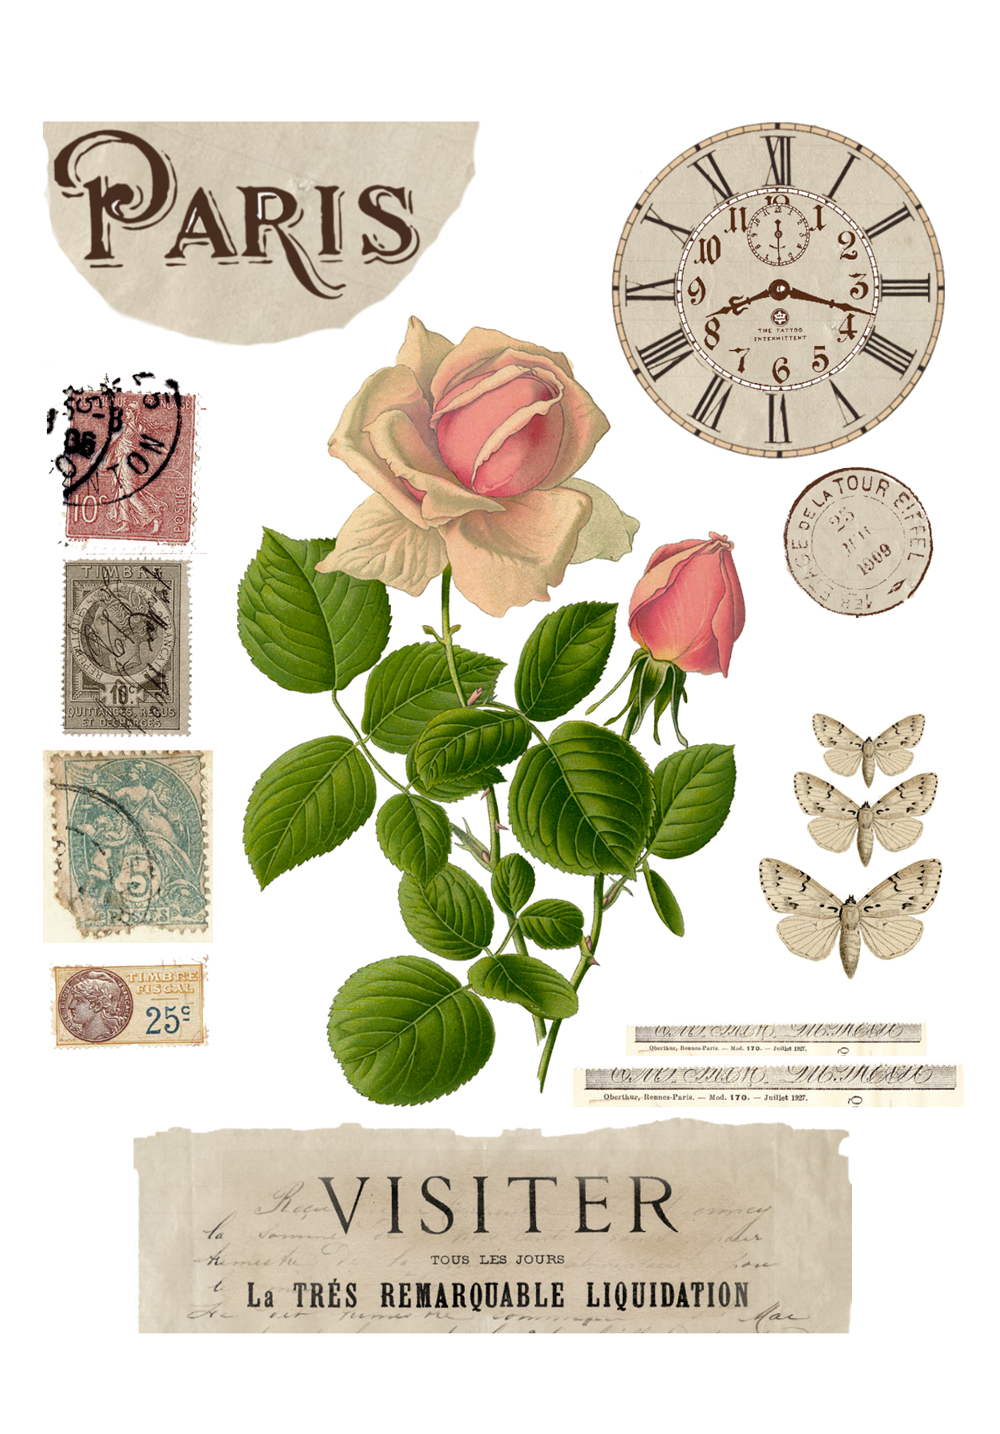 —-> Click HERE to Download the Full Size Printable PDF <—-
I believe everyone’s Altered Book project should be different and unique. I will show you a few easy and fun techniques that I tried, but please consider this tutorial just as a starting point for your own journey. Don’t be afraid to experiment! There are really no mistakes here, everything you feel you need to do, just do it! Your creativity will guide you throughout the whole process to make something that you really love! Something that is YOU!
Supplies for Altered Book Ideas:
MAIN:
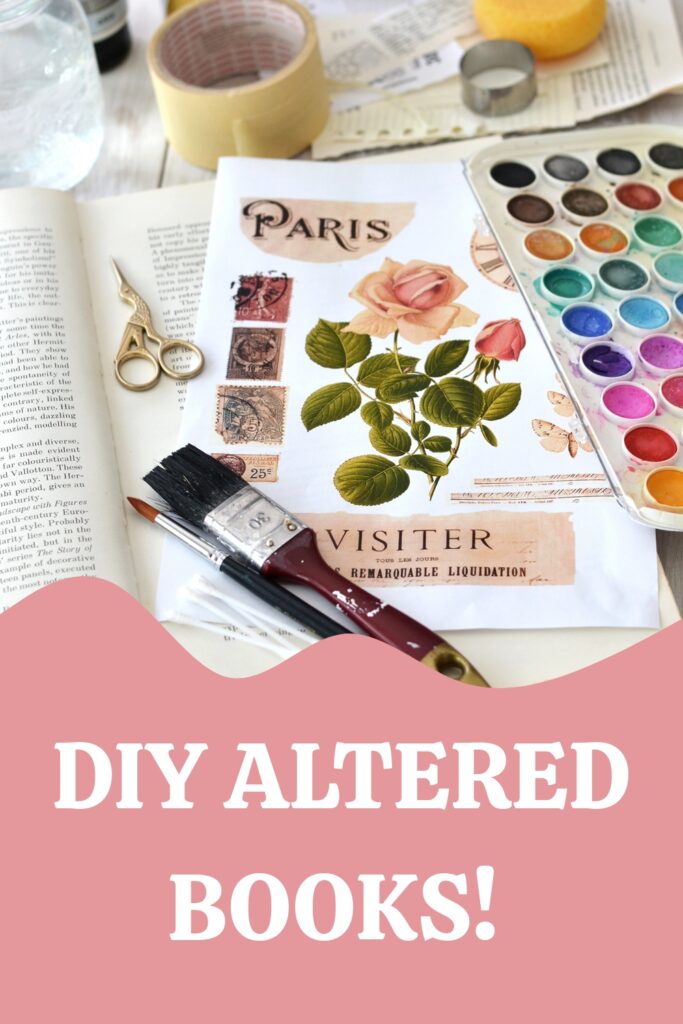
- French rose printable
- printer
- old or new book with hard covers
- gesso
- paper glue or other medium gel
- watercolors
- brushes
- craft sponge (or a regular sponge)
- scissors
- Q-tips
- colored pencils
- gold acrylic pain and a metallic gel pen
- a heat gun tool (or your hairdryer)
SECONDARY
- scrap pieces of different types of torn paper with different lining and printing
- scrap pieces of a recycled plastic mesh net bag
- a unique element written by you
- modeling paste / texture paste
- painter knife
- masking tape
- tracing paper
- pockets / plastic dividers or other type of foil (to protect our working pages)
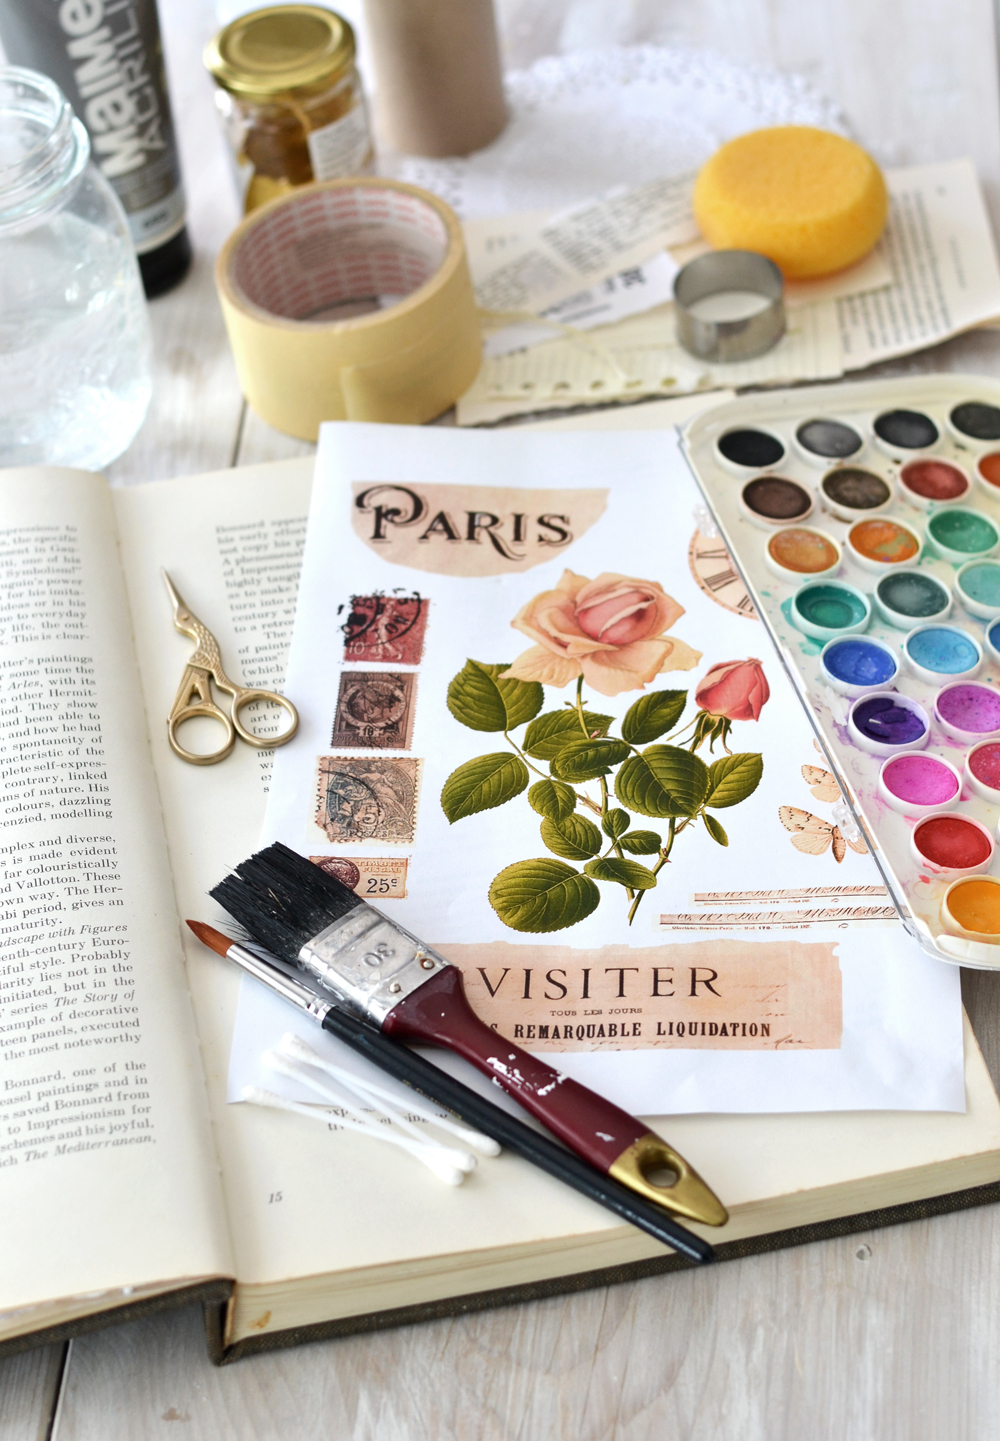
If I would have to shortly summarize these altered book ideas, I would say…it’s all about the layers! And the texture! These two elements are key elements here and will help us create interest and add dimension to our journal.
1. I started by gathering a few pieces of scrap paper to create my first layer! You can use anything from old or new books, dictionaries, music books, lined or dotted planners, bar codes, price tags, paper doilies, the sky is the limit here. Randomly torn pieces of paper will help us create texture! I also decided to use a small piece from one of those plastic net mesh bags that usually come with fruits and I think it was a great choice. I have to say that once you open your mind to a mixed media project like this, you will definitely look different to every piece of scrap paper or other scrap materials around you. They will no longer be scraps, but beautiful transformable items that will add unique textures to your work. I told you there is no turning back!
To make things more exciting, I thought it would be fun to incorporate a small handwritten special element into my mixed media project. See that middle scrap piece of paper with ”72270” written on it? That was my special written element to include. I actually found it the other days after my parents visit and I instantly recognized my mom’s handwriting. I guess she started writing down a phone number and stopped somewhere in the middle. So THAT was my special handwritten element – a bunch of random numbers that will always bring my mom into mind when looking at them. I really encourage you to do that too! Try including a special handwritten element (numbers or words) that won’t mean much to the world, but it will have a meaning to you! It will be your special assignment for this project, if you wish
2. I used paper glue to adhere my first scrap paper pieces, placed randomly on the journal and added two scrap pieces on the side, going outside the border, to create some sort of an index … and more interest. ( If you are using older books and your pages are very thin, you may want to glue groups of pages together for more stability)
3-4. I chose a scrap piece of fruit mesh to create texture and I used a little bit of modeling paste to adhere it to my journal. I placed it in a corner using a fairly thick layer of modeling paste (I added the paste using a painters knife, but you can also use a credit card). Then I put the mesh pieces on top and using a Q-tip, I pressed the mesh net down, until it was almost embedded into the paste.
5. I also randomly added some masking tape and a little bit of modeling paste on the bottom corner to add more texture. My first layer looked promising! 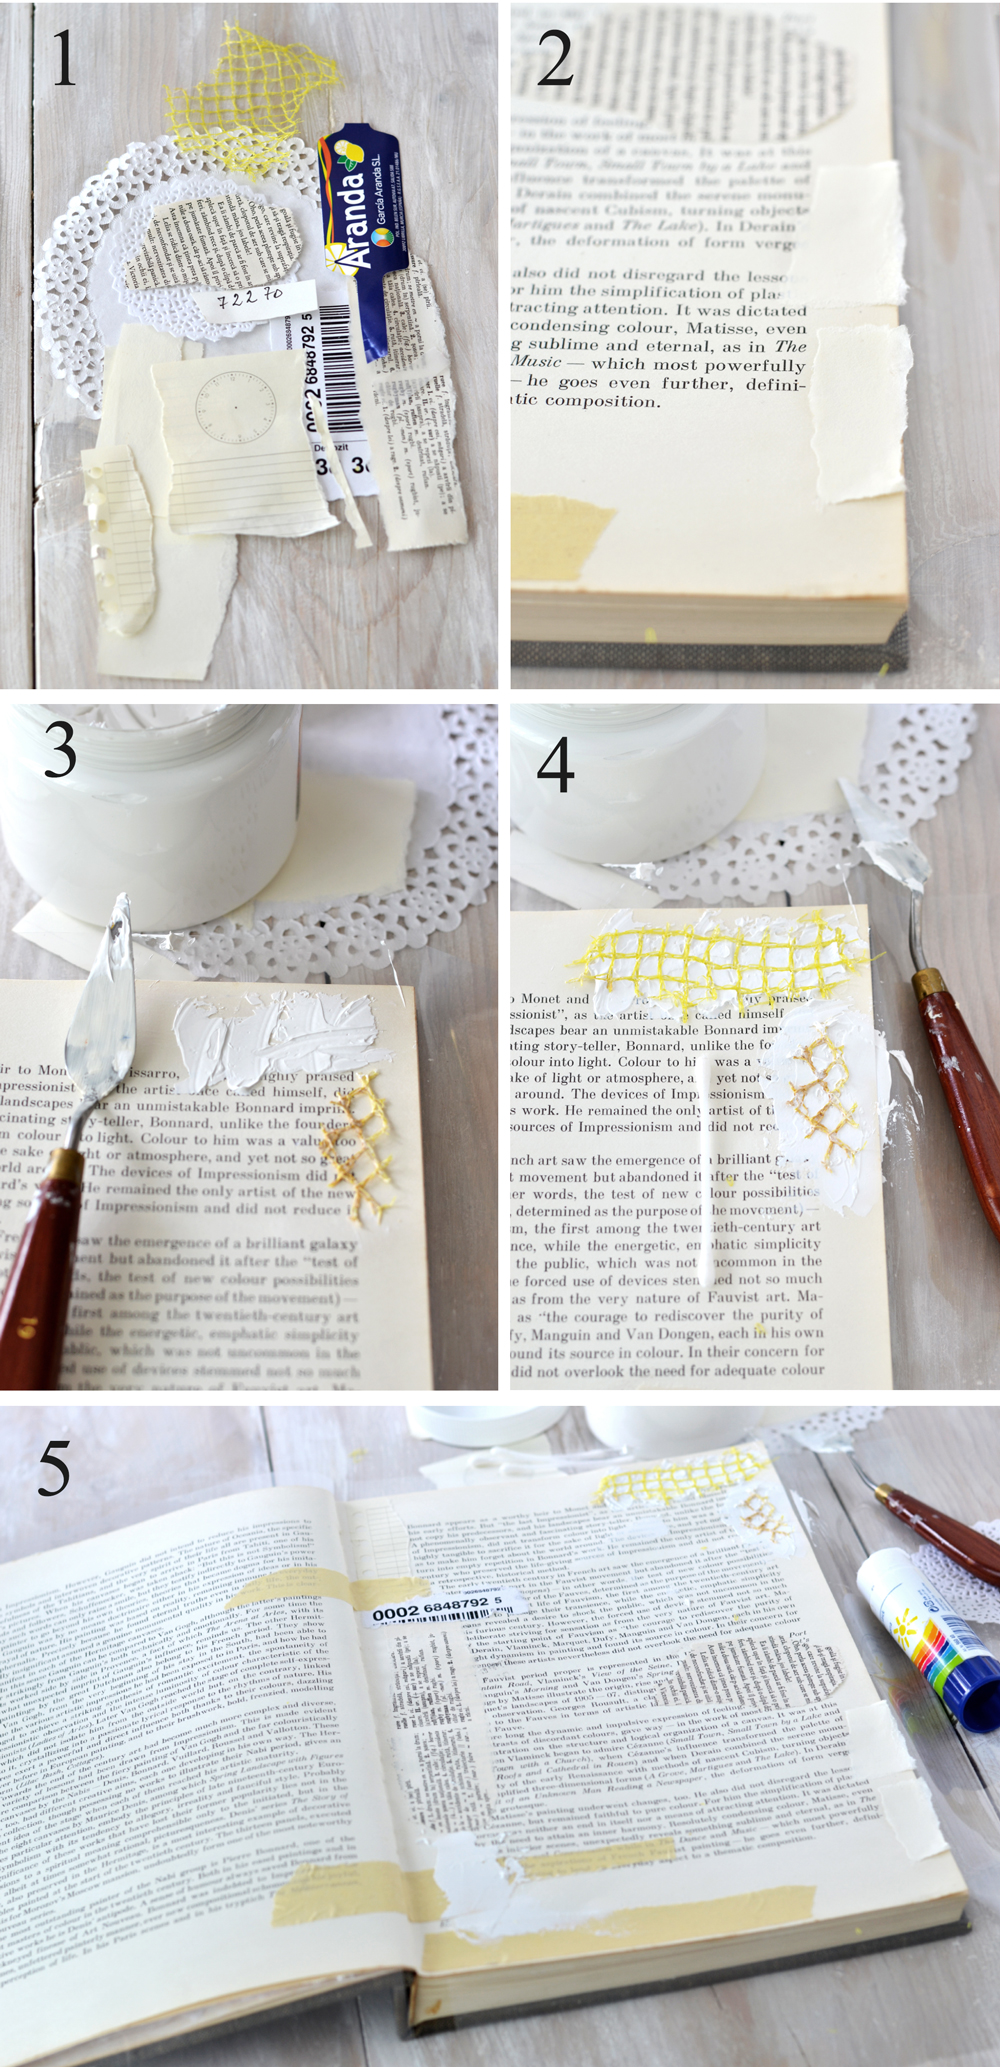
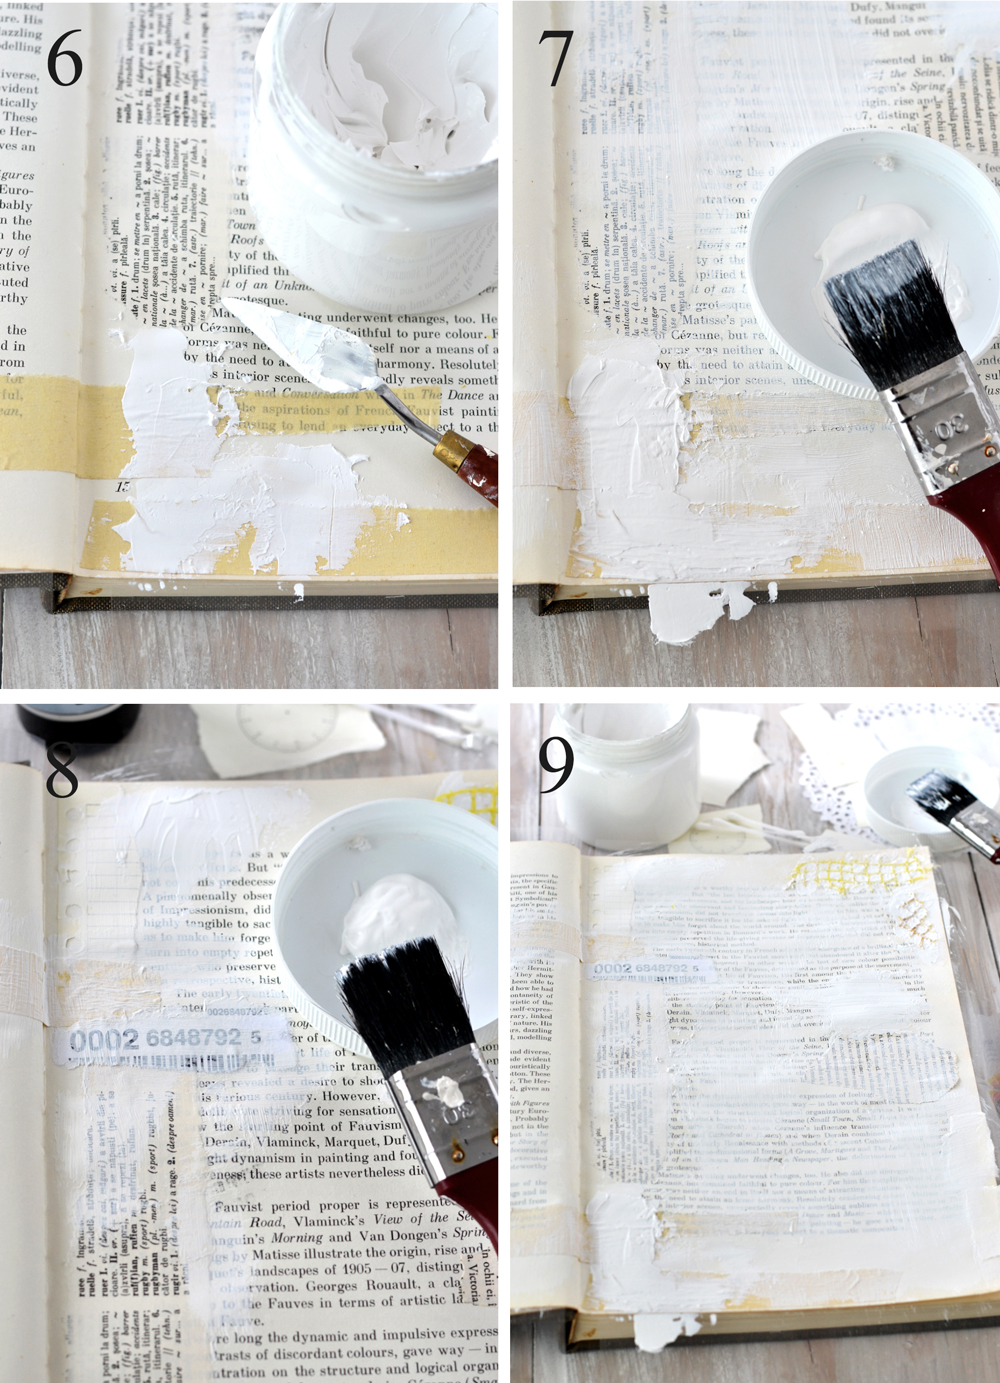
6. Now it would be the perfect time to add some sort of a protection under the page (pages) we will be transforming. I used two transparent pockets and placed them right under my working pages. One under the left page and one under the right page. You can’t really see them in my pictures, but they are there! We will be focusing on our right page here, but you could also give a little bit of a makeover to the left page, so you’ll have a more cohesive piece (of art) in the end. I used some more modeling paste here and there and let it dry a little.
The drying part is usually the hardest for me, so if you are like me, you are already on top of your game right now using your heat gun … or your hairdryer, like I did!
7-8. The next part – gesso! This part is really important because it will act as the base for our work. I added more or less gesso to create interest, but as a rule, I tried to have a small layer of gesso everywhere. I applied it using my brush and I tried not to completely cover the elements, but more to blend them together.
9. My gesso layer looked promising too! Now you can pull up your drying tool again to speed things up or just let everything air dry completely and move to the next step.
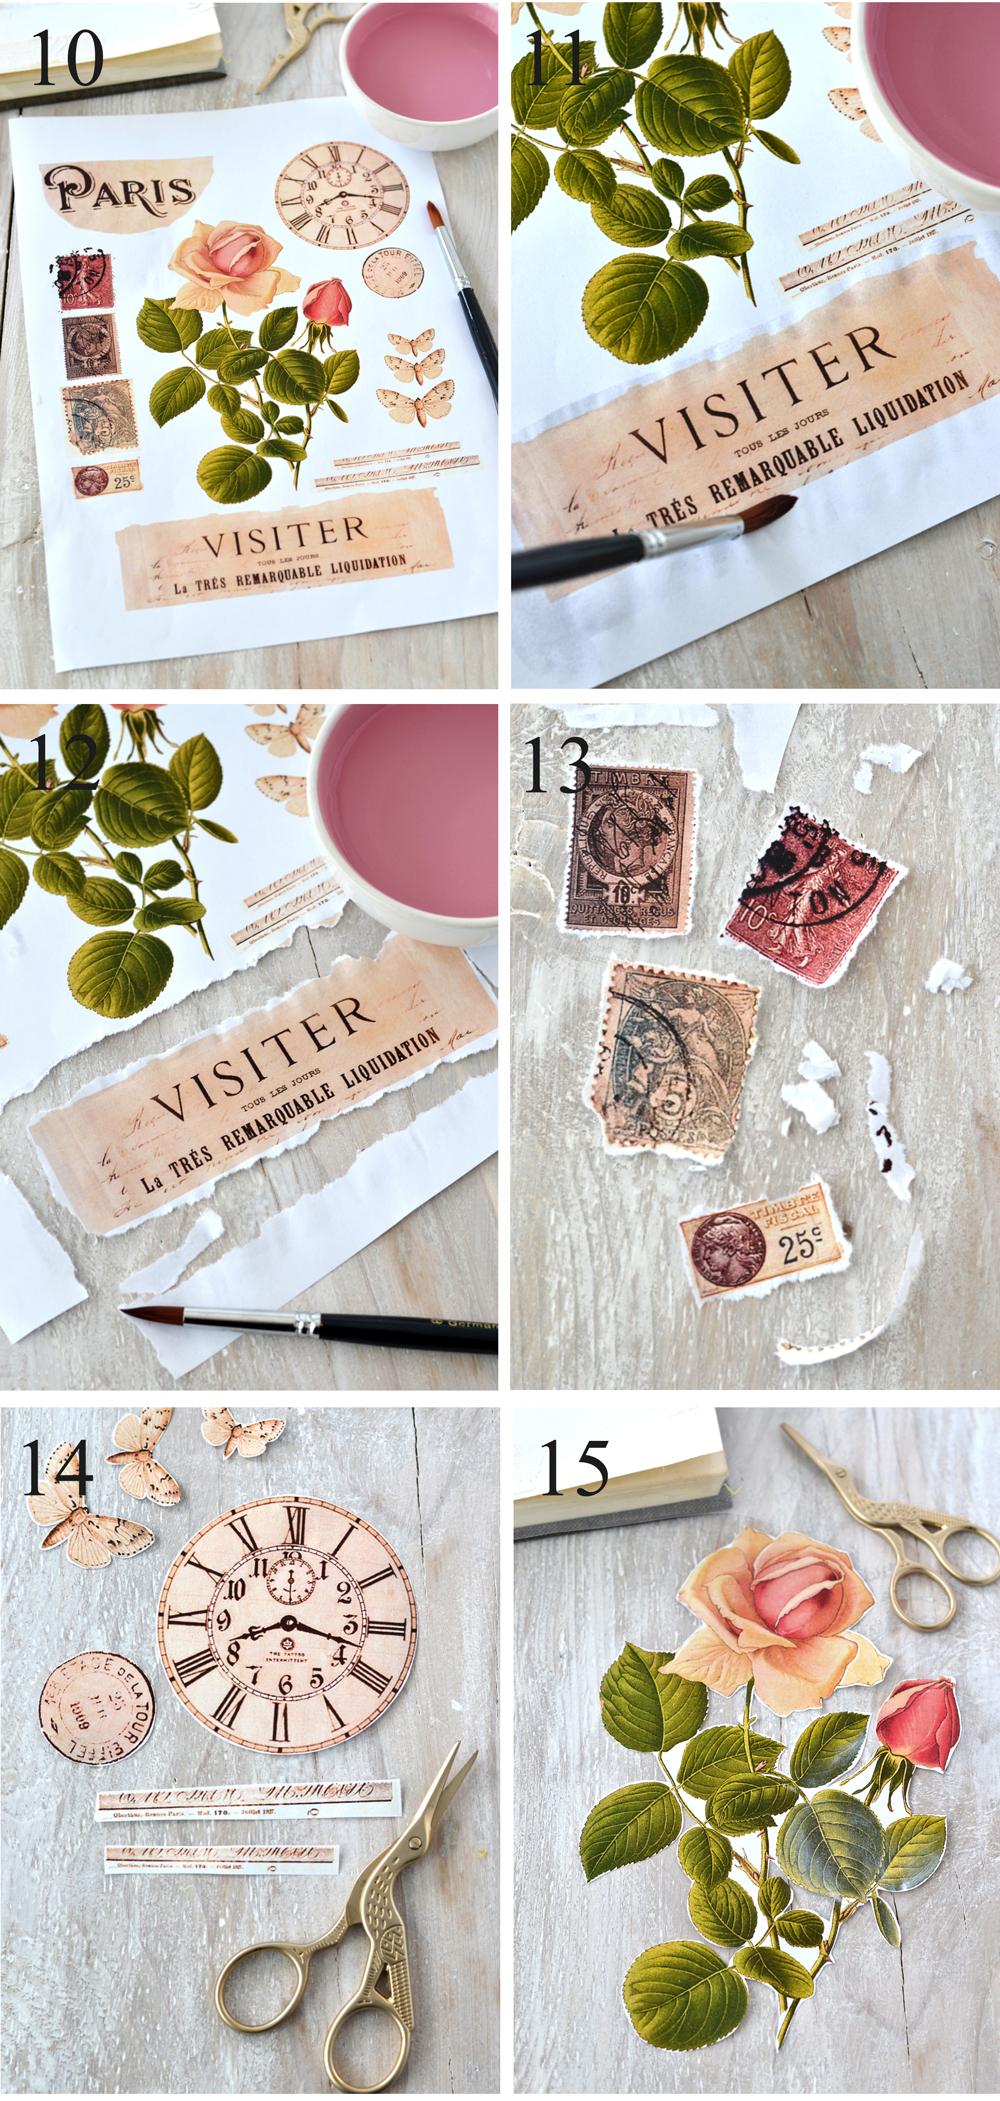
10-13. Now prepare your beautiful French collage, a small bowl with water, a small brush and some scissors. For the next step I used water to make some beautiful torn edges, like I did with my Hydrangea and Lavender Vintage Tags project, as I’m sure you can remember. It’s a really simple technique that will give us vintage-looking irregular and imperfect edges, so it will be easier to incorporate all the elements into our project. I used this technique for the French ephemera element and for all those adorable stamps.
14-15. For the other elements and the chic vintage rose I decided to use some small scissors to cut them first. You can use the “Paris” element like I designed it or just cut each letter individually, like I ended up doing.
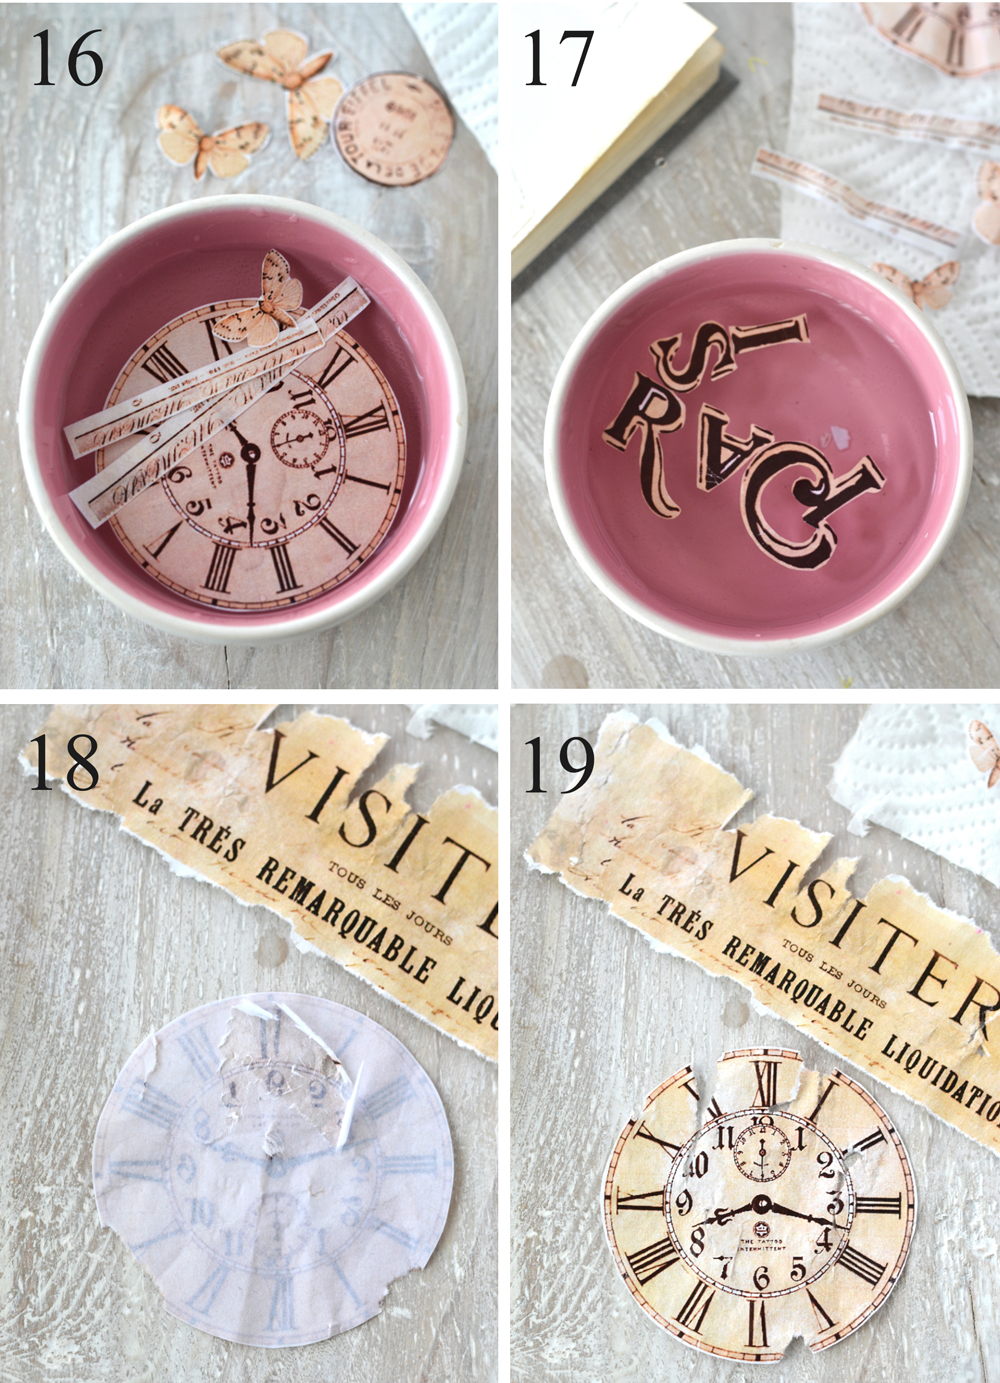
16-17. Because my scissors-cut-edges looked a little bit too sharp for what I was envisioning, I decided to completely submerge the smaller elements into water to give them some ”natural” wrinkles and make them look more vintage.
18-19. To take things even further, while the elements were still soaking wet, I scratched the back of the paper using my nails and rubbing gently, I removed some of the paper. Then I rubbed some more because I really loved the old looking effect I was getting This was just regular paper, nothing fancy, but the final results were simply amazing! You can do this with some or all the elements, depending on the vintage factor you are looking for! I let everything dry on paper towels and while they were drying, I moved on to the next step.
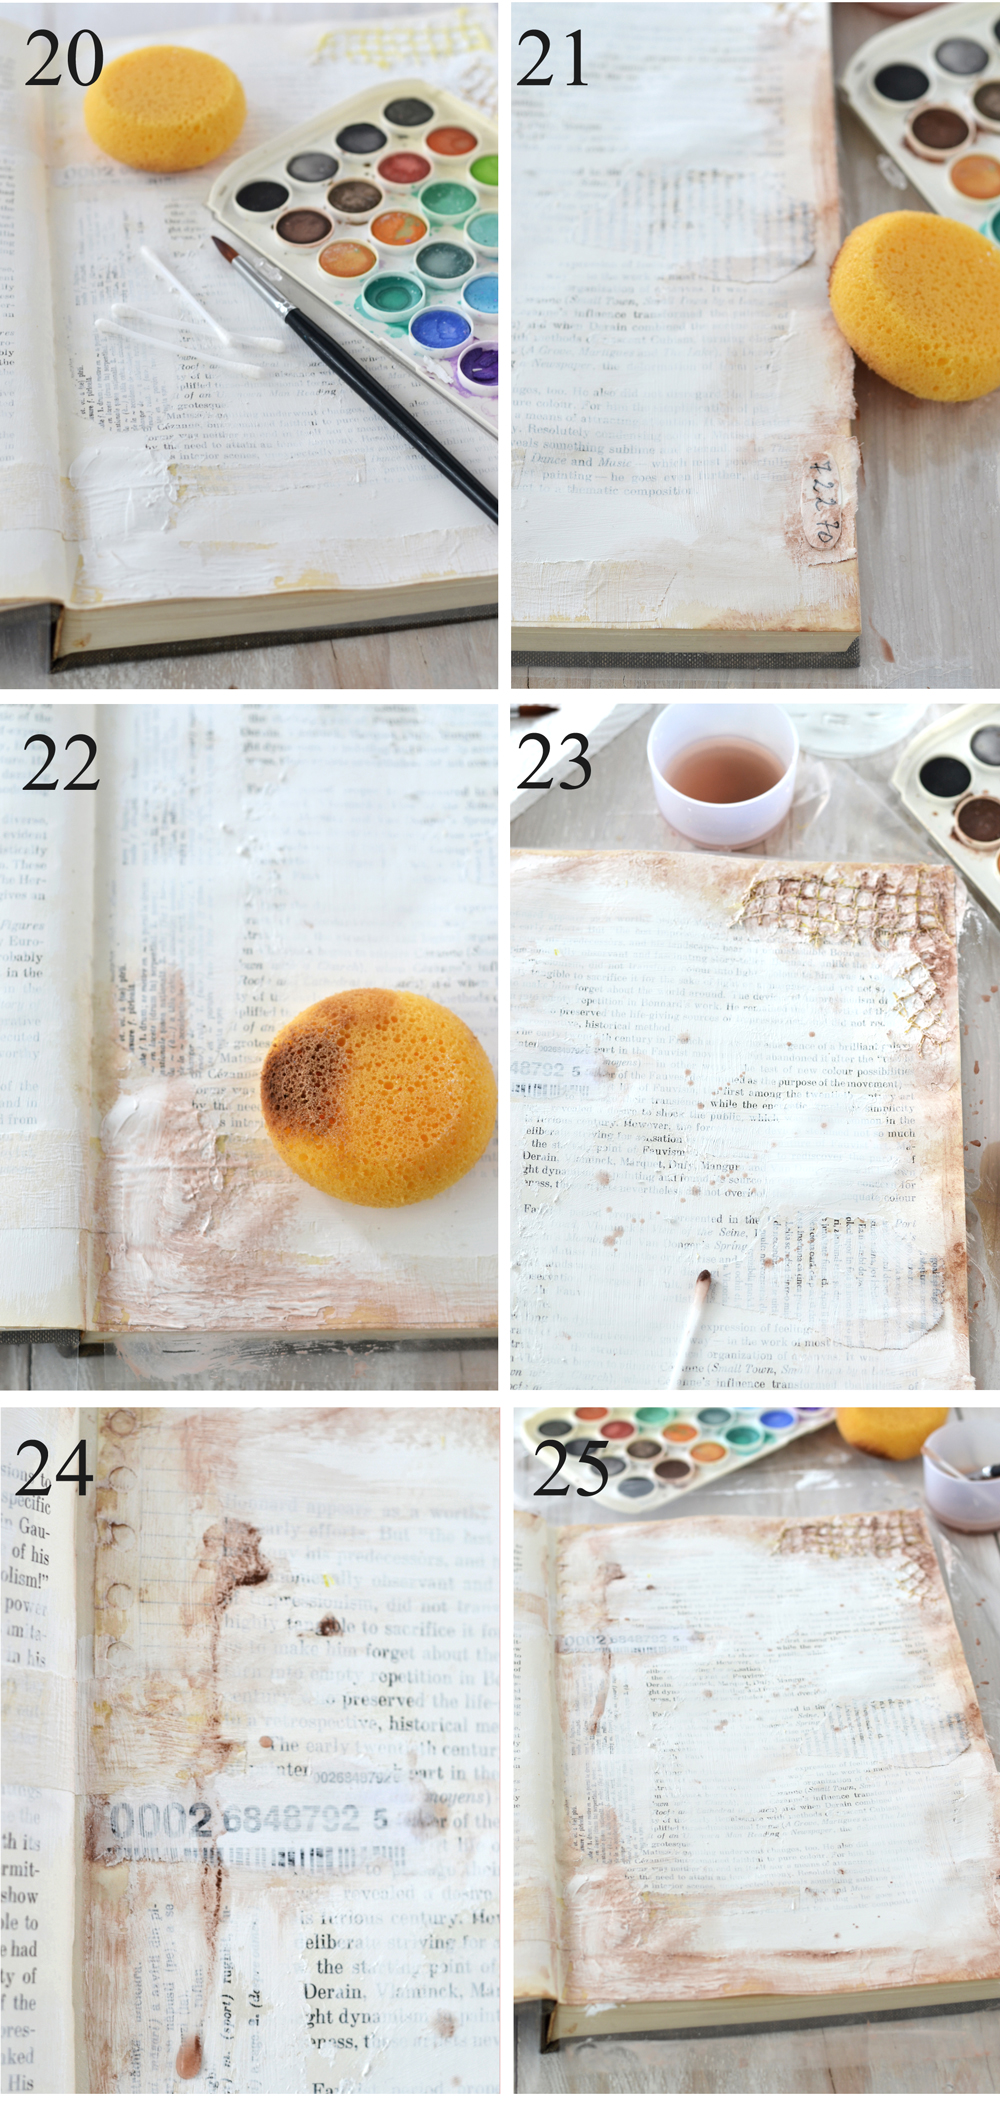
20. Now comes the distressing part! One of my favorites … because let’s face it, everything looks so much better with a little bit of patina, don’t you think? I used watercolors, a small brush, a craft sponge and some Q-tips at this stage. You can also use highly diluted brown acrylic paint, even tea or strong coffee, inks, it’s all up to you.
21. I started by going all over the edges with a little bit of watercolor paint. I used a craft sponge that I absolutely love and dabbing my way through, I tried to add a vintage feel to my journal applying less or more pressure. You can see my special handwritten element there on the right, I glued it on top of one of my scrap paper ”indexes”.
22. The sponge, the watercolors and the water added an interesting vintage feel to the paper. I didn’t even mind when some of the modeling paste that I applied earlier cracked a little, because it created some more texture. And texture is good, we want texture!
23-24. Then I used a Q-tip and some more watercolor to add some highlights here and there. I painted over the mesh with this useful mini tool and over the edges of the scrap pieces of paper I glued earlier on. I added a few splashed and drops and even let some of the paint create a dripping effect (while tilting the book).
25. I created a vintage, distressed edge to the whole page, letting enough white space in the middle for adding my elements next.
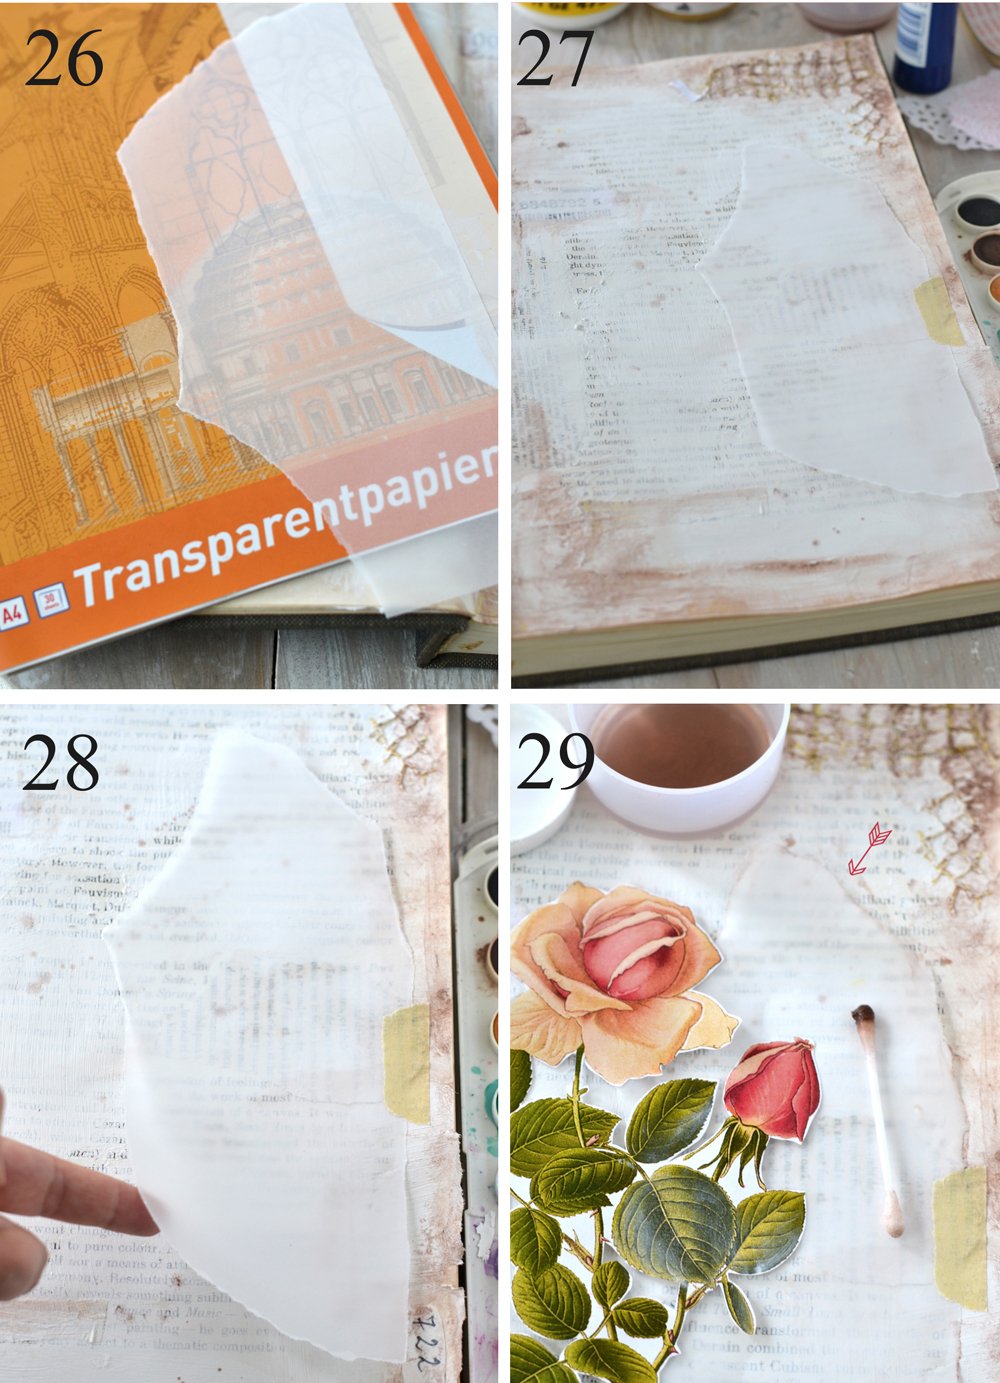
26-28. Next? I created another layer, of course! OK, it’s almost a half a layer, but I really loved the sheer effect I managed to create using a torn piece of … tracing paper and some masking tape! I think this could also work with baking paper, please report back if you give baking paper a try! I only used that small piece of masking tape and a little bit of glue in the middle to hold the tracing paper down, but I didn’t add any glue to the edges, because I wanted to create more dimension.
29. A handy Q-tip came to the rescue again, while I added some watercolors to the edges of the tracing paper to distress them.
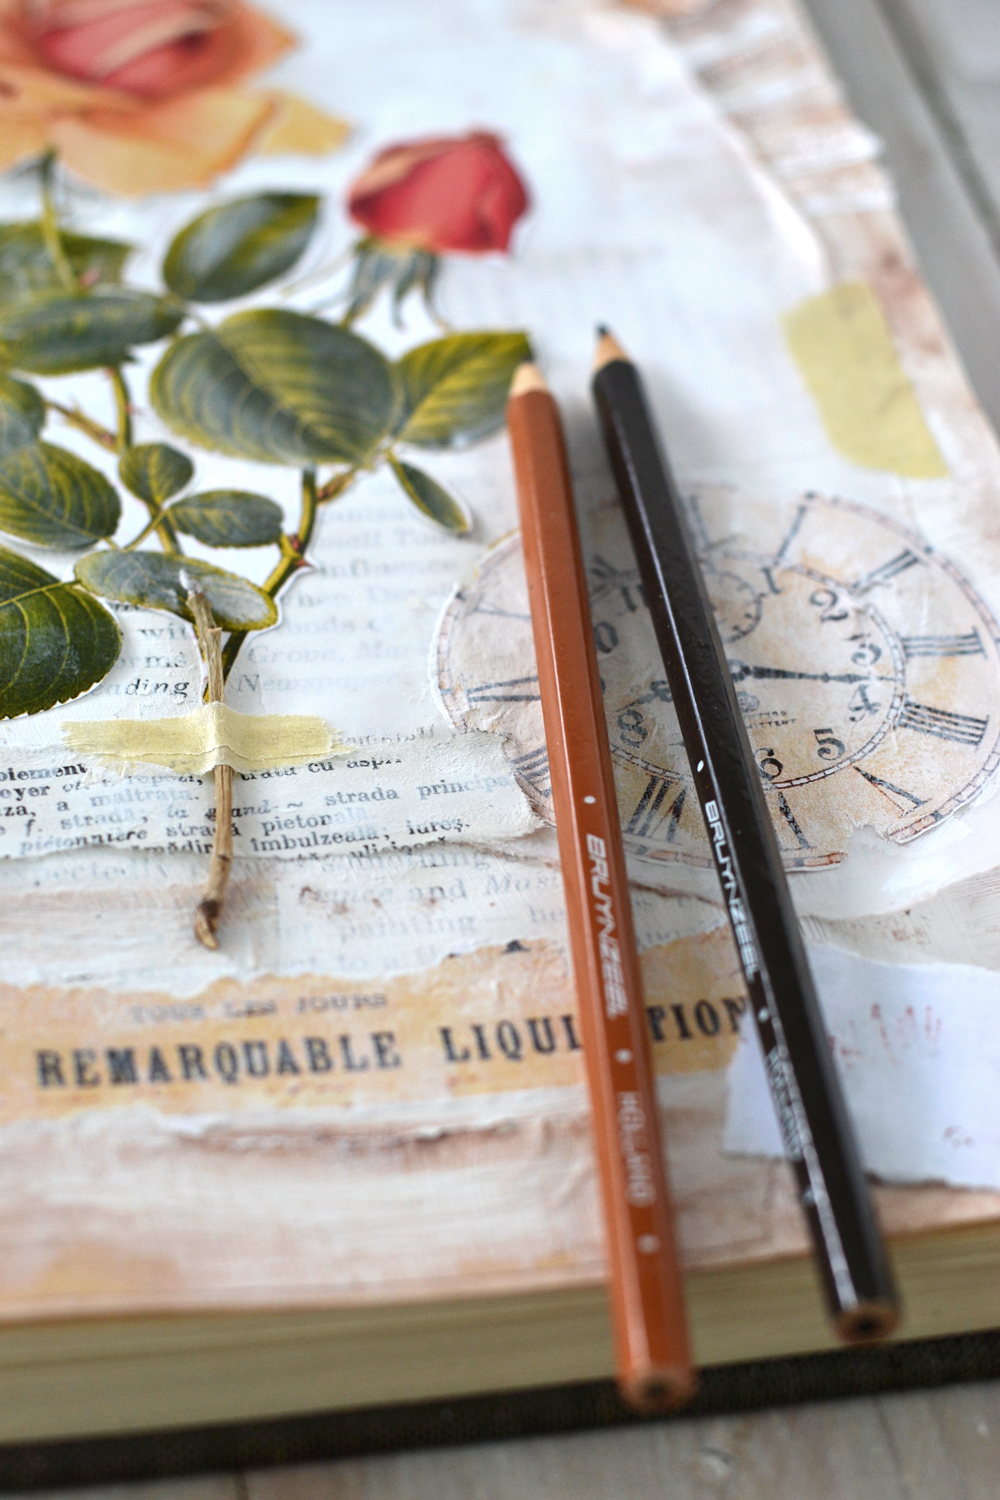
30-32. The stunning vintage rose will become our focus element in our French Altered Journal, our pièce de résistance! I used some more glue to adhere it on the middle of the page, but feel free to play with the rose and the other elements as you want and place them anywhere you want! I added a small dried leaf stem, a torn piece of paper from an old dictionary and another piece of masking tape to add more interest to my rose, because I wanted to create the feeling of a flower pressed between the pages of a book. I just LOVED them all! 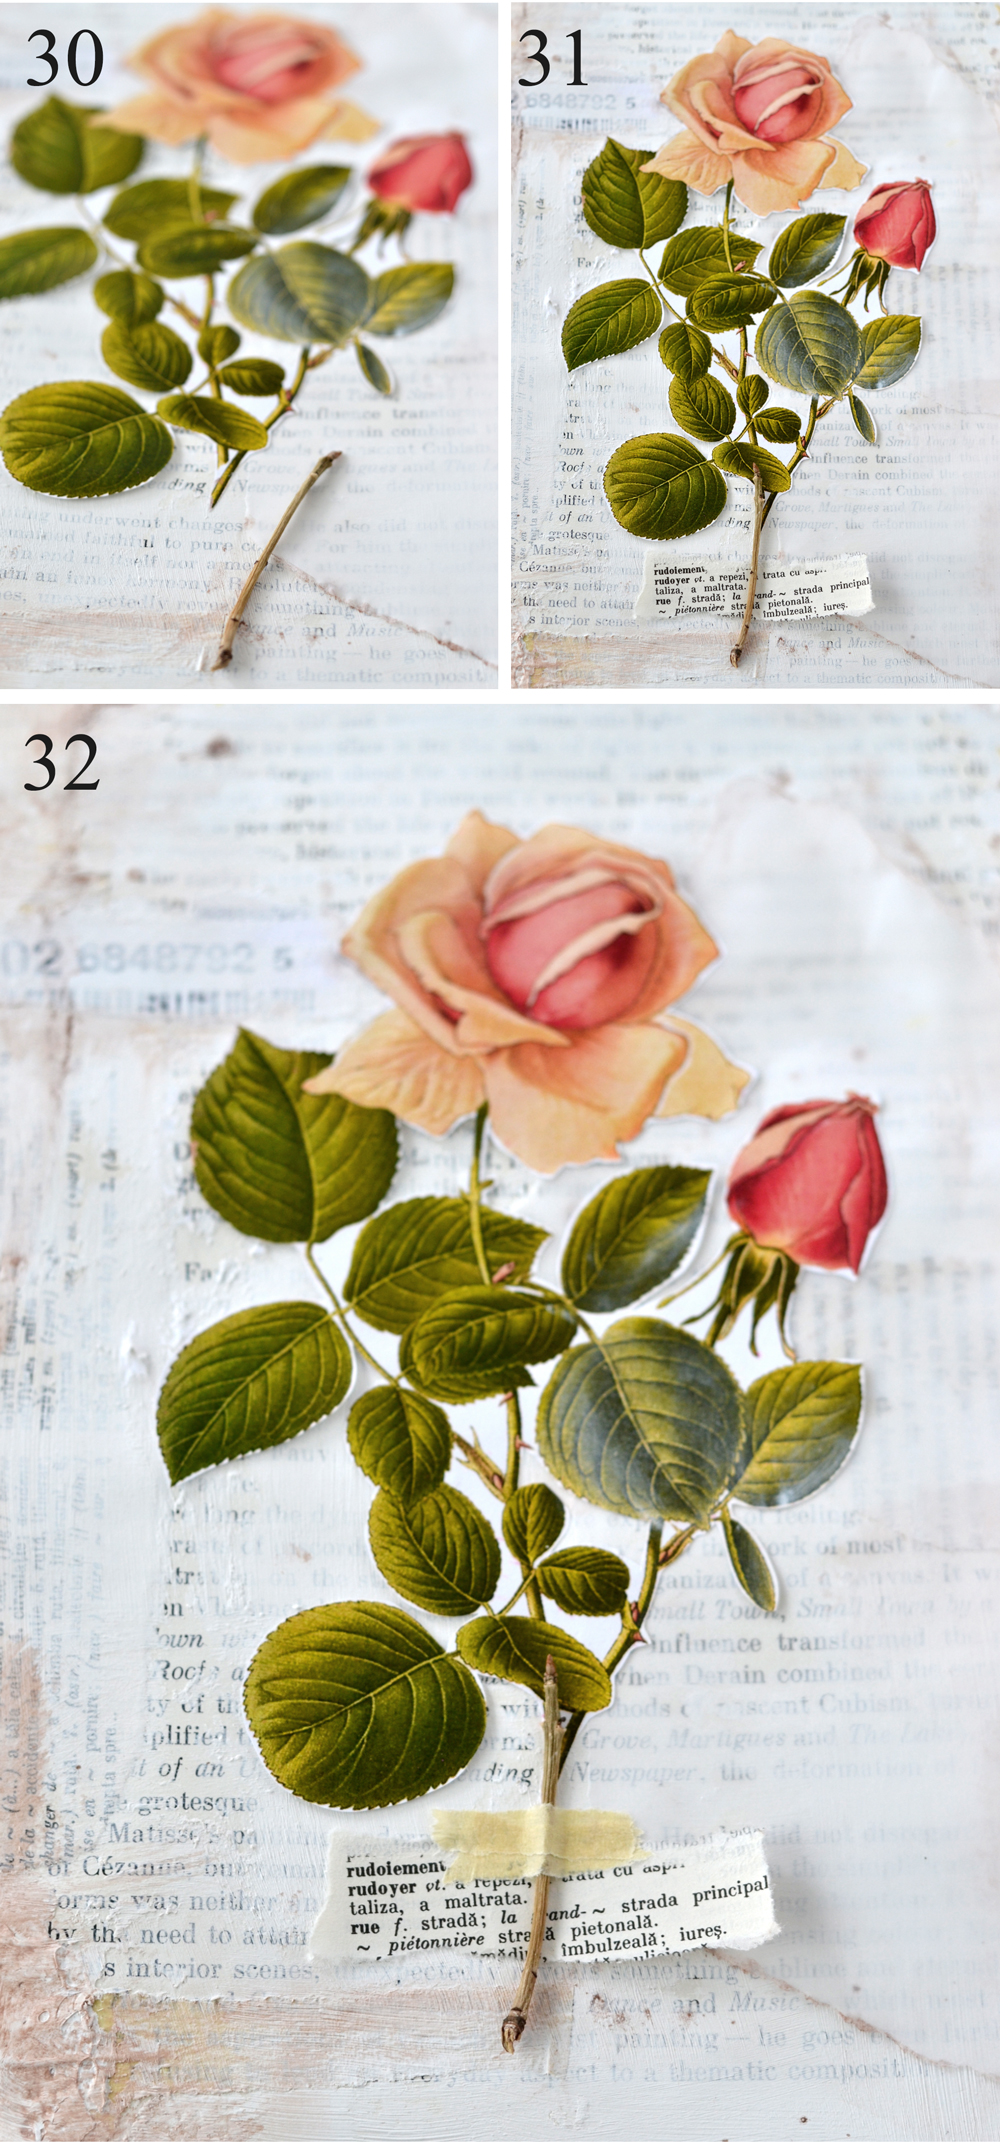
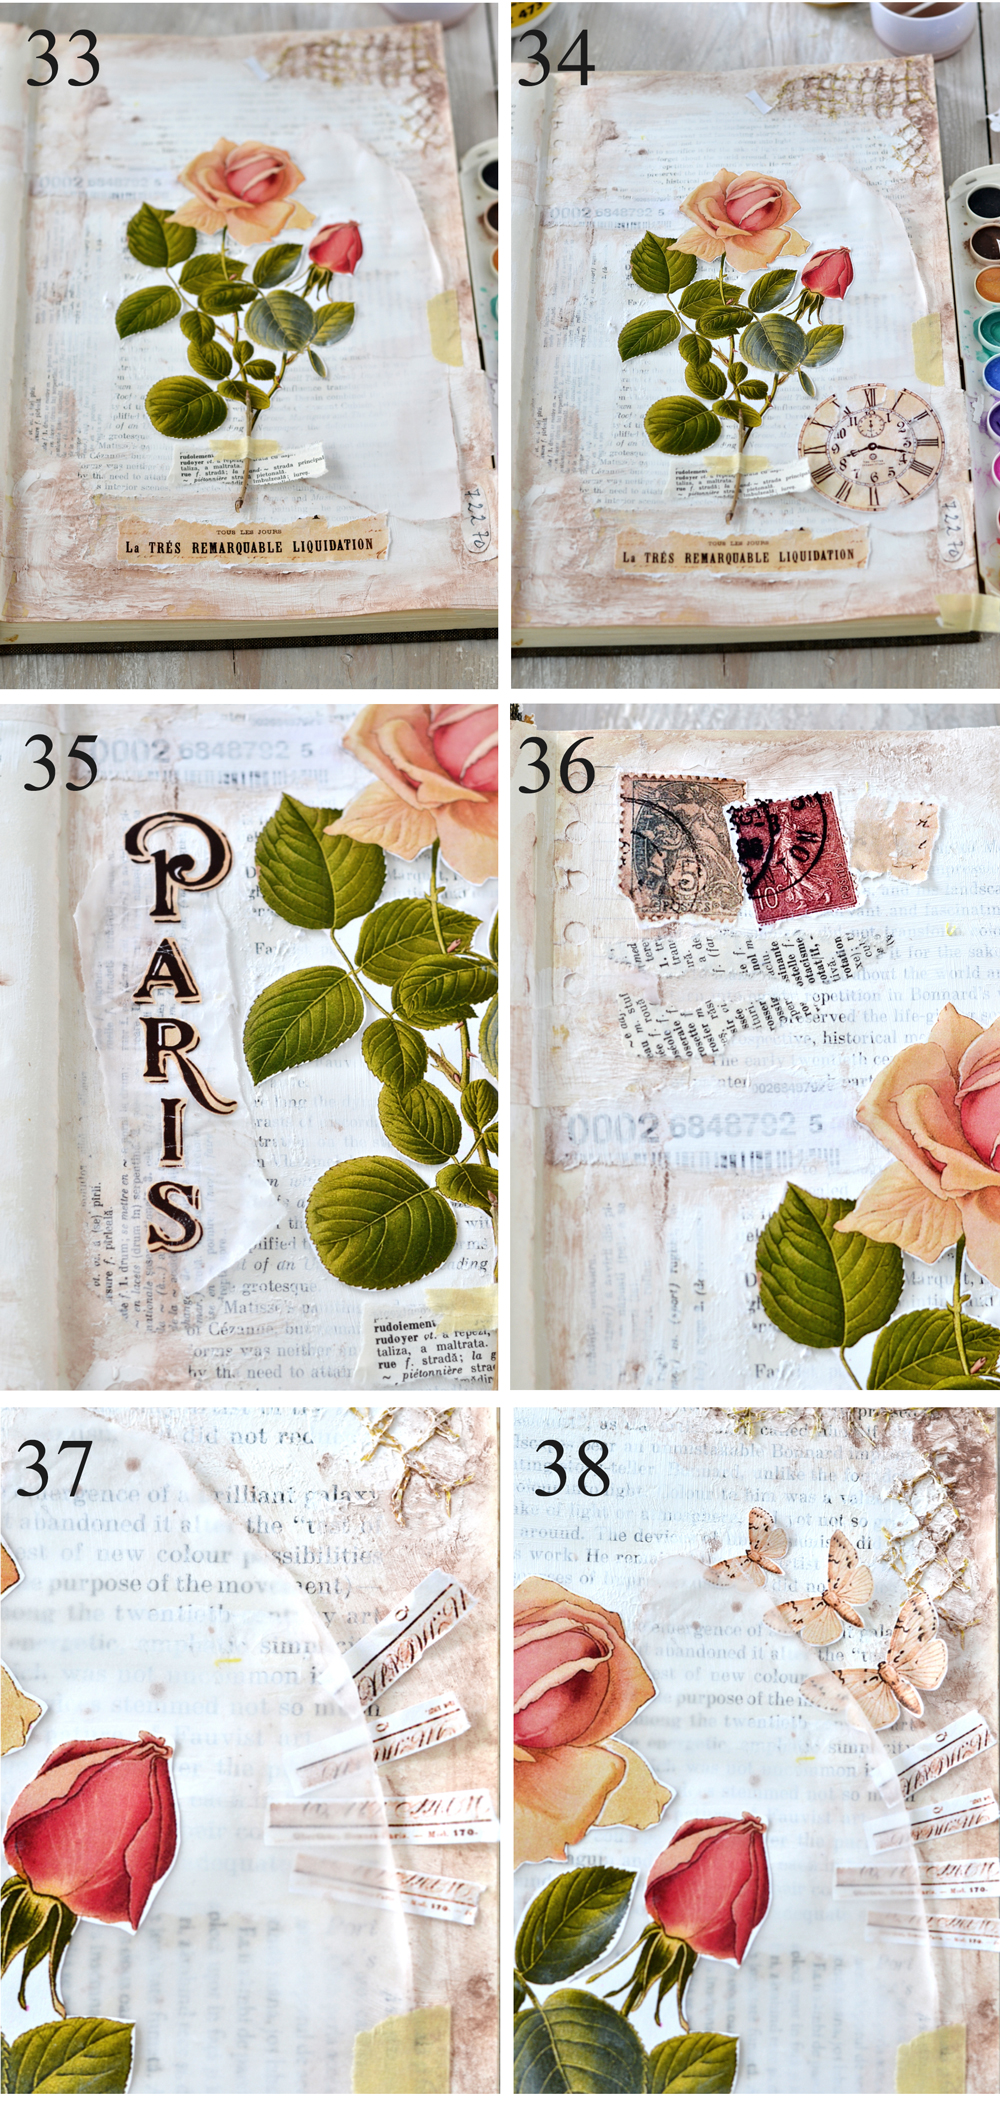
33. The French ephemera element was torn in half and was placed below my rose, because I thought the whole image would obscure some of the lovely details on the page.
34. I added the vintage clock on the right and I REALLY started to love how everything came together!
35-36. The “Paris” writing came to the left, along with some more of this chic looking tracing paper underneath, then the vintage stamps found their way on the top left side with some old dictionary pieces of torn paper.
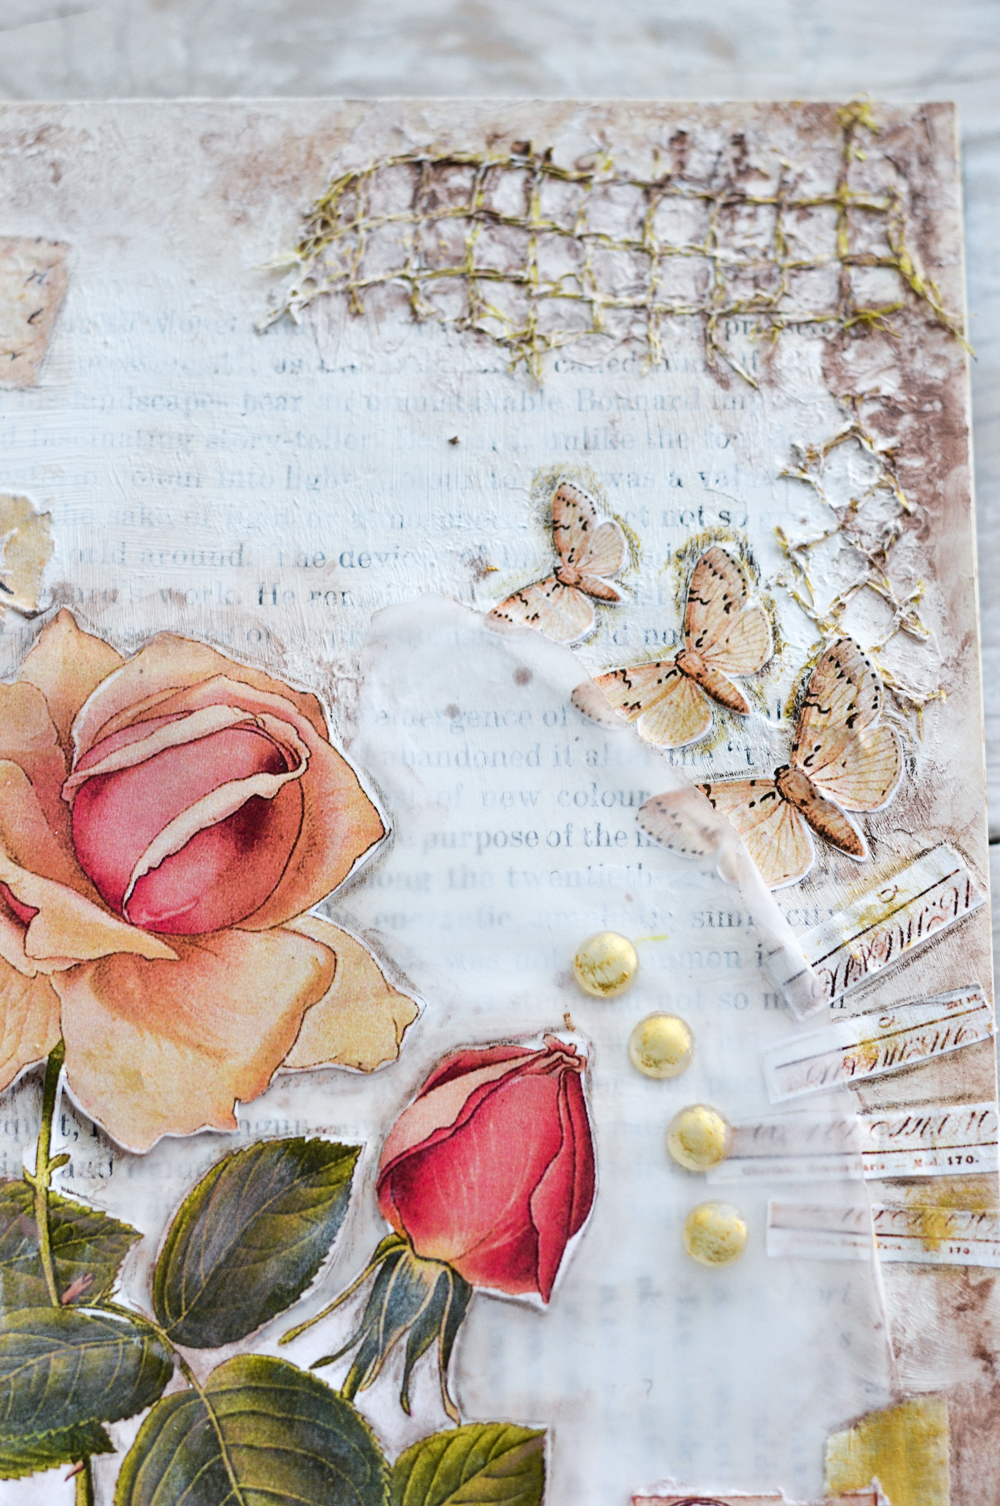
37-38. On the right of the rose, where the tracing paper created that sheer amazing effect I added the 2 code elements from the printable (I tore them in half to create 4 smaller elements). I basically stuck them half way under the tracing paper and glued them in place. Then I did the same with the butterflies, half sticking them under the tracing paper.
Please remember that you can play with the elements like I did, you can use them all or only a few. You can also experiment on your own, I’m sure you will find a few other stylish places for them!
39. The next steps are simply perfect for experimenting! If you feel like your secondary elements are maybe a little bit too bright you can dry brush them with a tiny amount of gesso.
40. I used colored pencils to outline all the elements from the printable and to create some sort of a vintage shadowing effect. I used irregular pencil strokes, rather than clean sharp strokes and I even rubbed my finger all over the edges to create a perfect imperfect outline.
41-42. Then I used my helpful Q-tip and some brown watercolors for one more time and went again all over the edges of all the elements. This time I basically created a watercolor outline for all these beauties! They magically started to look like they’ve been there for ages! OK, maybe for years, but you know what I mean!
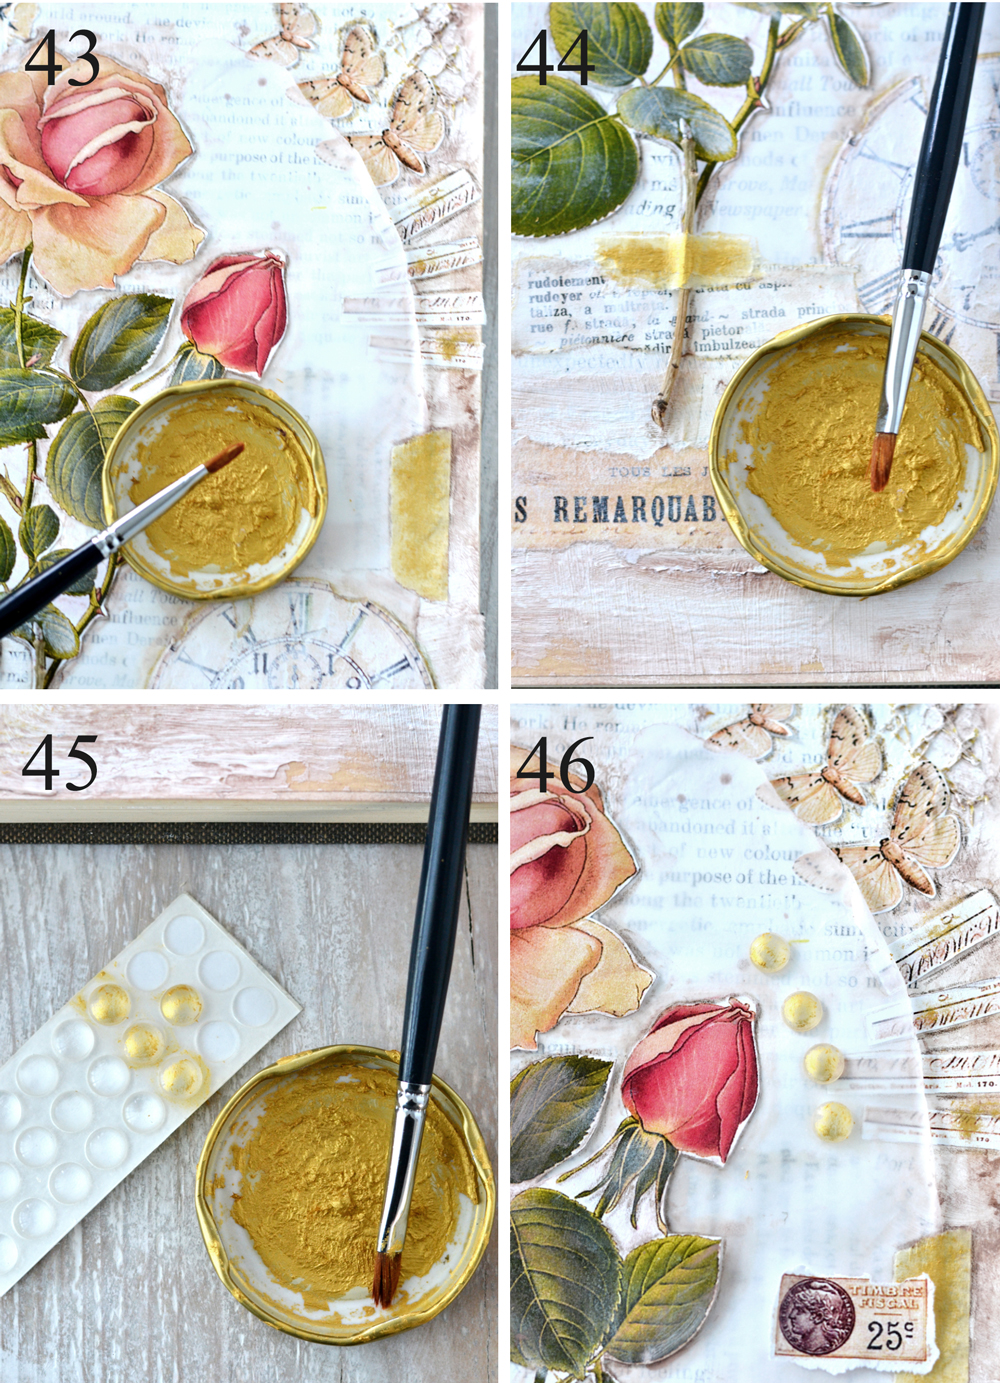
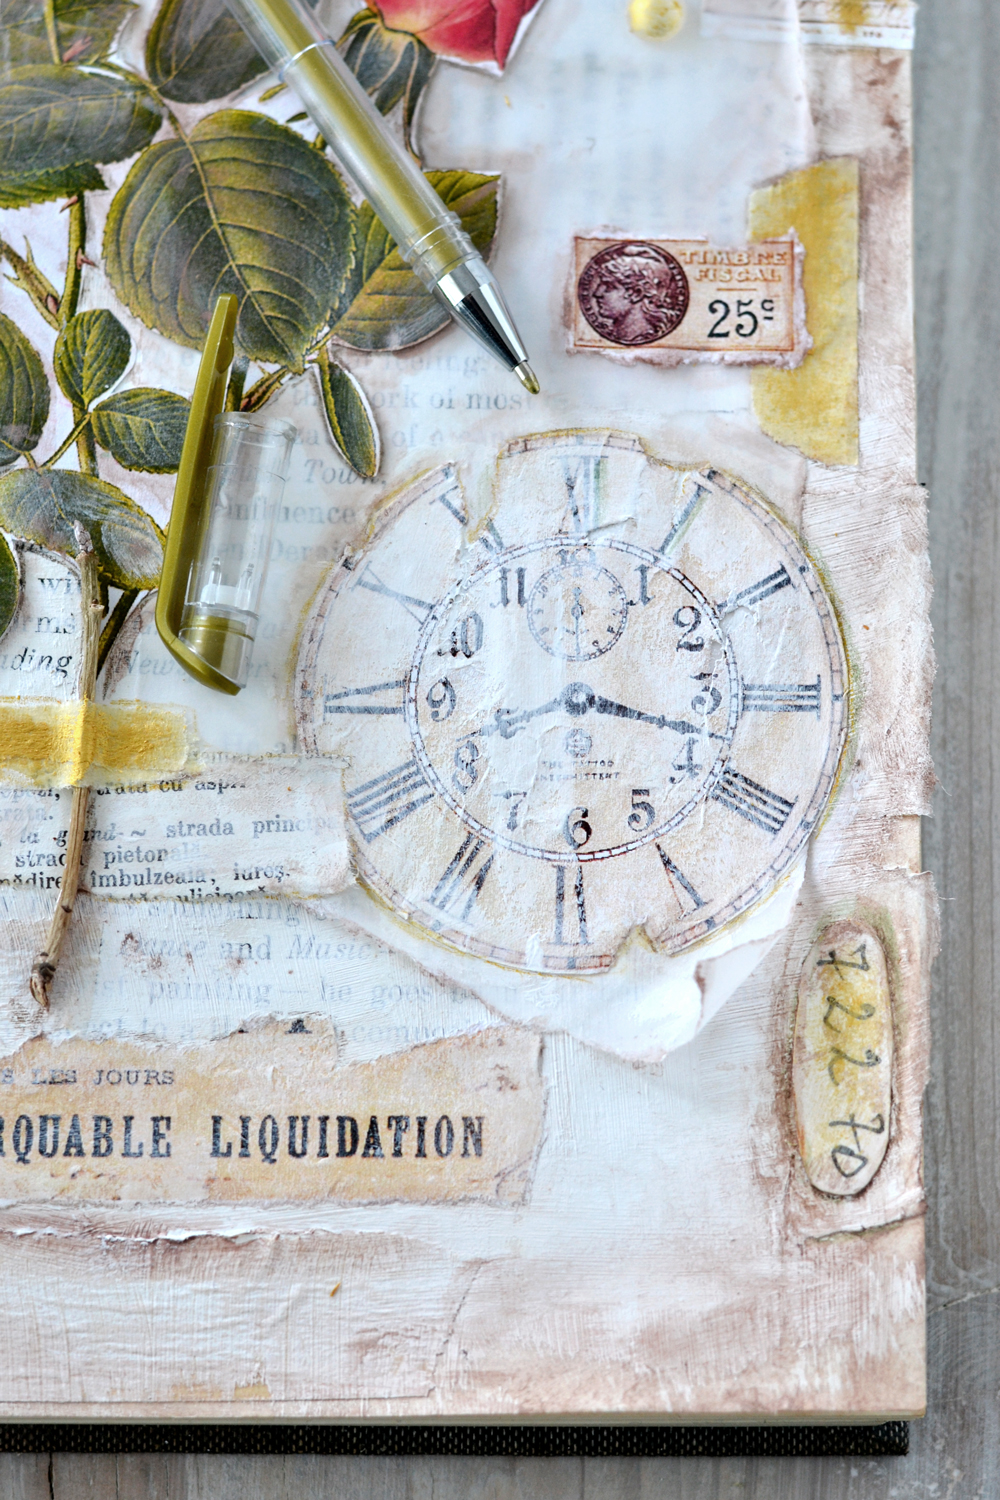
43-44. For the final touches I decided to use some gold acrylic paint … of course! You already know how much I love adding just a ”sprinkle” of gold into my projects, right? Exhibit 1, 2, 3 and 4 here. I added gold to all the masking tape pieces I added on my page (using a brush), a little bit on the petals of the rose (using my finger) and in some other random places here and there to create some glowing golden highlights.
45-46. On the last minute I thought it would be fun to also incorporate some silicone dots (if you don’t have them around you can simply make them following this tutorial). Of course I gilded them a little bit before finding them the perfect place on my page!
You can even use a gold metallic pen to go over some of the details, if you want.
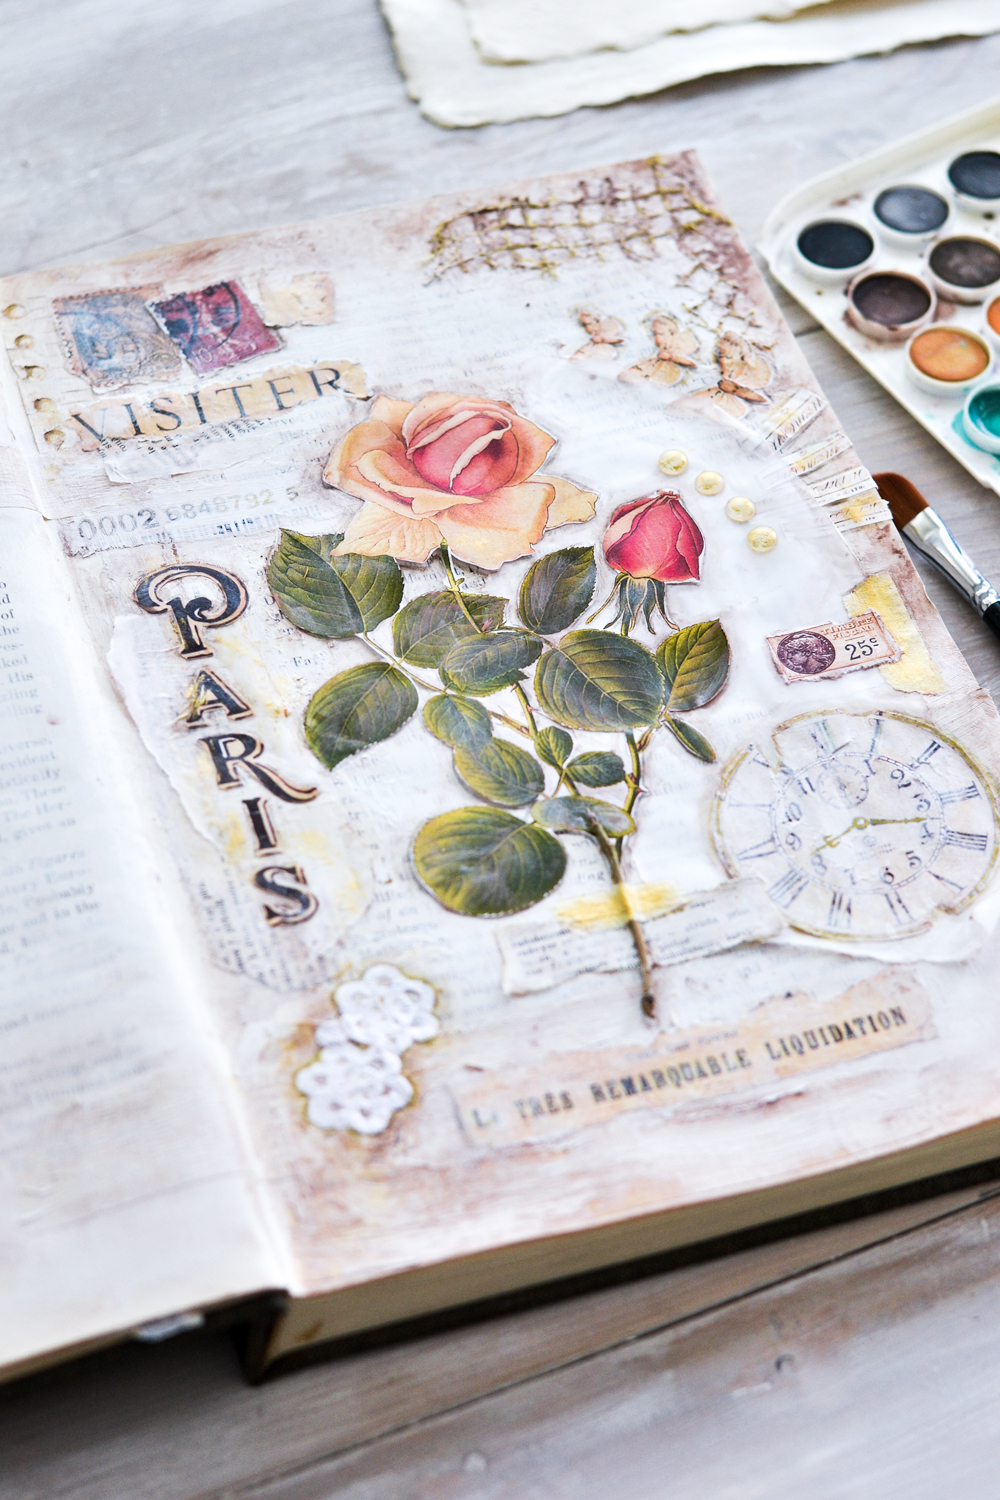
Finished Photos
And now my altered book artists… it’s your turn! Save all the pieces of paper that you can get your hands on, find that PERFECT book that would qualify as your next art journal and start experimenting on your own! Don’t forget about your special assignment too – including that one special handwritten element! Feel free to vary things up and add other elements or embellishments from your craft room, like washi tape, stickers, ribbon, rubber stamping, or sewing stitches. You can make marks or drawings with markers or crayons or pencil too. Add some acrylics paints using paint brushes or a stencil or maybe try some shimmering sprays to give your book a different feel.
You will be surprised how easy this project really is and how rewarding and fulfilling the final results are! 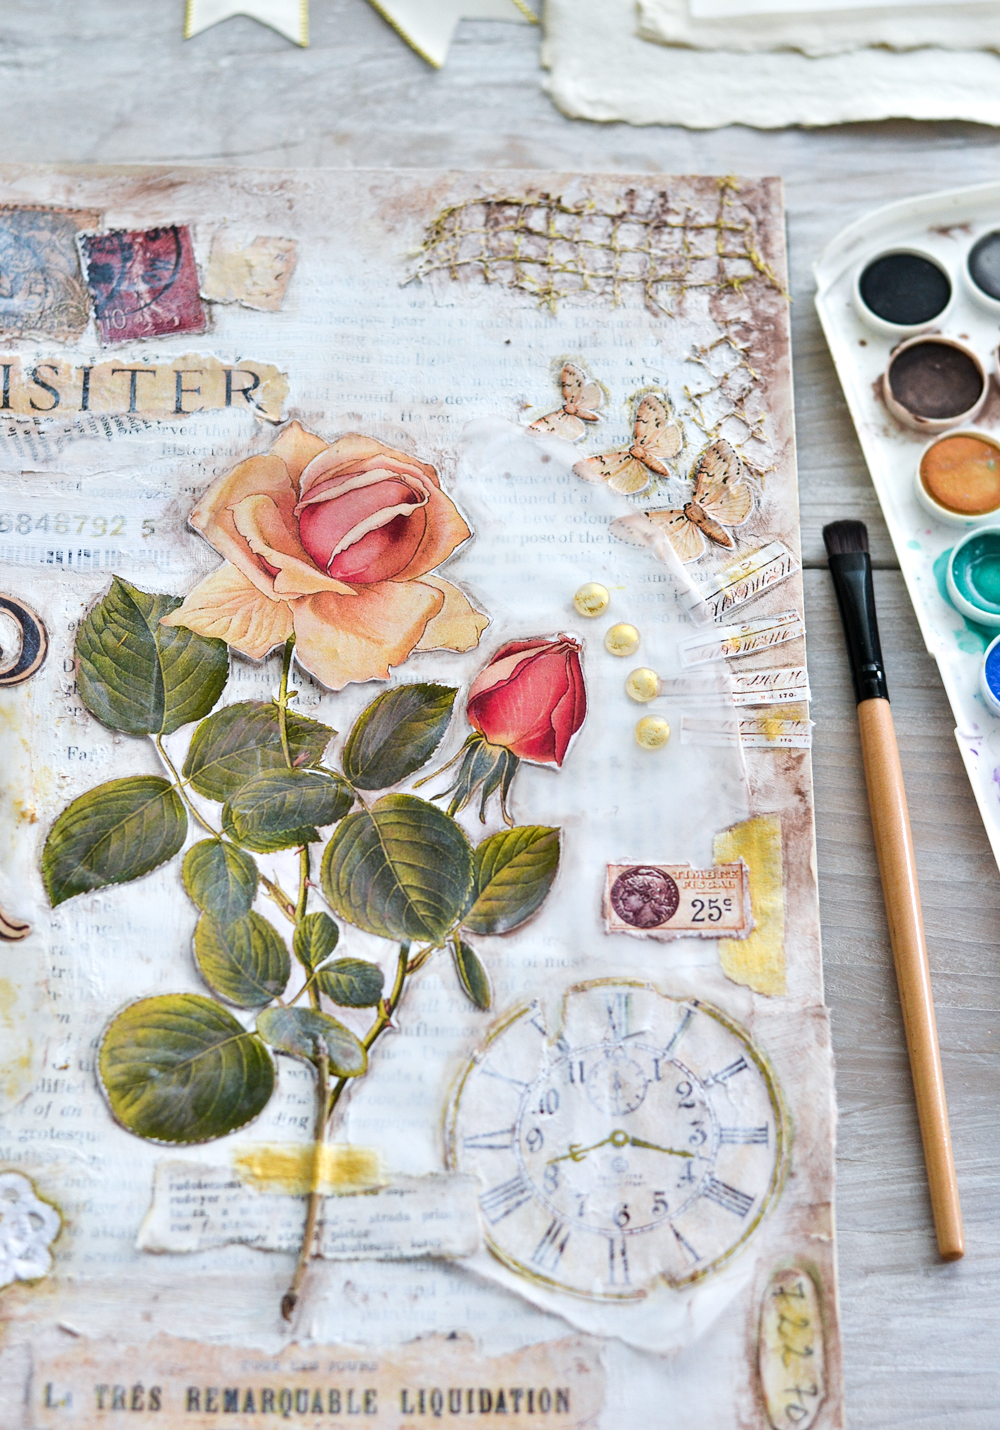
I hope you enjoyed this art form and these altered book ideas! You might also like my DIY Book Box HERE.
Happy crafting,
Diana/ Dreams Factory




Deb says
I cannot wait to make an altered book. These step-by-step instructions are very helpful. Yours turned out absolutely beautifully. Thank you.
Karen says
You’re welcome! I hope you find time to make them.
Connie Griffin says
Fantastic page, love how it all came together!
Karen Watson says
Isn’t it lovely? So glad you enjoyed it Connie!
Lynne Larkin says
Thank you for the great tutorial, and elements.
I did my version of the page on a 5X7″ canvas board and it’s bragging, I know, but it turned out Fabulous!! I will never be afraid to leave some element edges unglued again. I love the ‘floating” effect of the tissue paper.
graphicsfairy says
Good for you Lynne and it is not bragging to be proud and happy with your project, I’m sure it is Fabulous!!
Lisa says
Fabulous tutorial. Thanks so much. I love the layered look but never really know how to accomplish it!
Thanks so much for the d/l as well.
graphicsfairy says
Thank you Lisa, so glad you enjoyed it!
CaseyJ says
I am “distressed”! Have tried to print the .pdf, but no matter how much I downscale or upscale, I can only get the word “Paris” to print. 🙁
Karen Watson says
Hi Casey, I’m so sorry that you’re having trouble! Try saving the Printable to your computer first and then printing it from where you saved it. I hope that helps!
Cathy says
On your altered mixed media book, are you removing some of the pages to allow for the thickness of the villages page?
graphicsfairy says
Hi Kathy, Diana did not but feel free to do whatever you like to make it your own. Have fun!