
How to Make DIY Plaster-Dipped Frames
Hello, Graphics Fairy friends! It’s Rebecca ready to share How to Make Plaster Dipped Frames! Learn how to take this inexpensive photo holder and turn it into a gorgeous heirloom decor piece. We will create something truly unique with dollar store frames and silk flowers using just a few craft supplies. It is the PERFECT handmade gift, especially nice for Mom’s Birthday, Christmas or for Mother’s Day. As always, I will share tips and tricks I discovered along the way.
This post may contain affiliate links which won't change your price but will share some commission, you can find our privacy policy here.
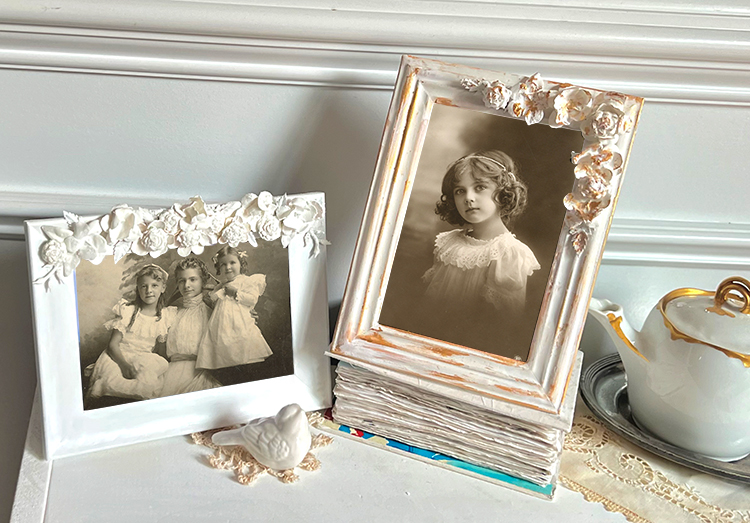
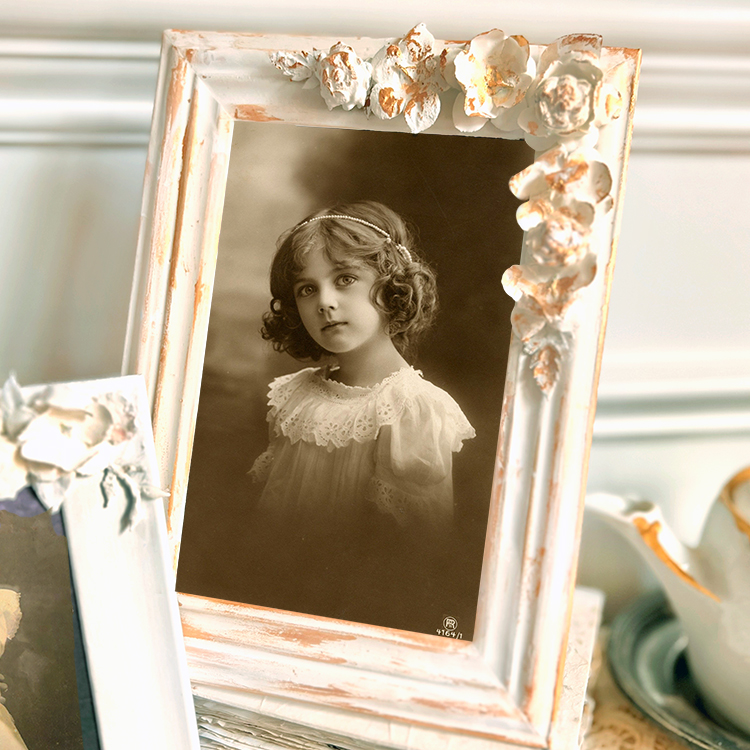
This DIY Frame project is one of the favorite things I have ever made for The Graphics Fairy. Taking a very inexpensive dollar store plastic frame and creating these beauties touched my creative heart and soul. This project was inspired by a very expensive frame I found at a chic high-end store. I examined it thoroughly and took a few photos to help me remember. At home, I experimented with a few potions and concoctions until I was able to duplicate the look and feel in two different ways. You will be able to adapt either one for your needs and decor. I really loved how it all came together! I bet you could not tell the original from the copy.
To Dip or Not to Dip
In my experiments, I found that dipping the frame and flowers was pretty messy and there were challenges with the plaster flaking off. Plaster of Paris can be finicky and must be mixed perfectly. So, I have offered two tutorials below – a plaster dipped frame (gilded frame in foreground below) and a faux plaster dipped frame (white frame in background below). You can accomplish the same look and feel by painting a plaster-like mixture onto the surface. You have options!
You need a tub of some sort to accomplish dipping the frame. It needs to be a few inches larger than the frame. I used small 4″ X 6″ plastic frames for my project. The dipping tub is a 6″ X 8″ rectangular, plastic food storage container. Doing a larger frame could be challenging, depending on the ability to find a suitable tub for dipping.
A Word About Flowers
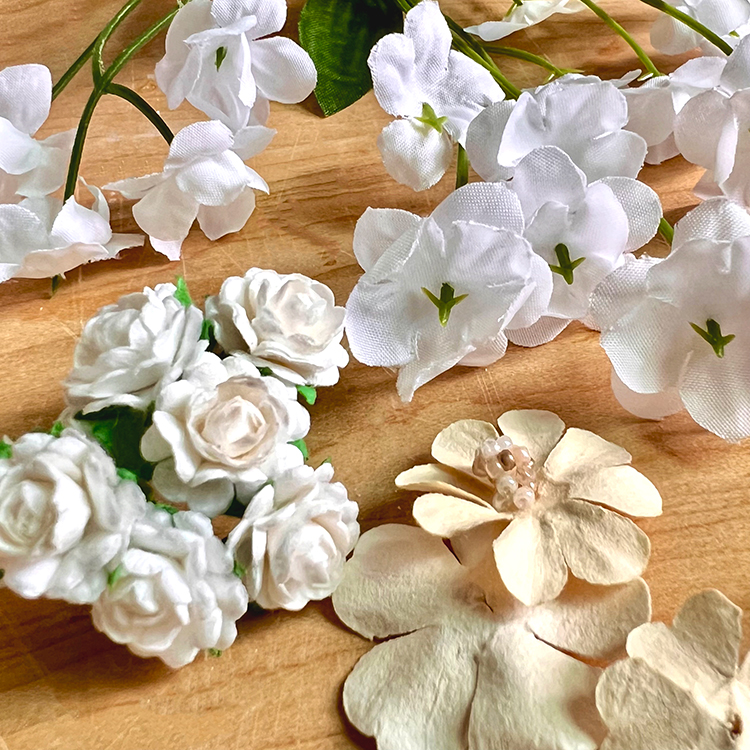
I used silk flowers for this project. I bought a stem of small flowers from the dollar store. They were mostly white, but you can use colored flowers since we coat them with plaster or paint. I also used some tiny 1/4″ roses from my stash. They were found in the wedding craft section of Michael’s. I also had some flat daisy-like flowers in my stash. I layered the small roses inside of these. You could use paper flowers or plastic ones if you prefer. I loved how the roses turned out. The flowers from the dollar store tended to ravel, but the coating fixed that for the most part. Just have fun with what you have.
Materials for DIY Plaster-Dipped Frames
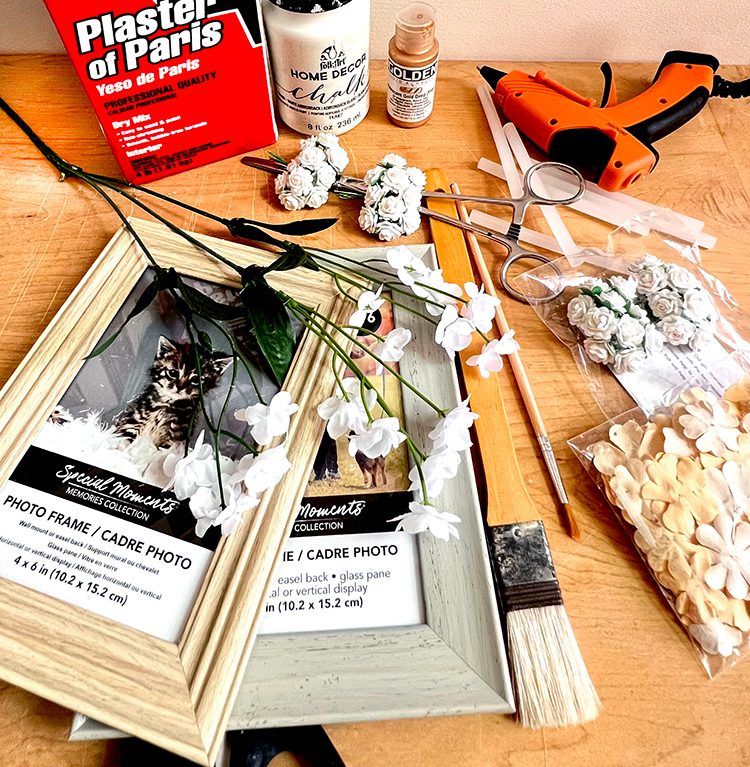
- Frame with detachable stand (I used 4″ X 6″ plastic frames from the dollar store)
- Plaster of Paris
- Water
- Chalk Paint
- Gesso
- Water Container
- Sandpaper (Fine)
- 6″ X 8″ rectangular, plastic food storage container with 2″ tall sides
- Fluid Acrylic paint (gold)
- Small round artist brush
- 1″ flat artist brush
- Plastic sheet or a nonabsorbent surface (to protect your working area)
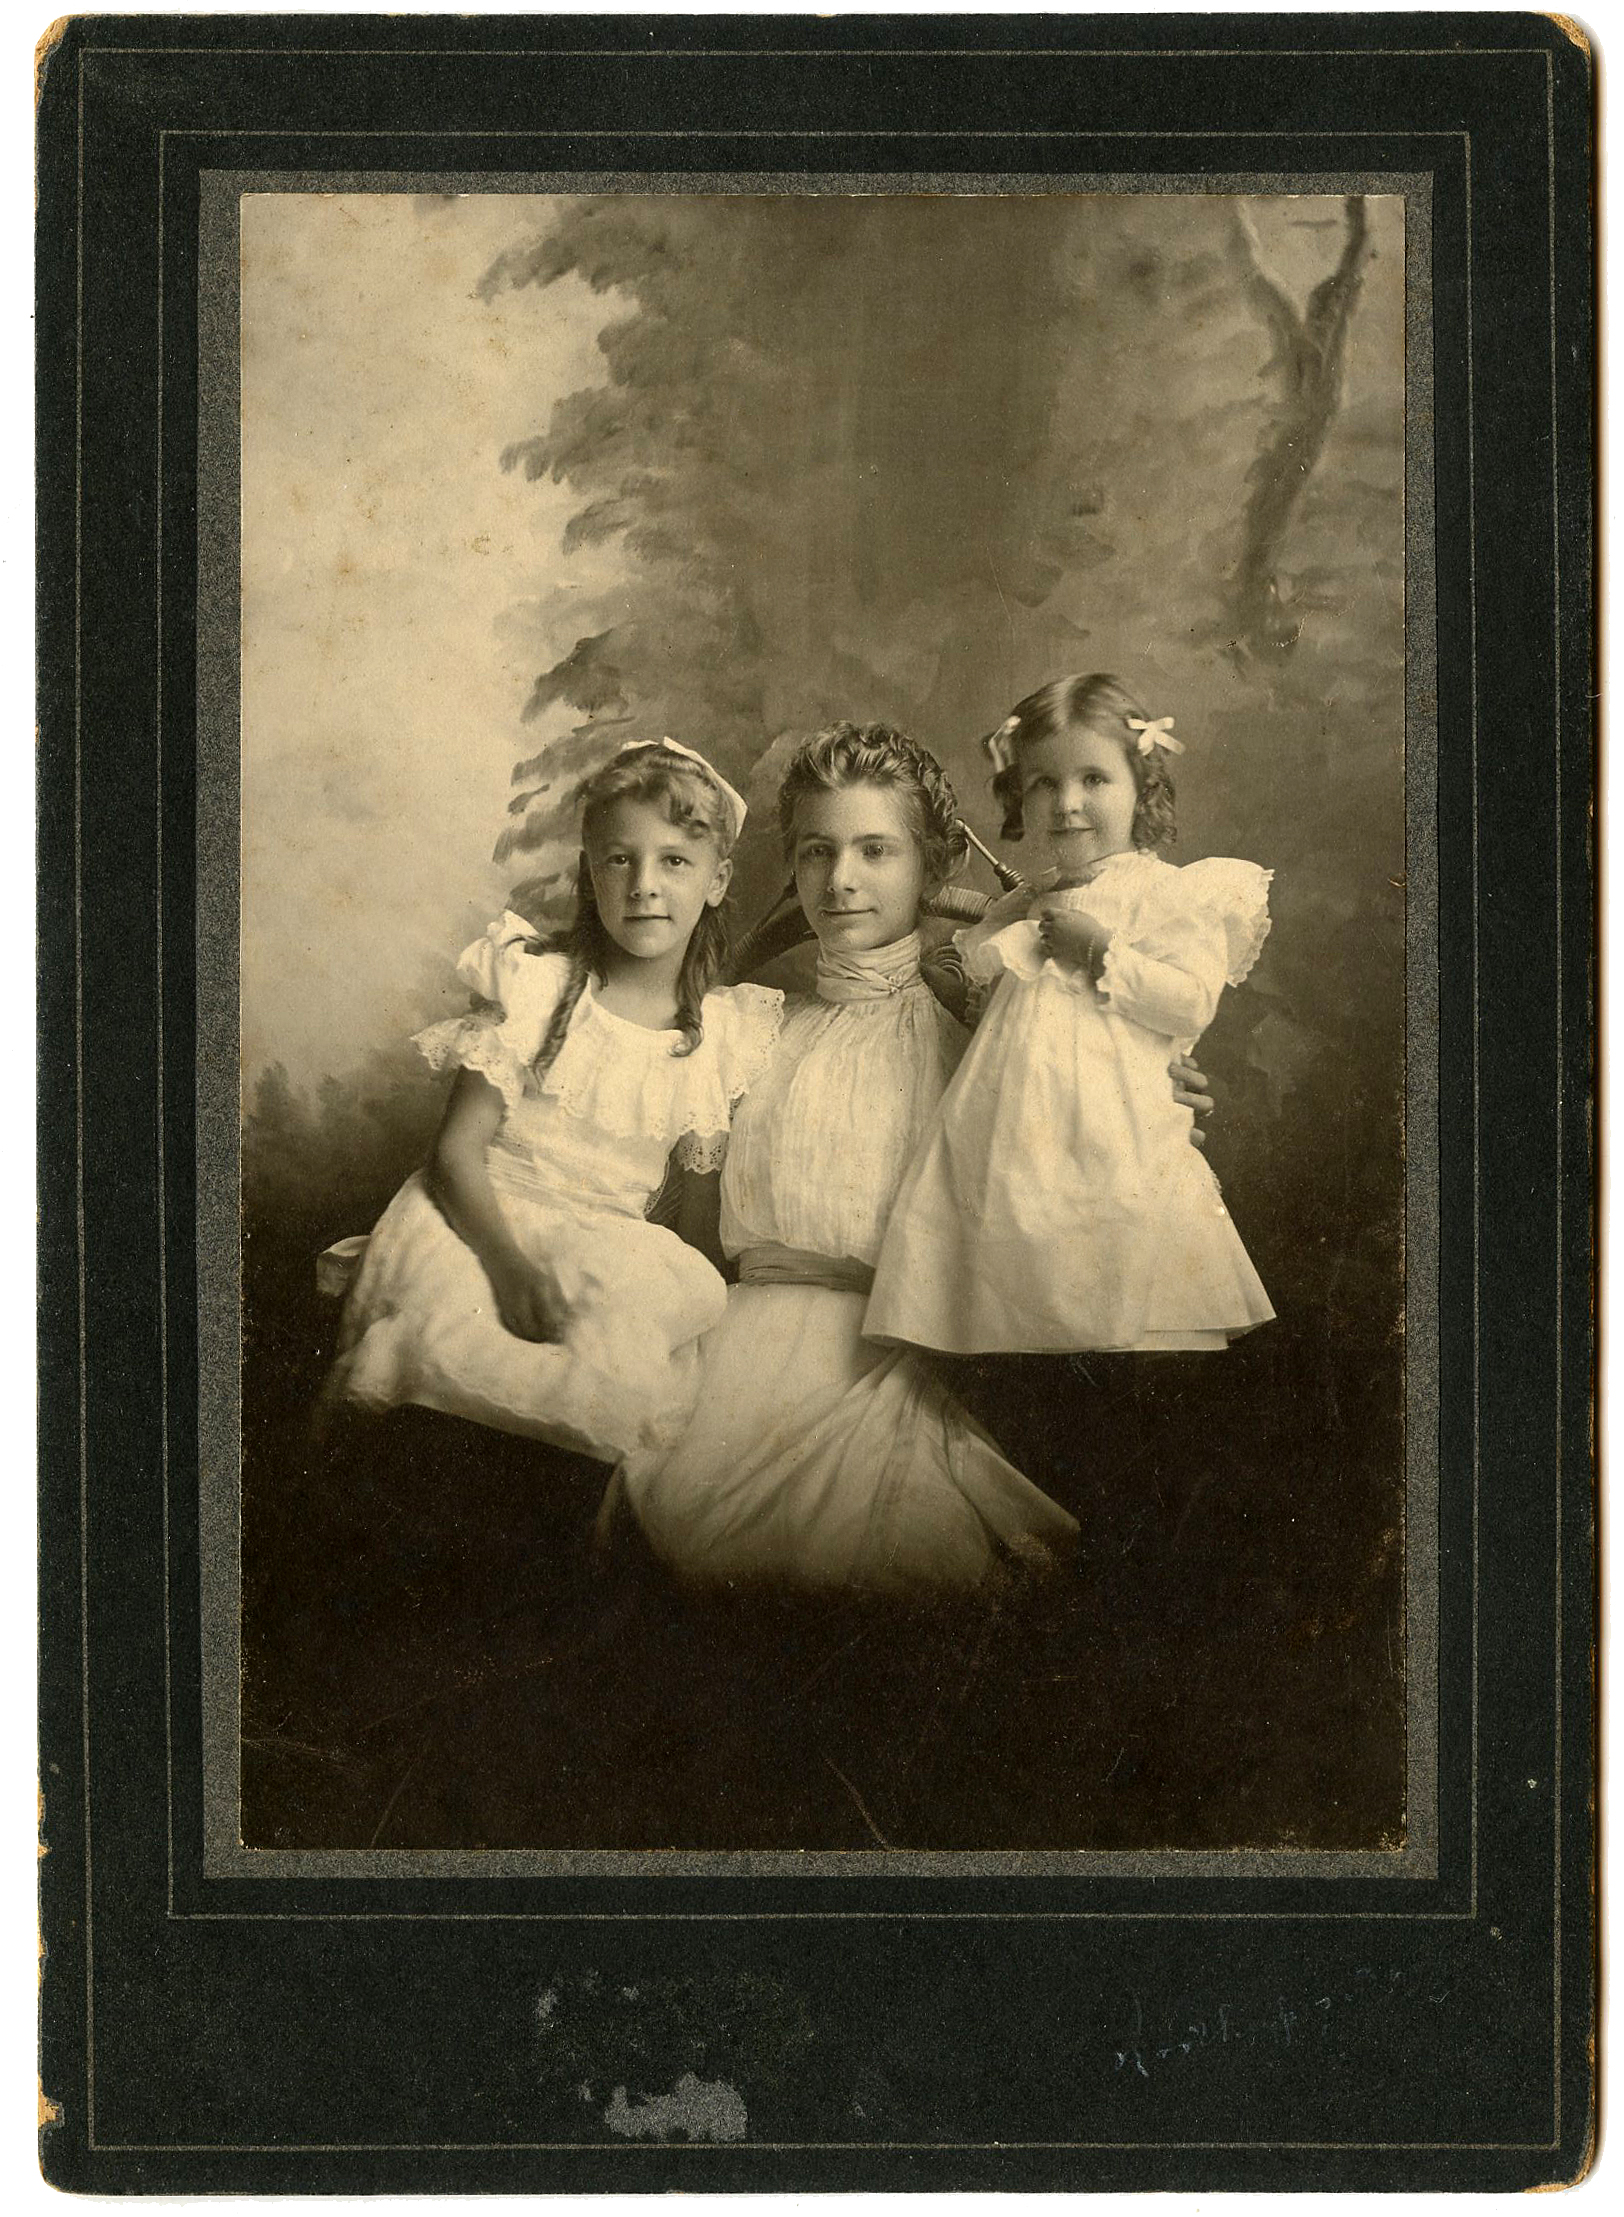
I used two TGF vintage photograph images in my frames.
The Pretty Girl and Mother with Daughters Photo

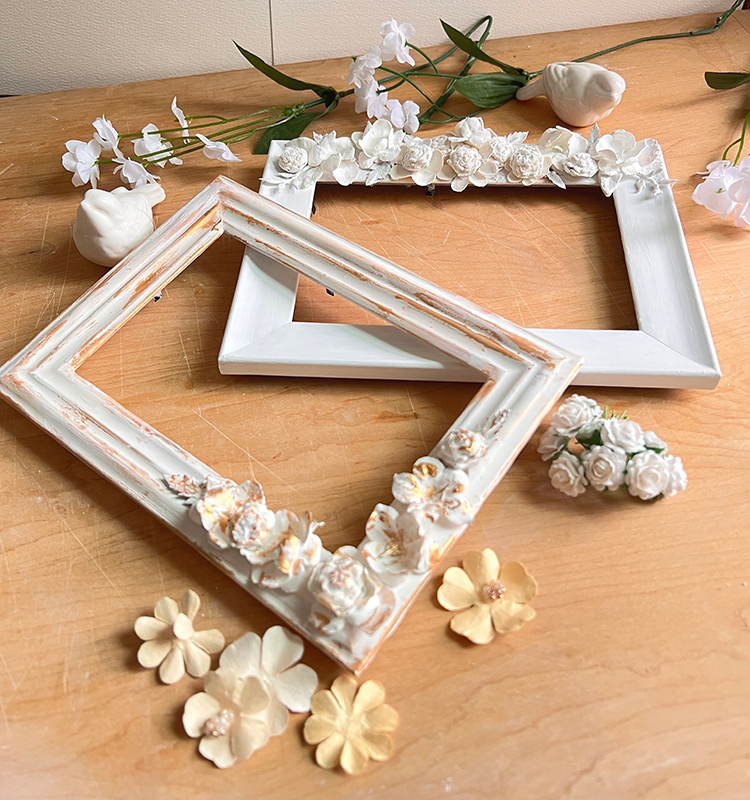
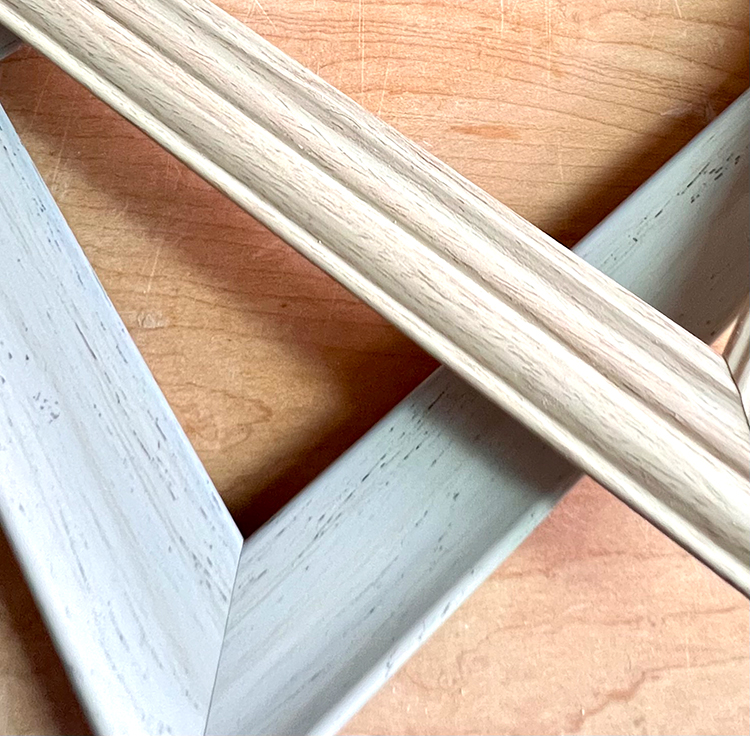
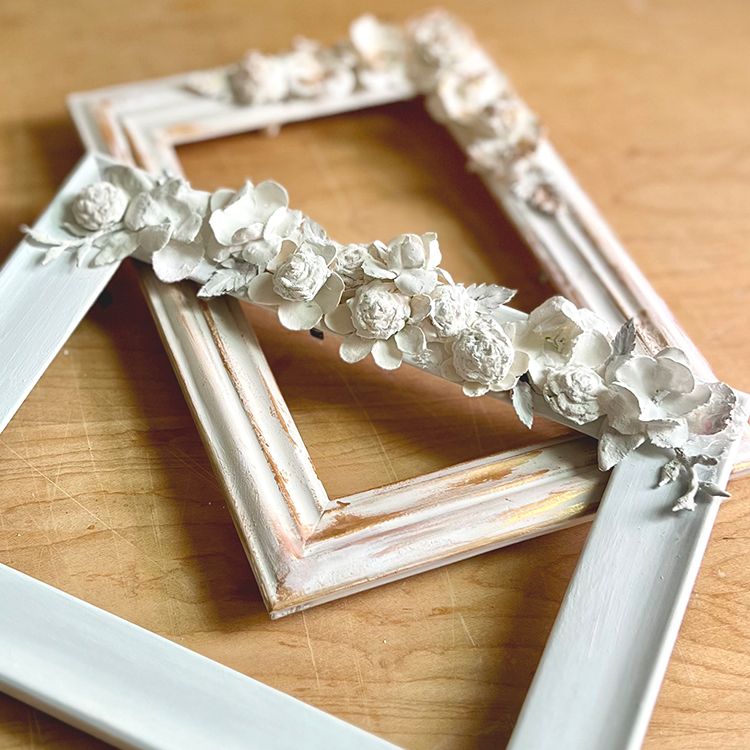
As stated above, I made two versions of the frame – two techniques and two color ways. I know we adore all things white when it comes to decorating so I made one pure white. I created a second version with some gold accents for a more sophisticated look. I added just a hint of gold distressing, but you could add more or less. You can of course paint with other colors if you like. I would say this beauty could be the PERFECT gift for a friend! I think some pretty pastels would work well for a baby or shower gift. I can’t wait to see what you decide to do!
Step-by-Step Plaster-Dipped Frames and Flowers
- Remove the glass and backing stand from the frame. HINT: If the stand is attached to the frame, it will be impossible to dip the frame. Set aside. Below you can see the two different frame designs I used.
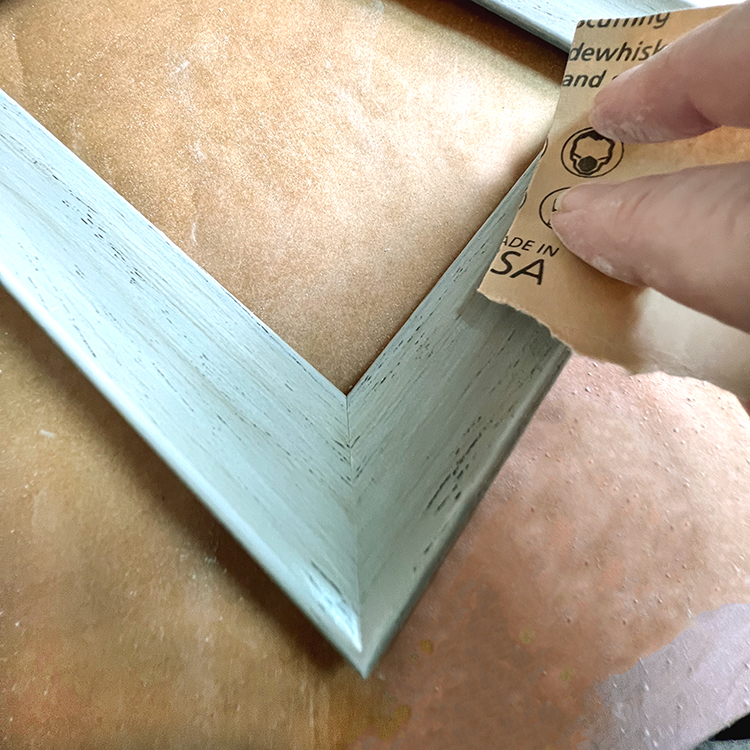
- Sand the plastic frame until the shine dulls. If you are using a wooden frame, sand lightly. Remove all sanding dust with a dry cloth.
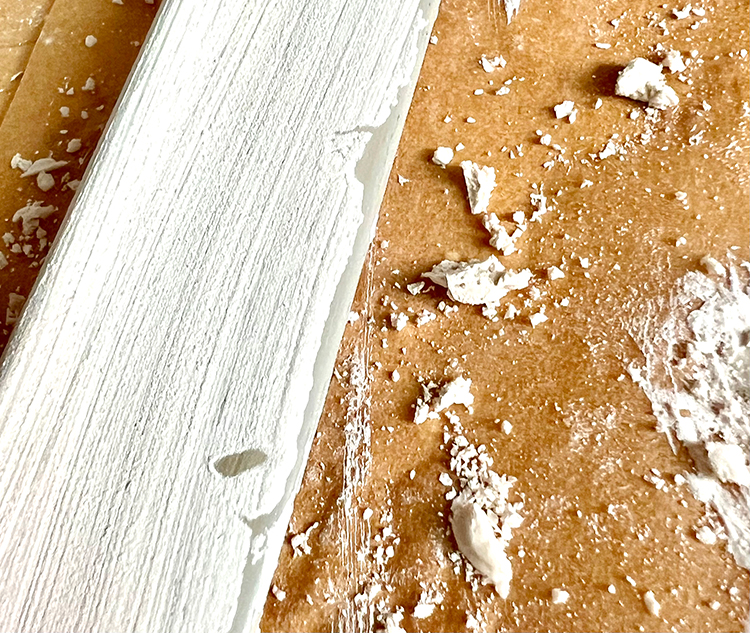
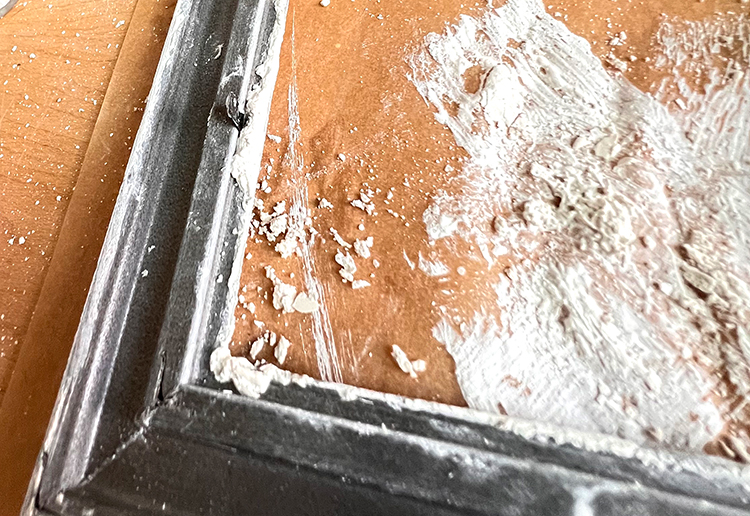
TIP: Preparation is everything in this technique. I share an OOPS photo below as I tried to cover a frame without sanding or coating with gesso. I also tried to brush the plaster on this frame. You can see the brush marks; it was almost impossible to brush it on evenly. See how the plaster cracked off and crumbled? Back to the drawing board.
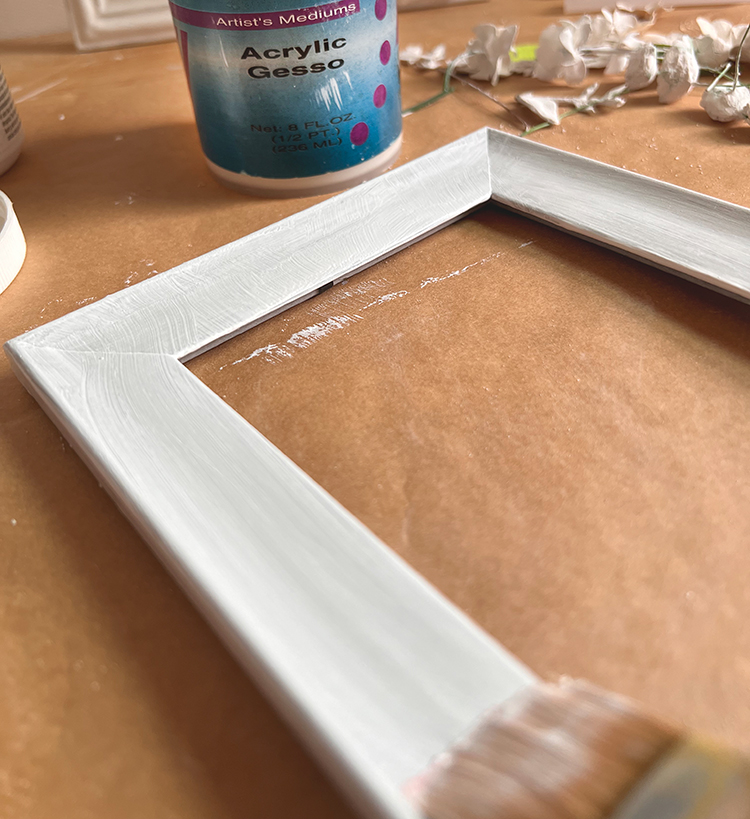
- Paint a coat of gesso over the face and sides of the frame. Trust me about this step.
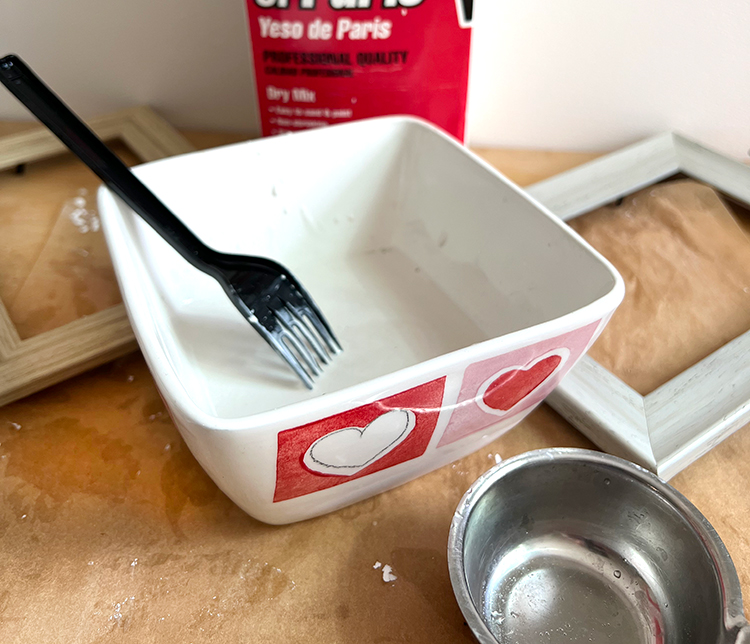
- Prepare the Plaster of Paris according to directions. Work Quickly!! TIP: PofP dries quickly, within several minutes. Make sure you have the time to finish the process before you start. Only mix exactly what you need. For my 4″ X 6″ frame, I used 1/2 cup of Plaster and 1/4 Cup of cold water. Mix well until all powder is incorporated. I found that a plastic fork works well for this.
- Pour the plaster mix into the dipping tub. Wait about 3-4 minutes until the plaster begins to thicken. I found that the consistency of mayonnaise is good. If it is too thin, it will not adhere to the frame.
- Hold the frame by the folding metal pieces and dip into the plaster.
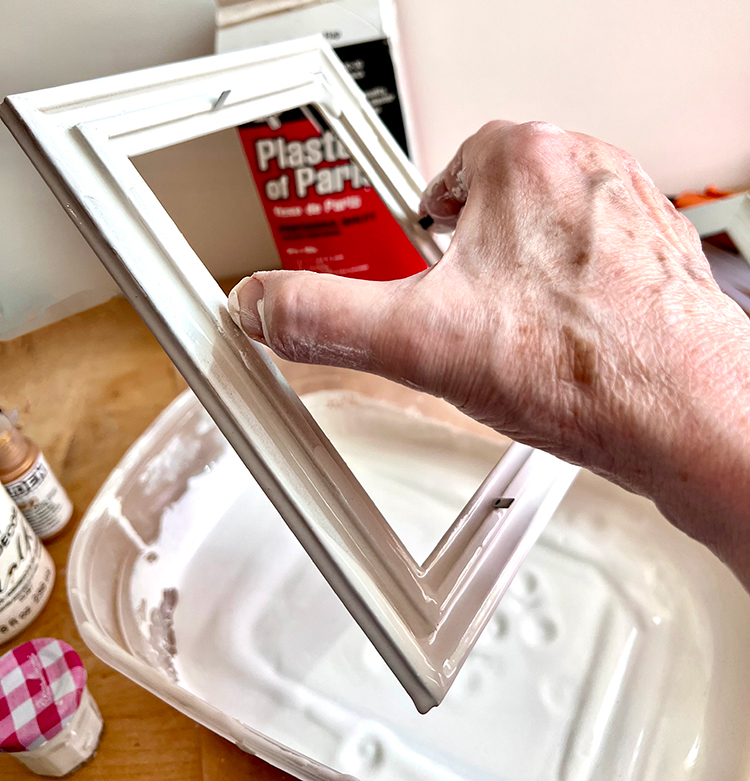
Gently wiggle the container back and forth, side-to-side to coat the front and sides of the frame. TIP: You do not want to coat the back of the frame. If the plaster does not reach the edges, try tipping the container in all four directions until it reaches the top of the side.
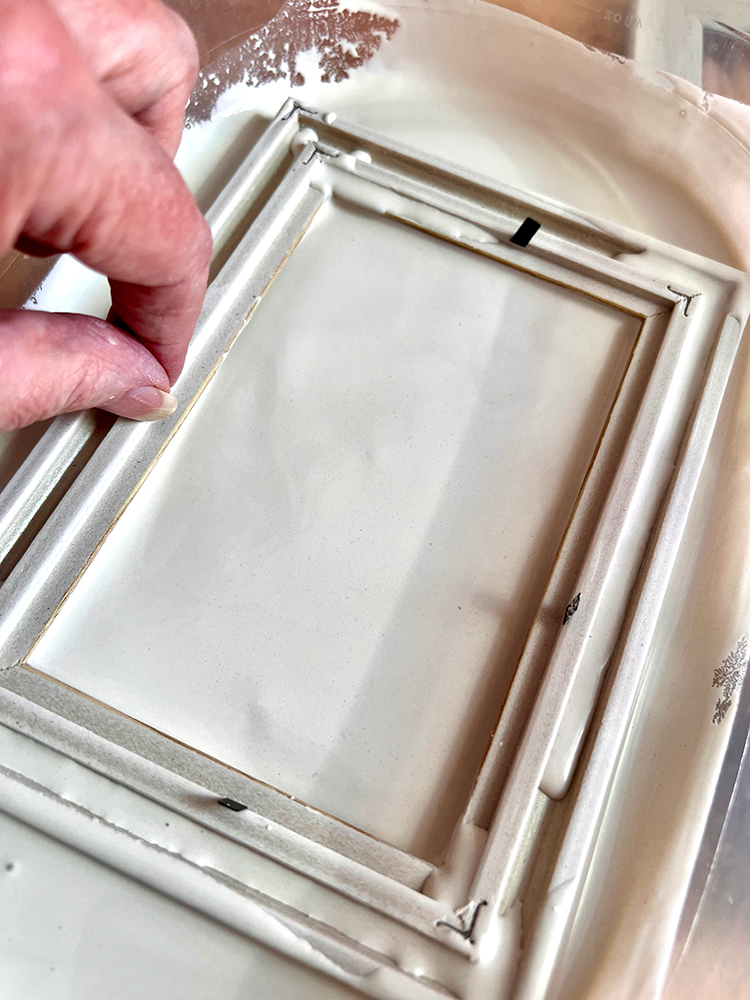
- Holding the frame by the metal pieces, remove from plaster. Carefully turn it over and place on the sides of the plaster container so it can drip. TIP: You do not want to touch the plaster on the frame while it is wet. Just let it drip dry for a few hours. You can see how the plaster is already drying in the container.
- Scrape off any dried plaster on the back of the frame, especially where the glass will rest. It will not sit properly in the frame if you skip this step.
Clean Up – IMPORTANT!
Just as preparation is critical to this project, PROPER cleanup is essential. IMPORTANT: DO NOT CLEAN YOUR PLASTER TOOLS AT YOUR SINK AND LET PLASTER WATER RUN INTO YOUR DRAIN! The plaster will turn solid in your pipes and give a nasty clog. Since we prepared the plaster in a plastic tub from the dollar store, it can be recycled or thrown away. If you want to wash and reuse it, run about 2 Cups of water in it and swish it around with your hands. The plaster will be hard and fall away from the sides. Outside, spread newspaper on the ground and pour the mixture onto the paper. Place another cup of water with dish soap into the tub and scrub with your fingers around the bottom and sides. Pour this onto your newspaper. Wipe tub with a paper towel. Let the newspaper dry and then recycle or toss.
Plaster Dipped Silk Flowers
- Prepare the flowers by cutting them from the stems. Leave a bit of stem attached to the flower to use as a dipping tool.
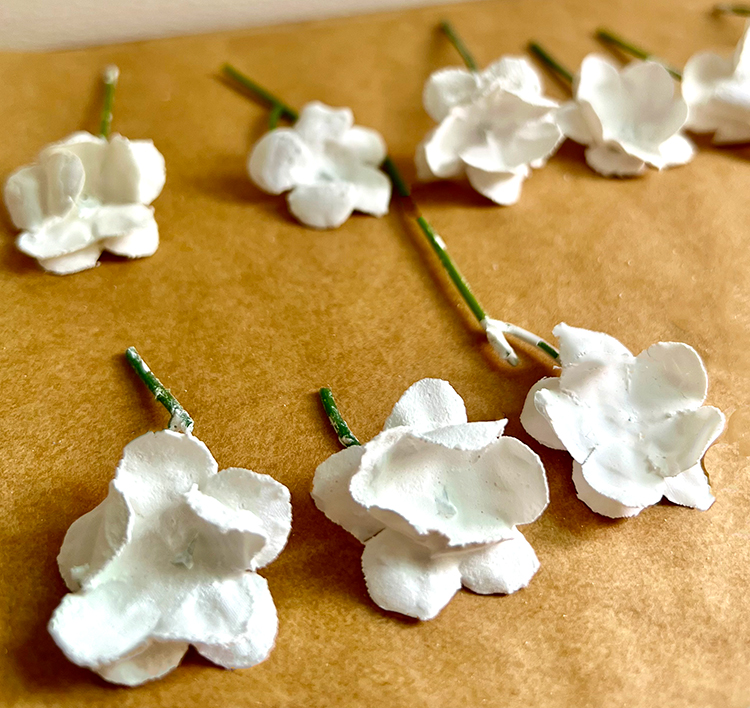
- Prepare the plaster as above, using a 2 to 1 ratio of plaster to water. You only need a small amount. I used 2 Tablespoons to 1 Tablespoon. I made two batches to dip around 12 large flowers, 12 small flowers, 10 leaves, and stems.
- You must move quickly. Dip the flower, holding the stem, into the plaster mix. Submerge it. Lift it out, letting the plaster drip into the container. Place flower on parchment paper or waxed paper to dry. I place mine on the side of the flower to make a nice, rounded shape. No need to wait until the plaster starts to thicken. Move quickly because there comes a point when you can no longer dip the flower into the plaster.
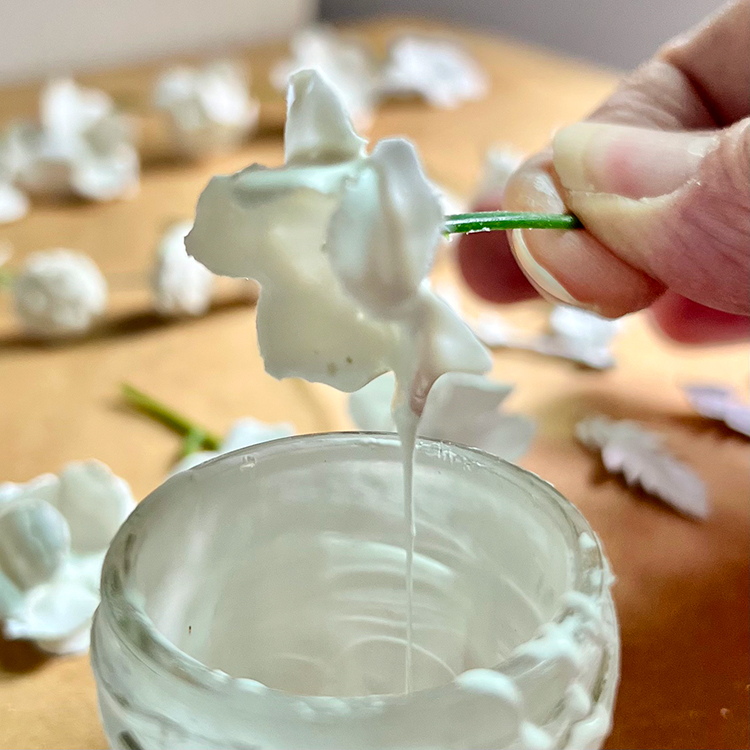
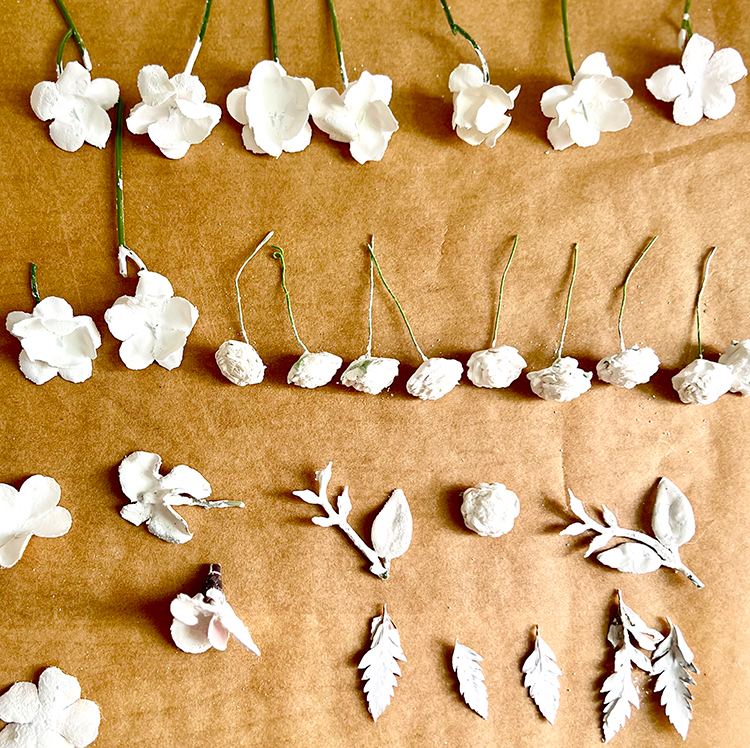
- Allow to dry overnight.
- Option: You can dip the flowers into thinned chalk paint or gesso as well. You can also paint the flowers with acrylic paint after you attach them to the frame, but it takes a long time.
Step-by-Step Faux Plaster-Dipped Frames
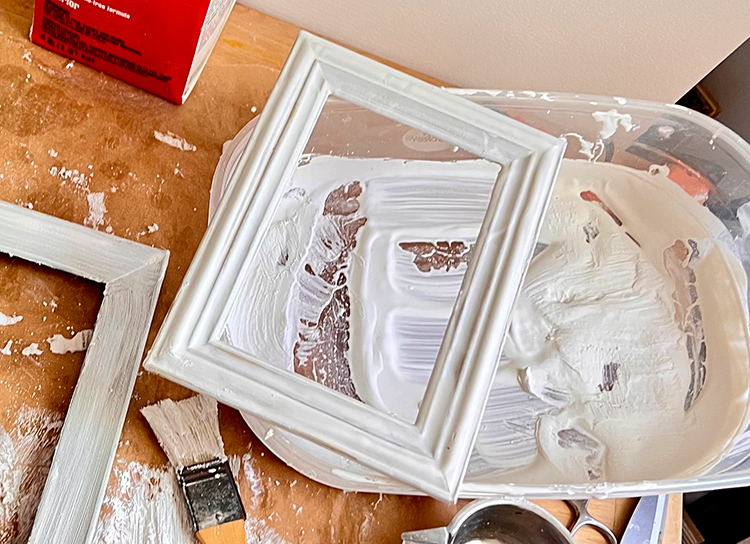
I found that chalk paint gave me the look and feel of plaster without all the fuss. Gesso works well also. Just make sure to sand the frame before painting it or the paint might not stick. I coated the frame with gesso to ensure that the chalk paint would adhere well. If you would like to make your own gesso, you can find my How to Make Gesso tutorial here.
- Sand and gesso the frame.
- Make sure the chalk paint is well mixed or shaken. Paint 2-3 coats of chalk paint over the face and sides of the frame, allowing each coat to dry before adding another. I let mine dry for a few hours in between coats.

- You can see below that this technique gives a beautiful matte look of plaster without all the fuss.

Attaching the Flowers
This process is the same for either frame technique.
- Plug in the glue gun. Tee Hee…
- Snip the stems close to the flower. The flowers should hold together because the plaster is dry and keeps them in shape.

- Dry assemble the flowers on the frame before attaching them. This will save you some heartache and frustration.
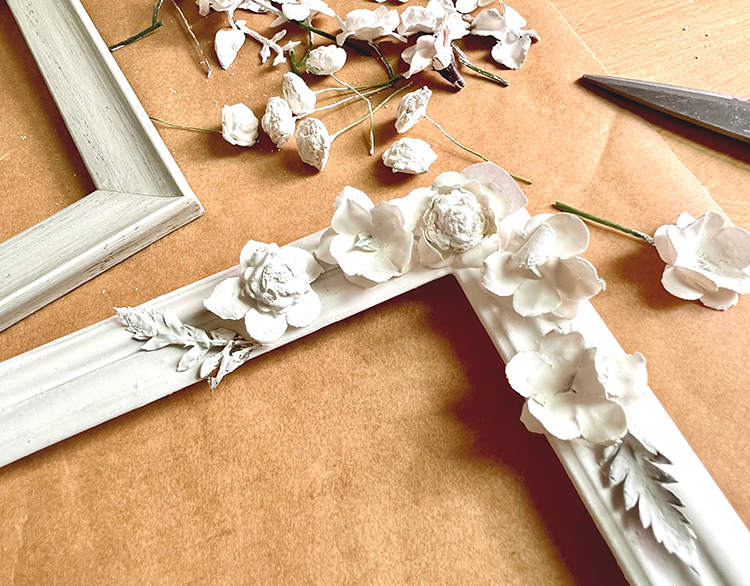
- When pleased with the look, remove the flowers and set them carefully near the frame.

- Start gluing with the back-most foliage in your design. TIP: Put glue on the flower or leaf, not on the frame! I put my outer edge leaves and stems in place first. Then I placed the middle flower, followed by placing the other flowers in both directions.
- Add the leaves last, gluing them behind the flowers in a pleasing manner.
- Allow to dry.
- Some of the plaster will fall from the plaster dipped flowers as you handle and glue them. Once the glue is dry, you can take some chalk paint and touch up any areas that need it using the small round artist brush.

Finishing Touches
Distressing or Gilding
I absolutely LOVE all the details of this project! The use of gold metallic acrylic paint on the edges and flower tips creates really beautiful highlights and effects. Also, the texture of the plaster and faux plaster makes the frames visually and tactilely appealing. YUM!

1. The distressing part is one of my favorite techniques, because it really adds depth and completely transforms the white plaster or paint. Place a few small blobs of gold acrylic paint on a pallet or piece of parchment (no water is needed). Use your finger or a small round craft sponge to dip into the paint. Tap the paint on the palette or paper first to remove any blobs. You only need a tiny amount on your finger or sponge to dry brush the frame.
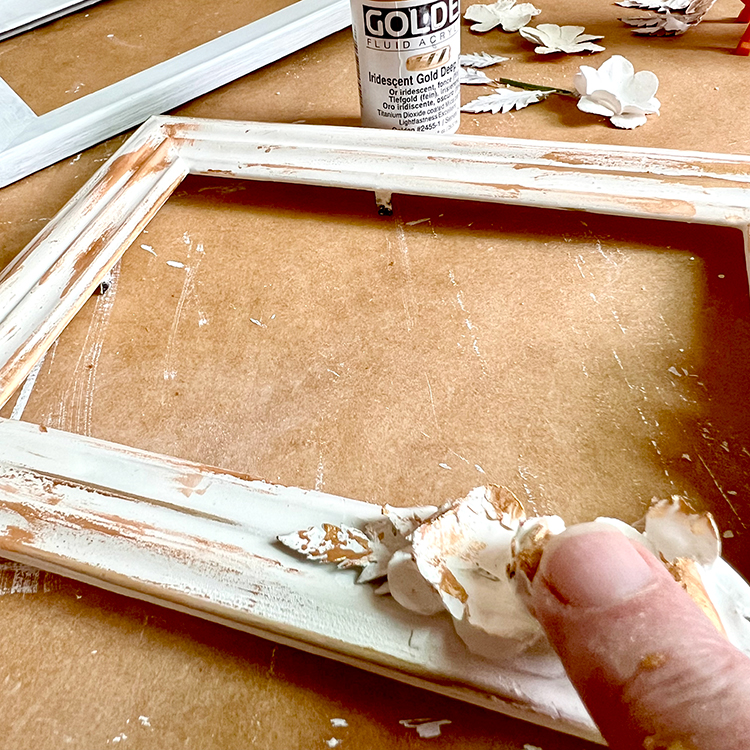
The amount of distressing is truly a personal choice, so just tap and here and there until you are happy with how everything looks. If you feel like you may have added a little bit too much ‘distressing’ or want to soften some bigger blobs, just tap some chalk paint over some of the gold areas. Swipe with a clean finger.

Hope you love this How to Make DIY Plaster-Dipped Frames tutorial as much as I do. I can’t wait to hear your thoughts on your creations! When I am not creating for TGF, I also create Photoshop Elements tutorials and craft project videos over on The Graphics Fairy Premium Membership site. You can find even more of my books, art, and whimsical shenanigans on my website – The Bookery.
May joy be with you all,
Rebecca


Leave a Reply