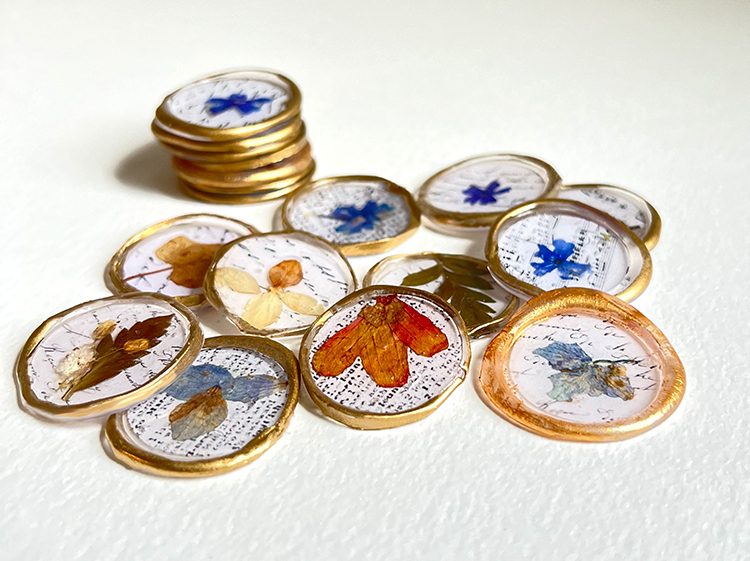
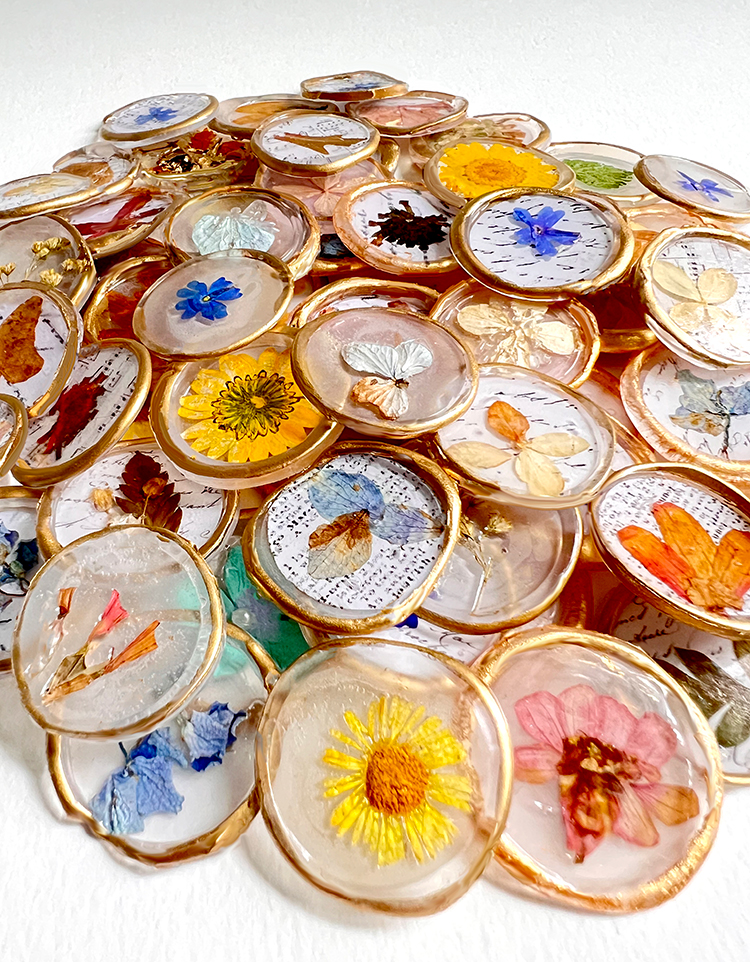
DIY Pressed Flower Seals
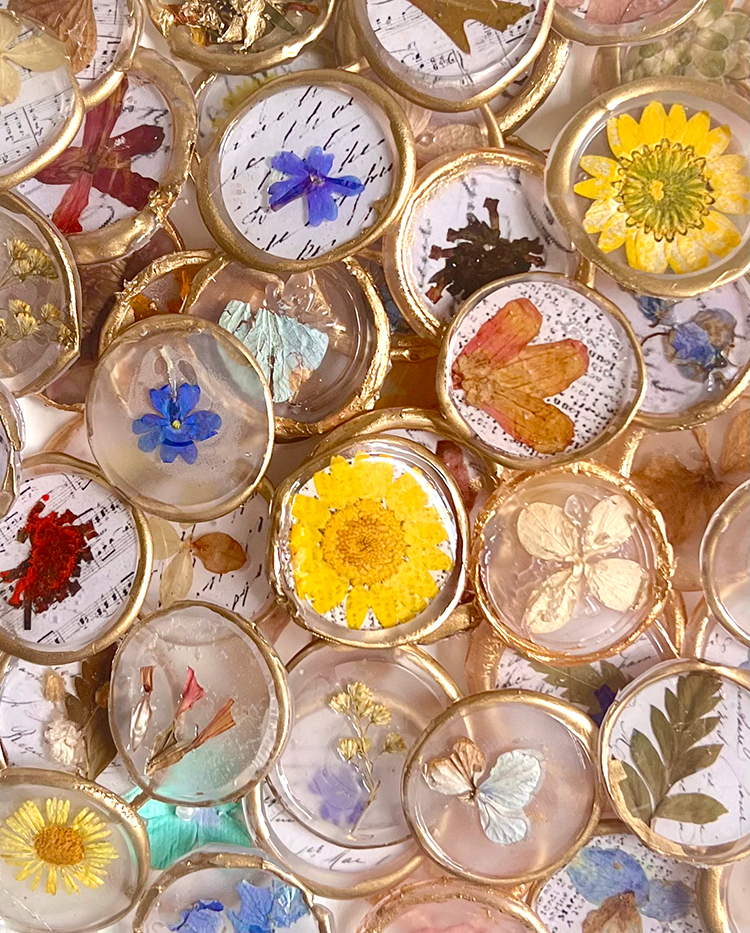
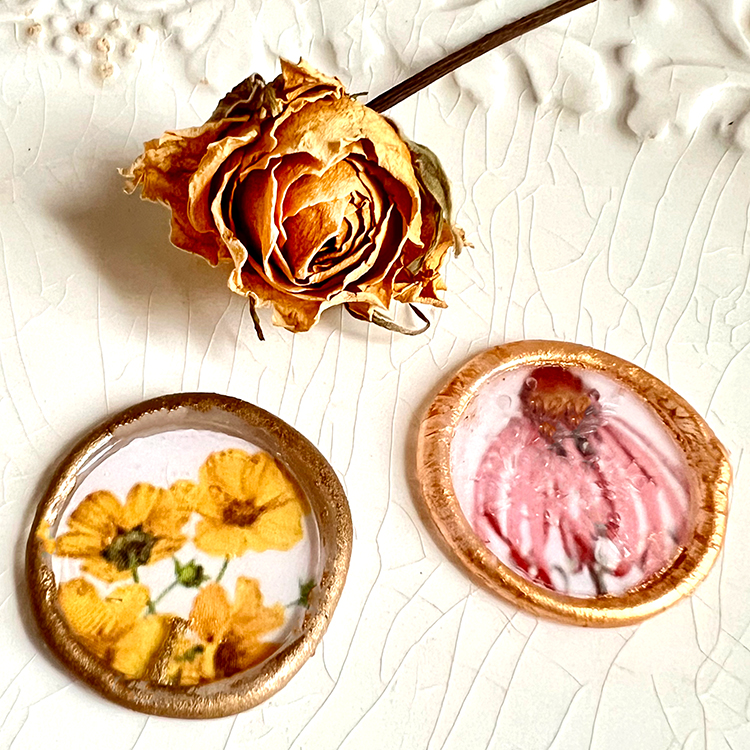
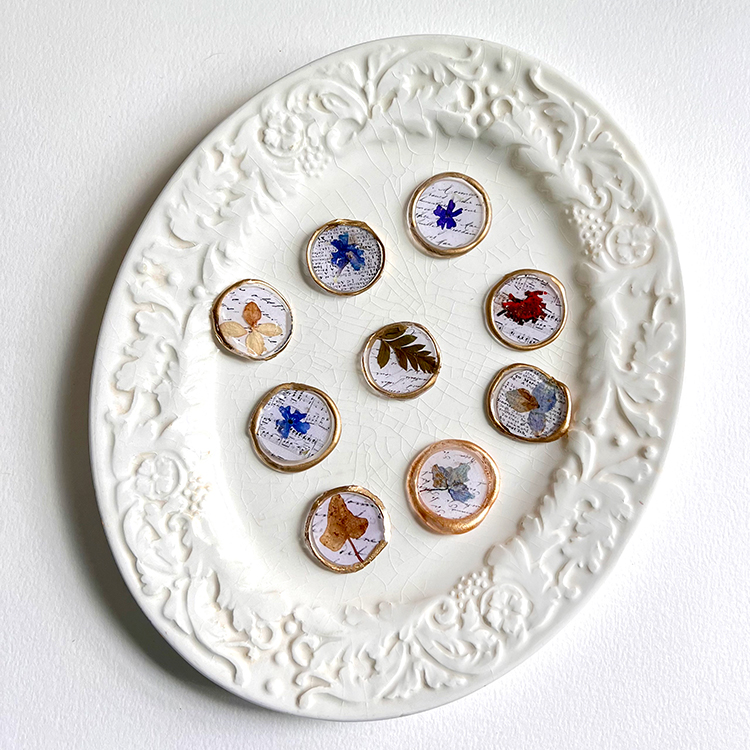
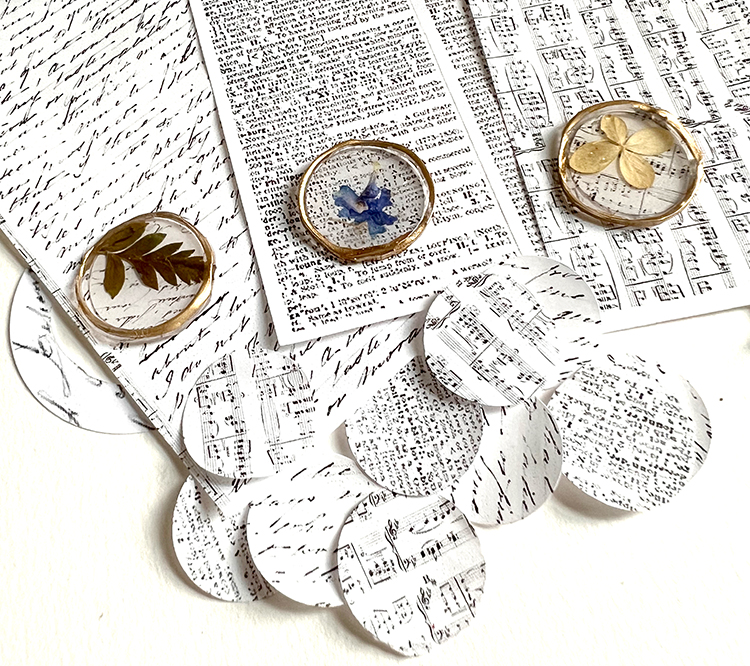
Hello all my Graphics Fairy friends. It’s Rebecca here to share how to make DIY Pressed Flower Seals with Dried Flowers. We will use pressed and dried flowers from the garden to create unique, gilded embellishments. Some of these will have background paper behind the flowers and some will be crystal clear. All will have golden edges.

This post may contain affiliate links which won't change your price but will share some commission, you can find our privacy policy here.
The technique produces stunning faux wax seals for your cards, paper crafting, books, junk journals, scrapbooking, and DIY projects. We will be focusing on technique and mastery of the process in this tutorial. I have loads of tips and tricks throughout the post that I learned by trial and error. Let’s dive in to creating these fun little disks.
Using Hot Glue
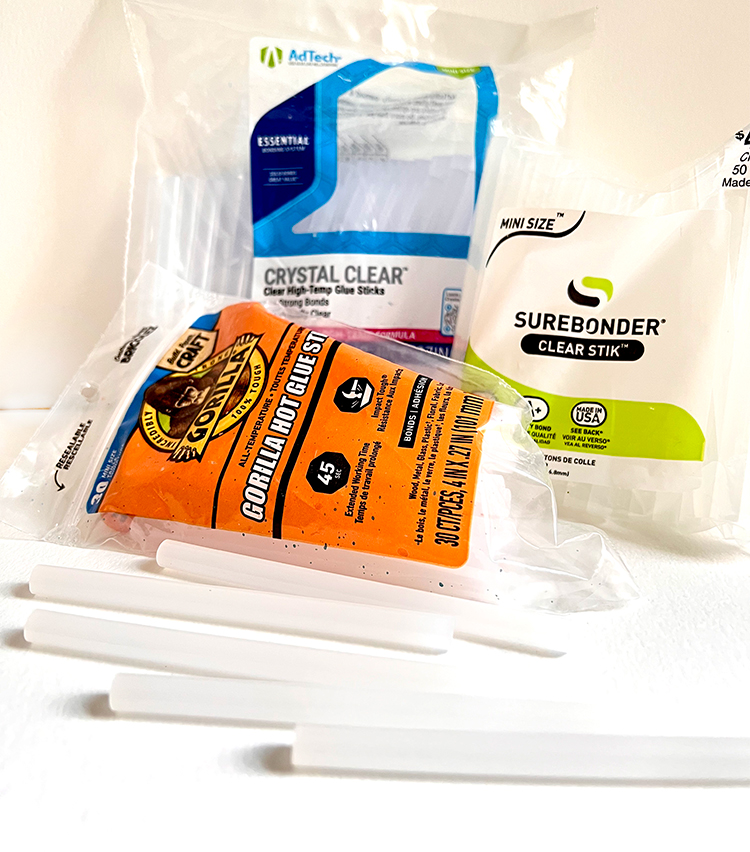
To achieve the best results, I experimented with several different hot glue sticks and the guns that melt them. I was surprised at the differences from brand to brand. So, I think a little discussion of hot glue is important for your eventual success and the product choices you make.

I have a whole Comprehensive Guide to Hot Glue HERE. But, in a nutshell …hot glue is basically a thermoplastic adhesive that is typically constructed into cylindrical sticks of different sizes and consistencies. These sticks are melted and applied to a surface using a hot glue gun. Most glue guns that are used by crafters have two temperature settings (hot or very hot) depending on the materials to which the glue is being applied. There are two basic sizes of glue sticks; mini and standard.
Which Hot Glue for Faux Wax Seals?
There are a number of quality brands available of which it really comes down to personal preference instead of an objective analysis that one is better than another. AdTech Crystal Clear Glue Sticks are my choice for see-thru wax seals. Gorilla Glue and Surebonder are a close second and did a great job.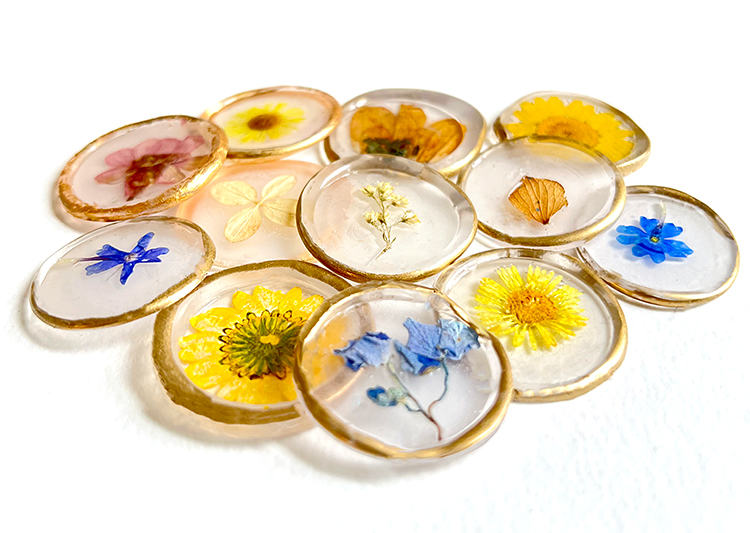
Glue Gun for Faux Wax Seals
Many crafters express that the quality of their hot glue gun is paramount to the brand of glue stick chosen. I found out the hard way that to achieve the results I wanted, I needed a standard full-size glue gun and full-size glue sticks. Why? How much glue comes out with each squeeze of the trigger is of utmost importance in making faux wax seals. I love my mini glue gun for most of my craft needs, but I had to squeeze the trigger up to 6 or 7 times for each seal. That causes real finger fatigue if you are making a bunch of these! So, I went back to the craft store for a full-size glue gun as my old one was smoking. The AdTech Pro 75 Full Size Hot Glue Gun was a godsend for me. With one to two movements, I had the perfect amount of glue to make my wax seal.
Which Temperature for Glue Gun?
Okay this might be confusing and it is probably a matter of opinion, but here are my thoughts after making over 100 of these seals. I prefer the standard size glue gun on lo-temp with the dual temp glue sticks. I explain the reasoning of less squeezing above. Plus, hi-temp glue takes longer to dry and is very, very hot. I really like the look and the ease of the seals made by my mini glue gun on hi-temp with the dual temp glue sticks. But I have to squeeze the trigger too many times.
How Much Glue for a Seal?
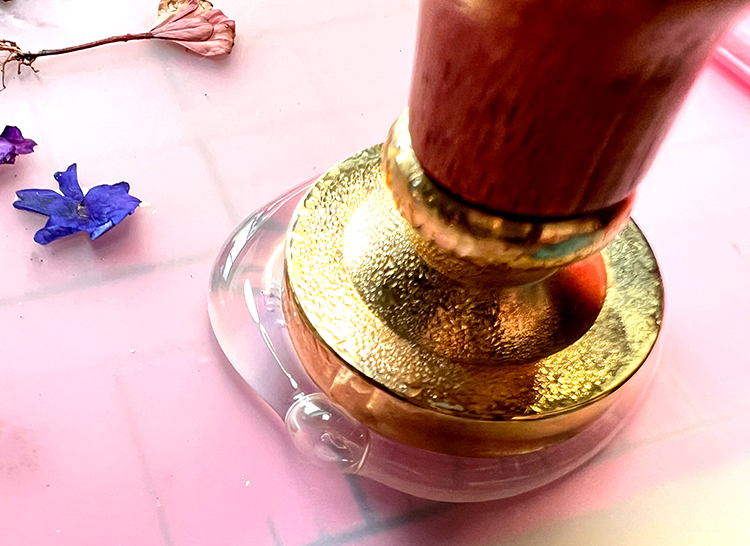
Again, this is a preference thing. The aim is a thin, level rim the entire way around the seal as seen below.
 If you squirt too much glue, you will have big, odd-shaped seals or the rim edges will be too high or undulating.

If you squirt too little, you will not have a rim around the entire seal, or it will be thick on one side and thin on the other.
I found that the correct amount for my seals is one long squirt from my standard glue gun or 4-7 squirts from my mini glue gun. Of course, your gun may release more or less glue than mine, so you will need to find the sweet spot for your particular gun.
CAUTIONS: Please be careful when doing this project. The melted glue and the tip of the glue gun will burn if touched 250-500 degrees). Children should only use low temperature sticks with supervision for obvious safety reasons, but these are still very hot and will burn.
Do All Glue Sticks Dry Clear?
All glue sticks do not dry clear and transparent. This is one of the big lessons I found in this technique. I first used my stash supply of glue sticks. Some produced cloudy, semi-translucent seals. Others produce seals with a yellow cast. I actually made three different trips to the store to find the one that dried clear as glass, which is the look I wanted. I ended up ordering them online.
Glue sticks known as being ‘Crystal Clear’ are purposefully made to dry clear and remain invisible when dry. These are the glue sticks you want for your wax seals with pressed flowers. Otherwise, you cannot see the flowers.
Dried and Pressed Flowers
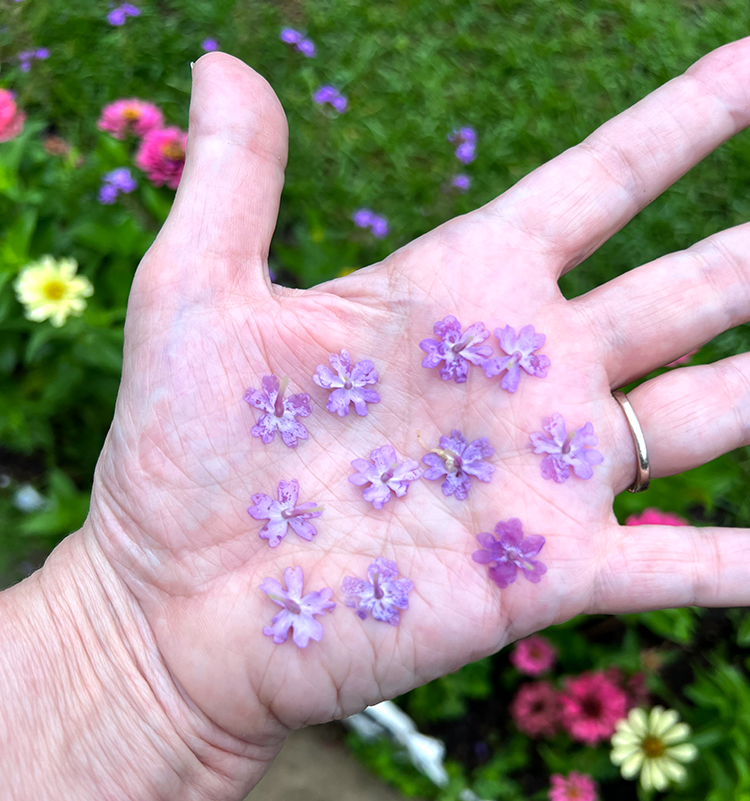
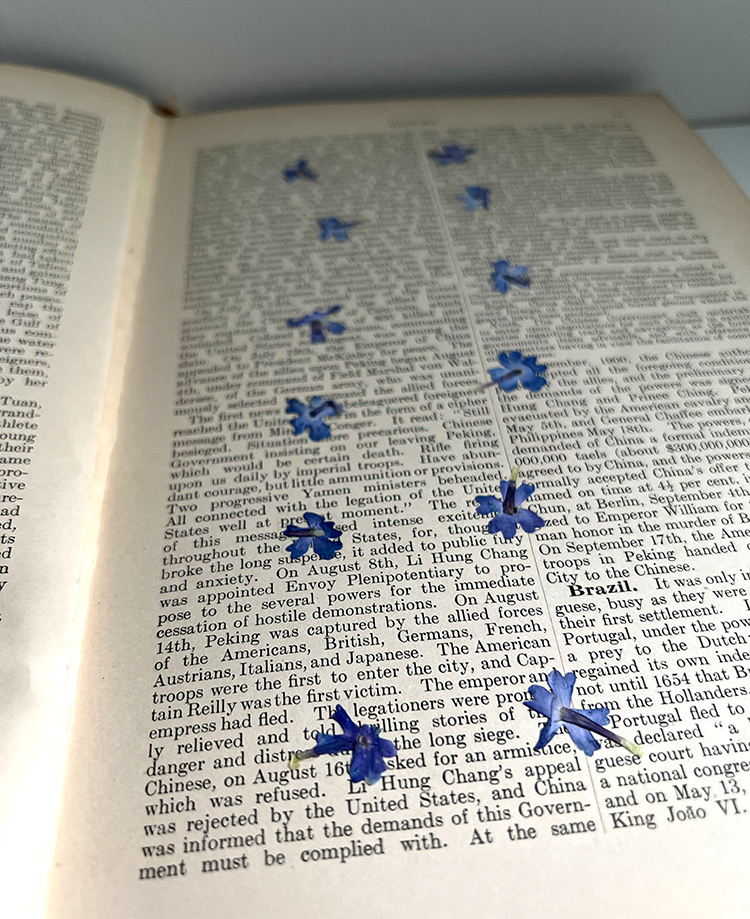
I used the flowers from my garden for these seals. I have dried and pressed blooms for years. I found that phlox and hydrangeas and smaller zinnias are great for this project. But it takes a few weeks to dry and press them. These are the beautiful phlox flowers from my hand after they were pressed. They turned a lovely shade of blue.
I did purchase some tiny yellow flowers at my craft store, but they didn’t have many choices. You can buy several different flowers online if you don’t have a garden. I love tiny leaves also and the tips of ferns work beautifully.
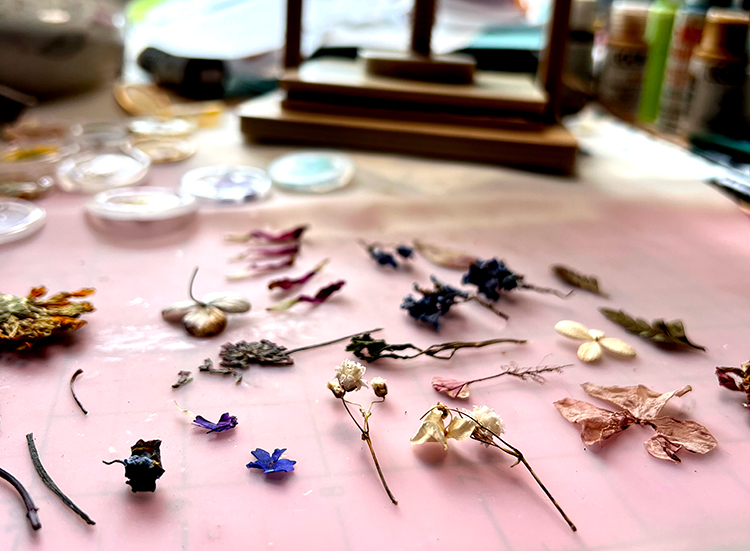
Another option is to use some of the beautiful flowers here at TGF. I just reduced them to fit in the 1″ round. See them below.
DIY Pressed Flower Seals Tutorial
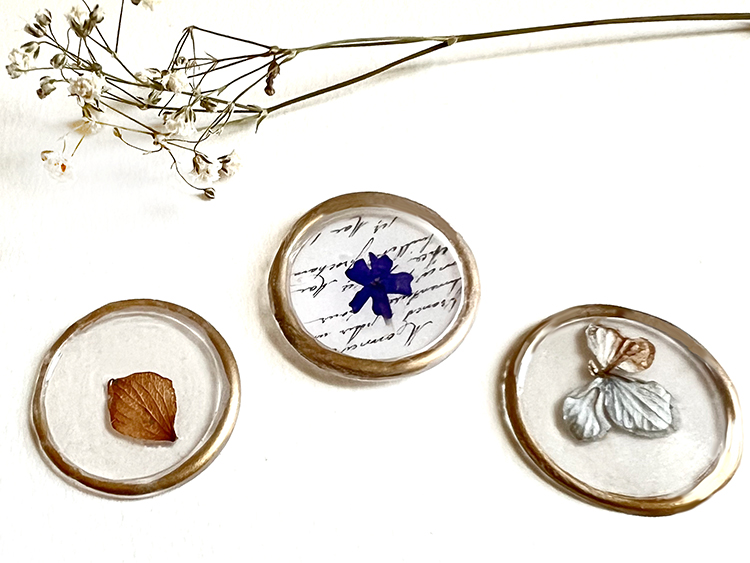
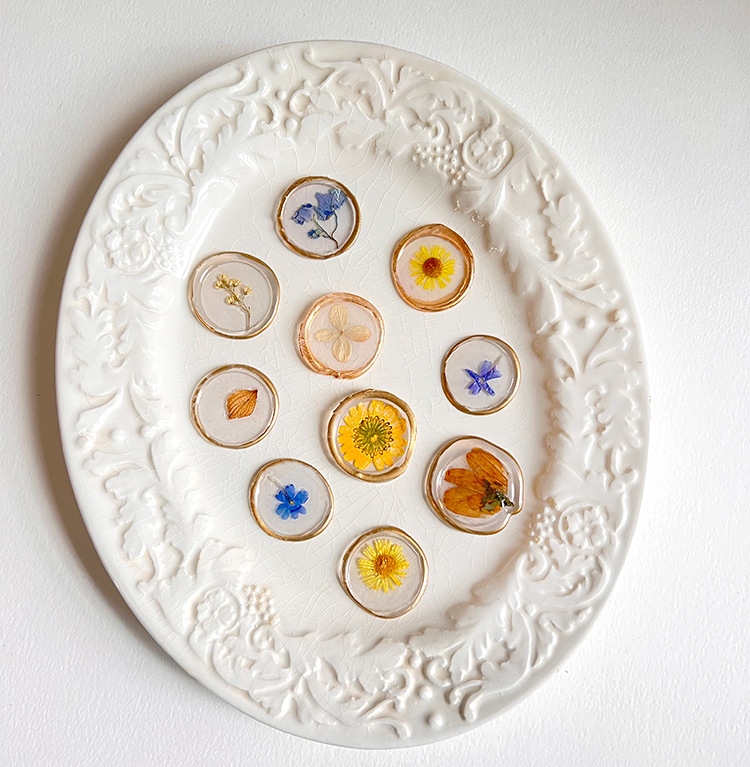
I will be sharing the step-by-step process for two unique wax seals. The first will be the pressed or dried flowers inside a clear seal. WOW! The second will have the addition of background papers with handwriting, dictionary pages, or sheet music from our Graphics Fairy archives. I think you will love them both, but the technique is a little different for each.
Materials Needed
- Glue Gun
- Crystal Clear Glue Sticks
- Tiny Pressed or Dried Flowers (under 1″)
- Background papers (see free Printable below)
- Silicone mat
- Kylon Leafing Pen, Gold
- 1″ Circle Punch
- Large Ice Pack
- Tweezers
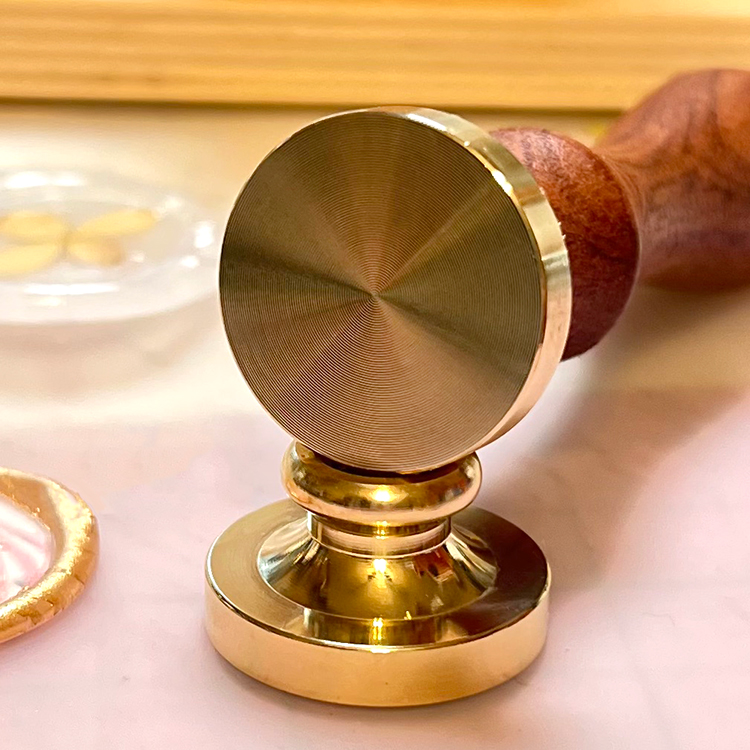
- 3 Round Blank Wax Seal Stamp 25 mm (almost 1″)
Clear Hot Glue Wax Seals with Dried Flowers
You must move fairly quickly to get everything together in the right time and order. It is fairly simple, once you get the hang of it and know how long your glue stays workable. I like the hi-temp glue because it stays wet a bit longer than the low-temp. It is best to have at least 3 blank seal stamps, so you can keep the process moving. You can use stamps with a design, but it will distract from the flowers.
- Protect your worktable with a silicone mat. I did not have success making the seals on wax or parchment paper. I found the silicone mat to be essential. Mine is translucent and I place it on top of a cutting mat. I could see through it to place my seals inside a 1″ square. It helped me place the stamp in the middle and help to gauge the amount of hot glue. You can see how this works below.
- Set up your workstation. Place your ice bag to the side of your mat. Lay the blank seal stamps flat on the ice to cool them. Plug on your glue gun and load a glue stick. Have extra glue sticks available close by. Have a plate or something with the flowers laid out to easily pick up with tweezers. It is best to have everything ready once you begin.
- OPTION 1: Once glue gun is heated, squeeze a 1″ dollop of glue on the mat. Let it rest for a few seconds to smooth out. This is one of the most critical parts of the process.
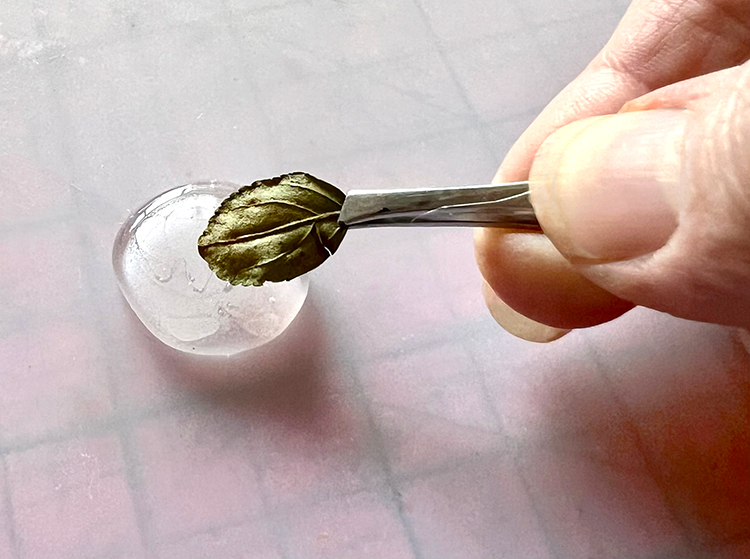 Grab a flower with the tweezers. Place it in the middle of the glue dollop. You need to have a steady hand for this as it cannot be moved once it is dropped on the glue. Even if it is a little askew, it will be beautiful. You can burn yourself trying to move the flower.
OPTION 2: Place dried or pressed flower on mat. Squeeze a 1″ dollop of glue on the flower. It might wiggle around. Let it rest for a few seconds to smooth out.
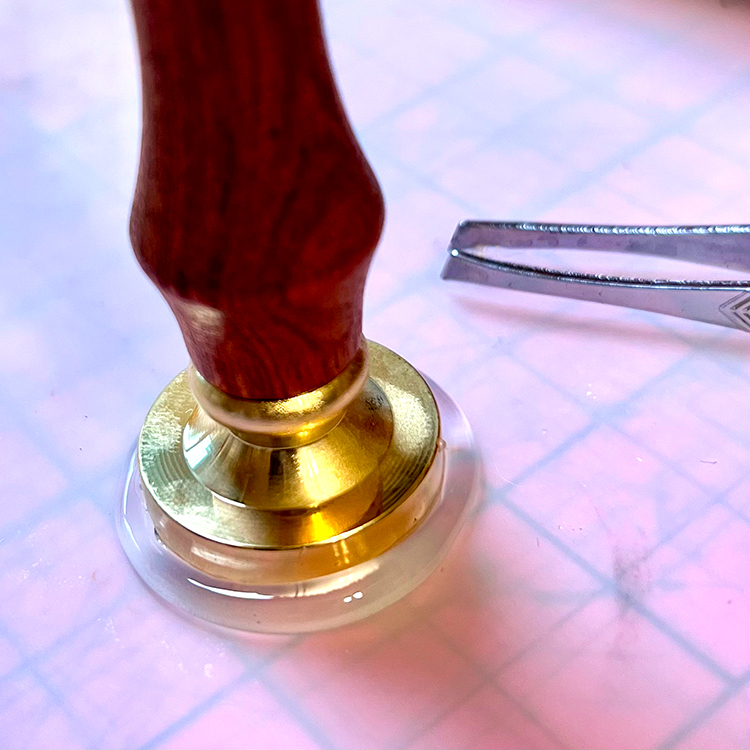
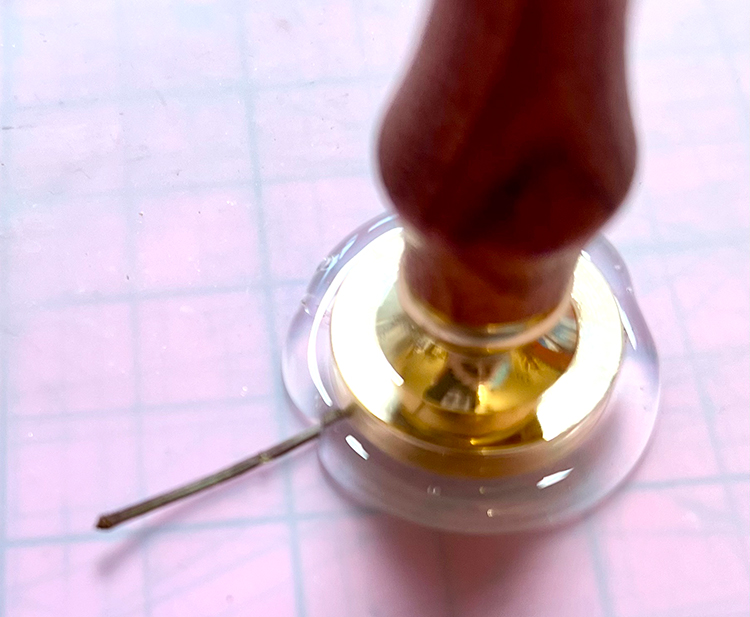
- Pick up a cold seal stamp and place it over the middle of the glue dollop. Once it is centered, gently press it into the glue. If you press too hard, the glue will spread out wildly. you will get the idea of how hard to press the stamp after a few tries. Bubbles can form at this point. Let them go. This step pretty much happens as it happens. You don’t have much control here. Relax and let it do its thing. Leave the stamp on the glue for 2-3 minutes, on the mat.If you try to pull the seal off the mat too quickly, it will make a string of glue on the side as seen below.
 You can get a bubble in the glue side. You can leave it or pop it. I have heard that using a heat gun can make them meld into the seal. My heat gun crashed, so I didn’t get to try it.
 A stem can stick out of the wax and be trimmed later.
- Slowly peel the seal away from the mat. Stop if it is still wet.
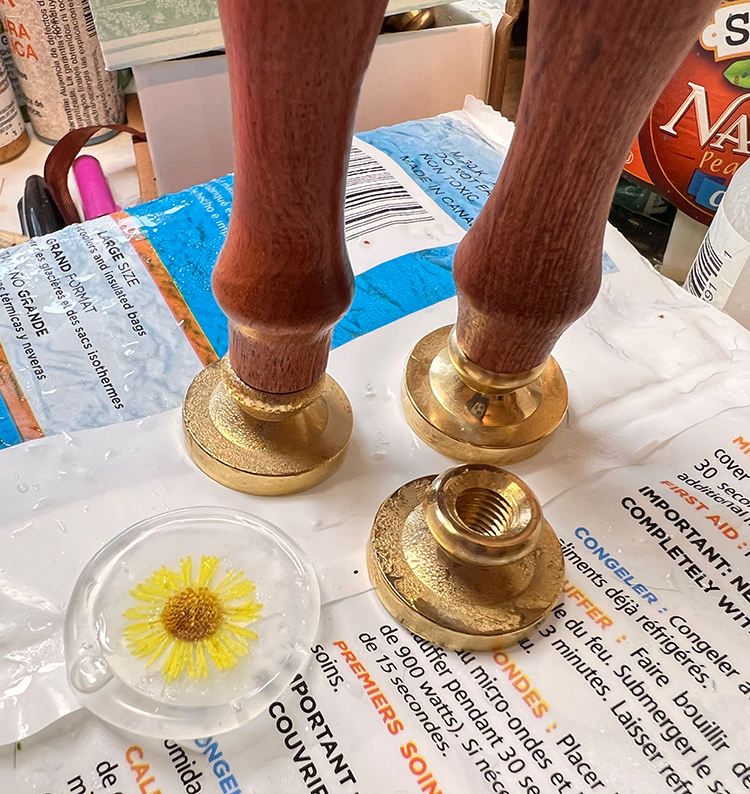
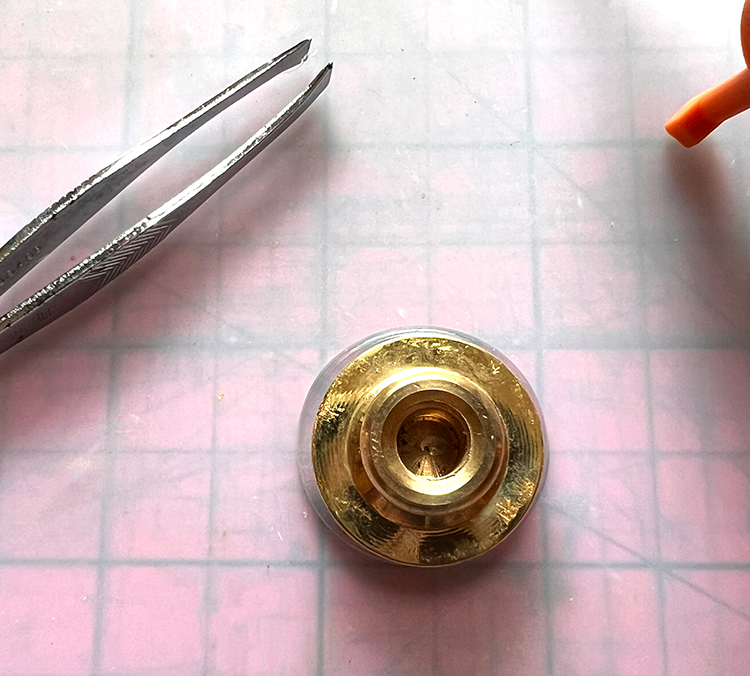
- Move the seal and stamp onto the ice to cool. Let it cool for 2-3 minutes. Remove the seal from the stamp. Place stamp on ice.
- Allow faux wax seal to dry for 20-30 minutes before painting.
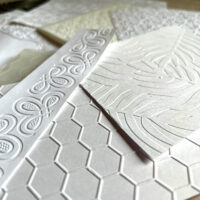
Using Background Papers
Cut several background paper circles in advance. If you printed them on an ink jet printer, please seal them before using or they will run. I have created a Wax Seal Printable for you to download and use of the handwriting, dictionary page, and sheet music seen below. It is at a size perfect for background of the was seals. Just print and punch!
- Protect your worktable with a silicone mat.
- Set up your workstation.
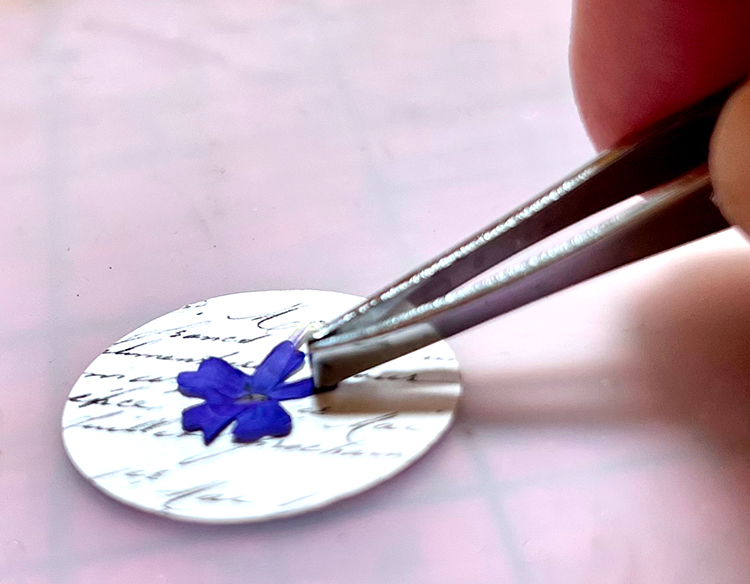
- Place a background paper circle on the mat.
- Grab a flower with the tweezers. Play it in the middle of the paper circle. You can move it around for a few seconds to get the right placement. Even if it is a little askew, it will be beautiful.
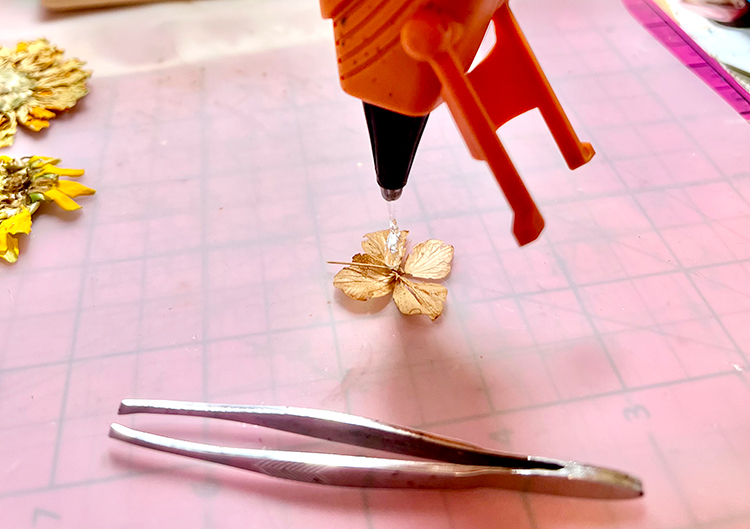
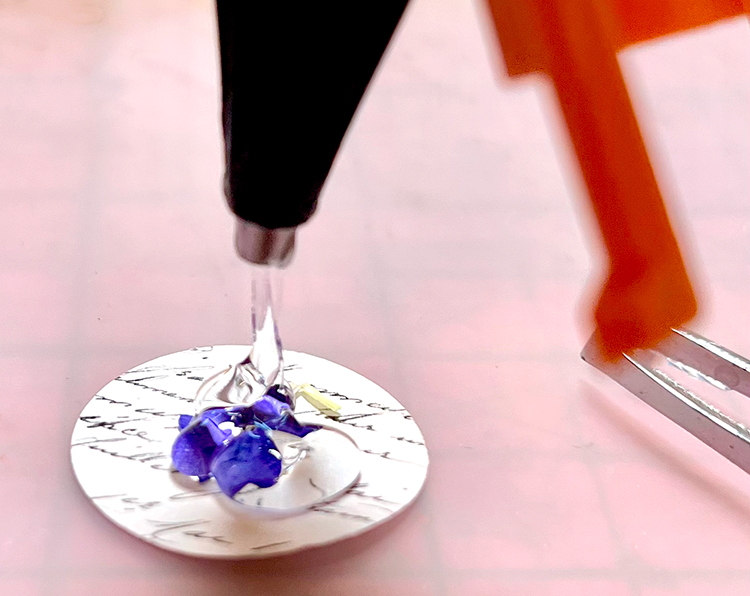
- Squeeze a 1″ dollop of glue on the circle and flower. I usually start in the middle and go around in circles until the glue stops flowing. This is why I prefer a large glue gun to the mini. One squeeze of a standard glue gun usually releases the correct amount of glue for these seals. If you have a mini, it can take up to 10 squeezes to get the right amount. Let it rest for a few seconds to smooth out.
- Pick up a cold seal stamp and place it over the middle of the glue dollop, centered over the background circle as close as you can. Once it is centered, gently press it into the glue. The glue will spread out. If you move the stamp too much, the edges will be very uneven. You don’t have much control here. Leave the stamp on the glue for 2-3 minutes, on the mat.
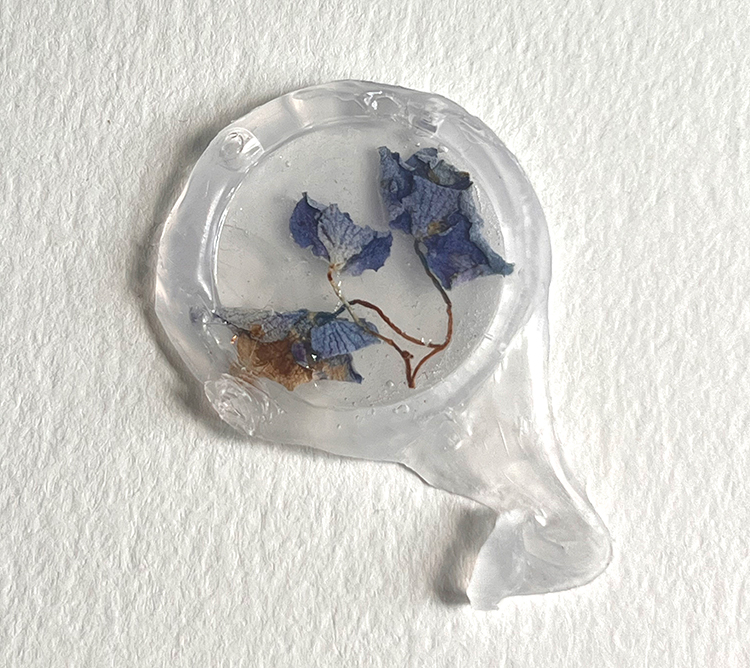
- Slowly peel the seal away from the mat. Stop if it is still wet. If the glue is still wet, it will stretch and make a mess as you see below.
Move the seal and stamp onto the ice to cool. Let it cool for 2-3 minutes. Remove the seal from the stamp. Place stamp on ice. - Allow faux wax seal to dry for 20-30 minutes before painting.
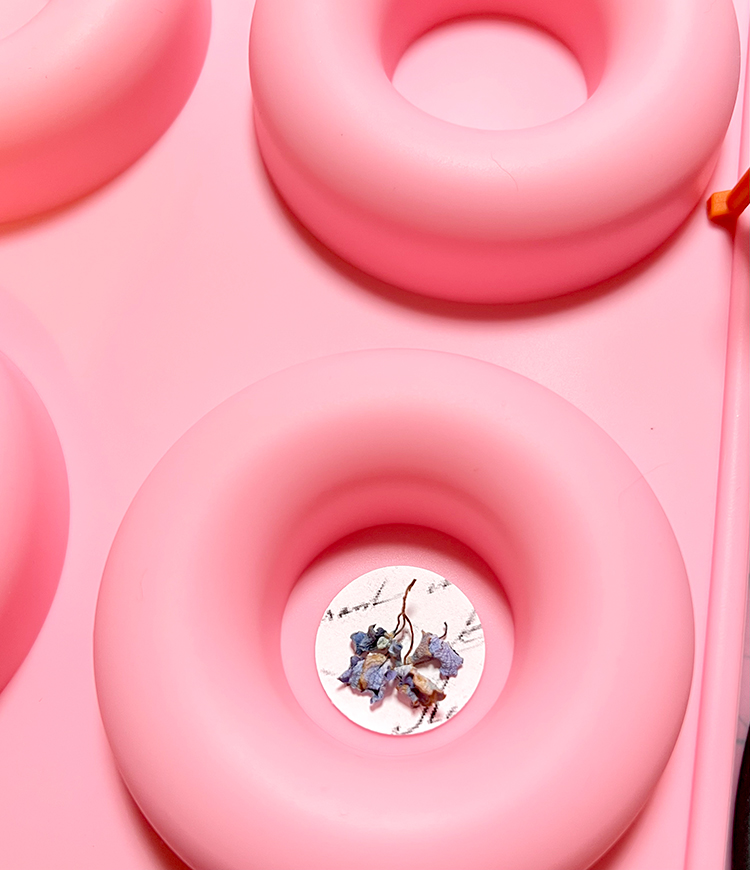
OPTION: You can also use a silicone mold to form your seal. I used the bottom of a donut mold. The circle is about 1-1/2″ in diameter. There are candy molds that work also. Just center your background paper and flowers in the mold and add the glue. Let rest for a few minutes and remove. It is perfectly round.
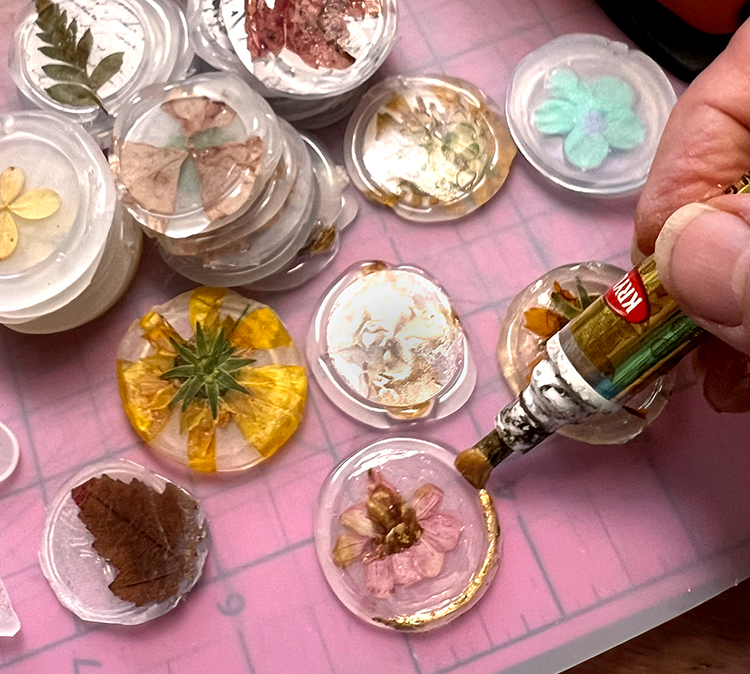
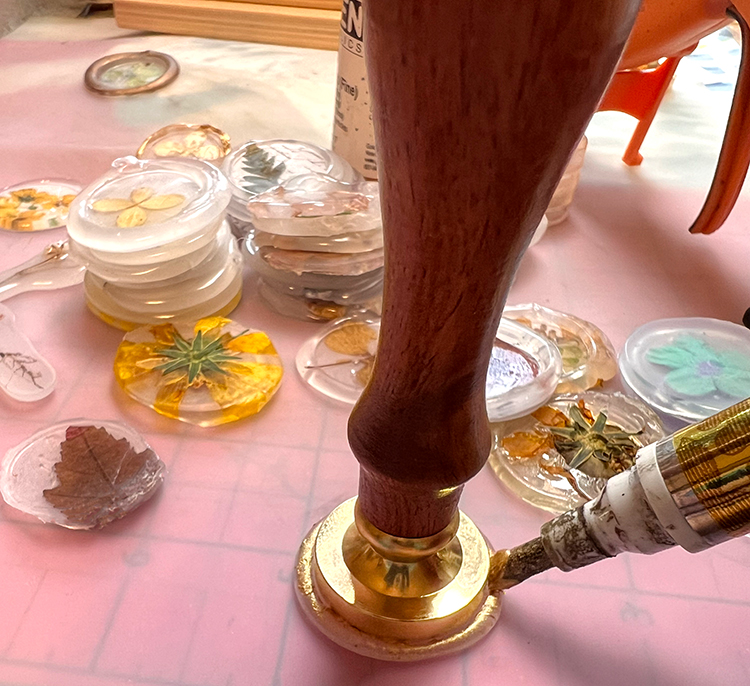
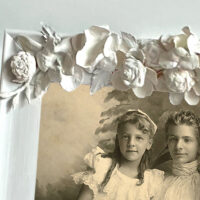
Gilding the Edges of the Wax Seals
This is an optional step, but it adds a bit of glamor to the seals. I like the ease and the shine of the Krylon Gold pen, but you can use other metallic pens and markers. You can also paint the sides of the stamp with metallic acrylic paints as well.
- Shake your pen according to manufacturer’s directions.
- Carefully draw around the edge of the seal holding the pen tip just on the rim. Make sure you get the sides as well. It can be messy and feel awkward at first rolling the seal without getting paint on the center.
- OPTION: You can place the stamp on the seal and paint around it to keep it neat.
- If paint gets on the image, dip a cotton swab into some alcohol and gently rub over the spot.
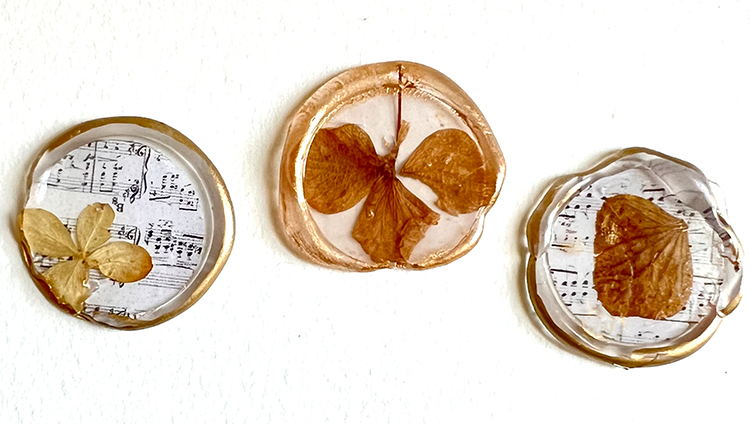
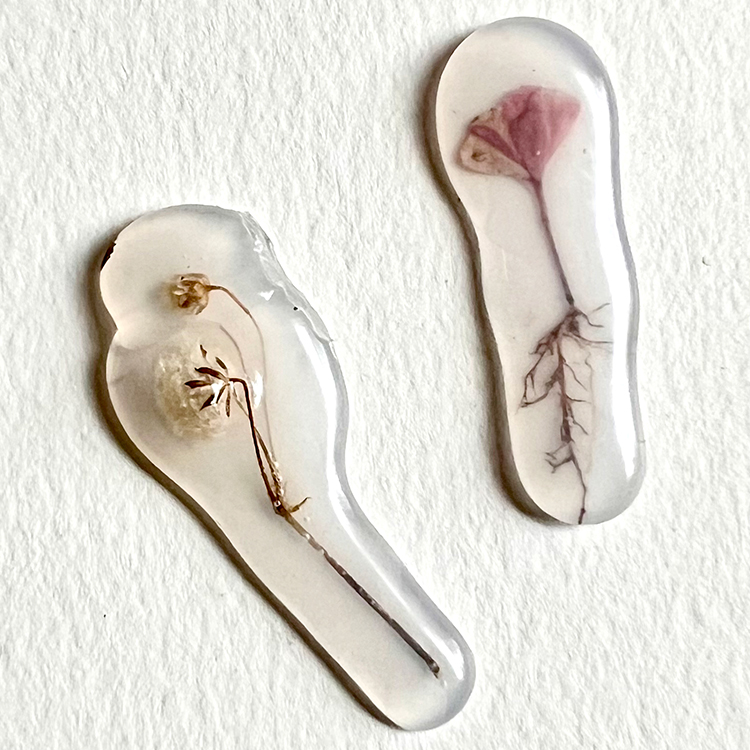
Other Shapes
Below are some alternate shapes that happened naturally. I left them unpainted as I like them just like they are.

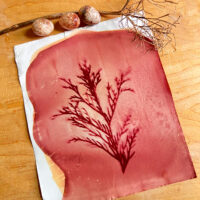
You can just drop crystal clear glue over a flower and allow the shape to form organically. Below is a dried hydrangea flower.

Below are encased flowers that have a long profile. I can think of many things to use them for in my artwork.
Hope you enjoyed learning how to create these pretty DIY Pressed Flower Seals. I can’t wait to hear your thoughts on your creations! You might like another Faux Wax Seal Tutorial HERE and one with Rubber Stamps HERE. When I am not creating for TGF, I also create Photoshop Elements tutorials and craft project videos over on The Graphics Fairy Premium Membership site. You can find even more of my books, art, and whimsical shenanigans on my website – The Bookery.
May joy be with you all,
Rebecca


Leave a Reply