
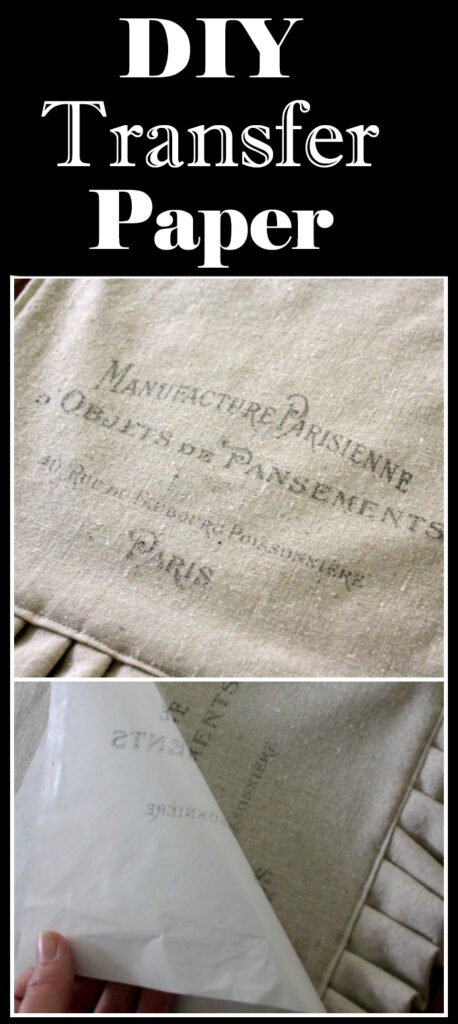
DIY Transfer Paper
Hi, I’m Gina! I’m a blogger and crafter and you may know me from my blog, The Shabby Creek Cottage. This week, I’m sharing a pretty simple project for making our own DIY Transfer paper for an InkJet Printer. You are going to love this simple easy technique that uses Freezer Paper! {I love this awesome technique!} I started with this table runner (you can learn how to make it over at my blog, you can find the link at the bottom of this post for that.) You could make one too … or a store bought one is also fine. Ikea can be a great resource for simple linens that are inexpensive, so keep that in mind.

Of course you don’t have to make a runner, this technique will work with any fabric project. Just keep in mind that the ink won’t be washable so make sure you use it on decorative projects only and not on wearables. Throw pillows, fabric ornaments or soft Junk Journal covers would all be great uses for this technique too.
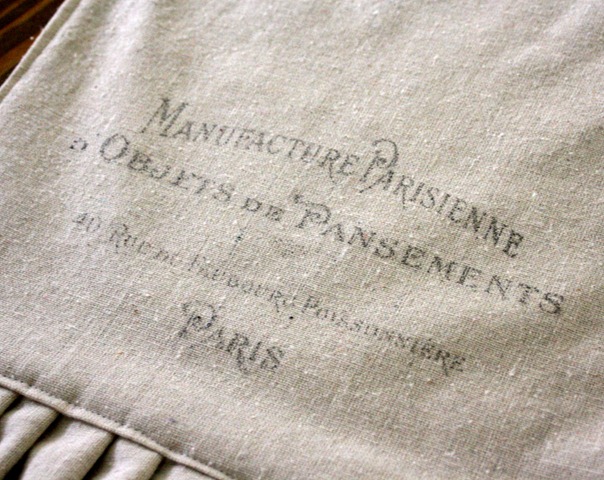
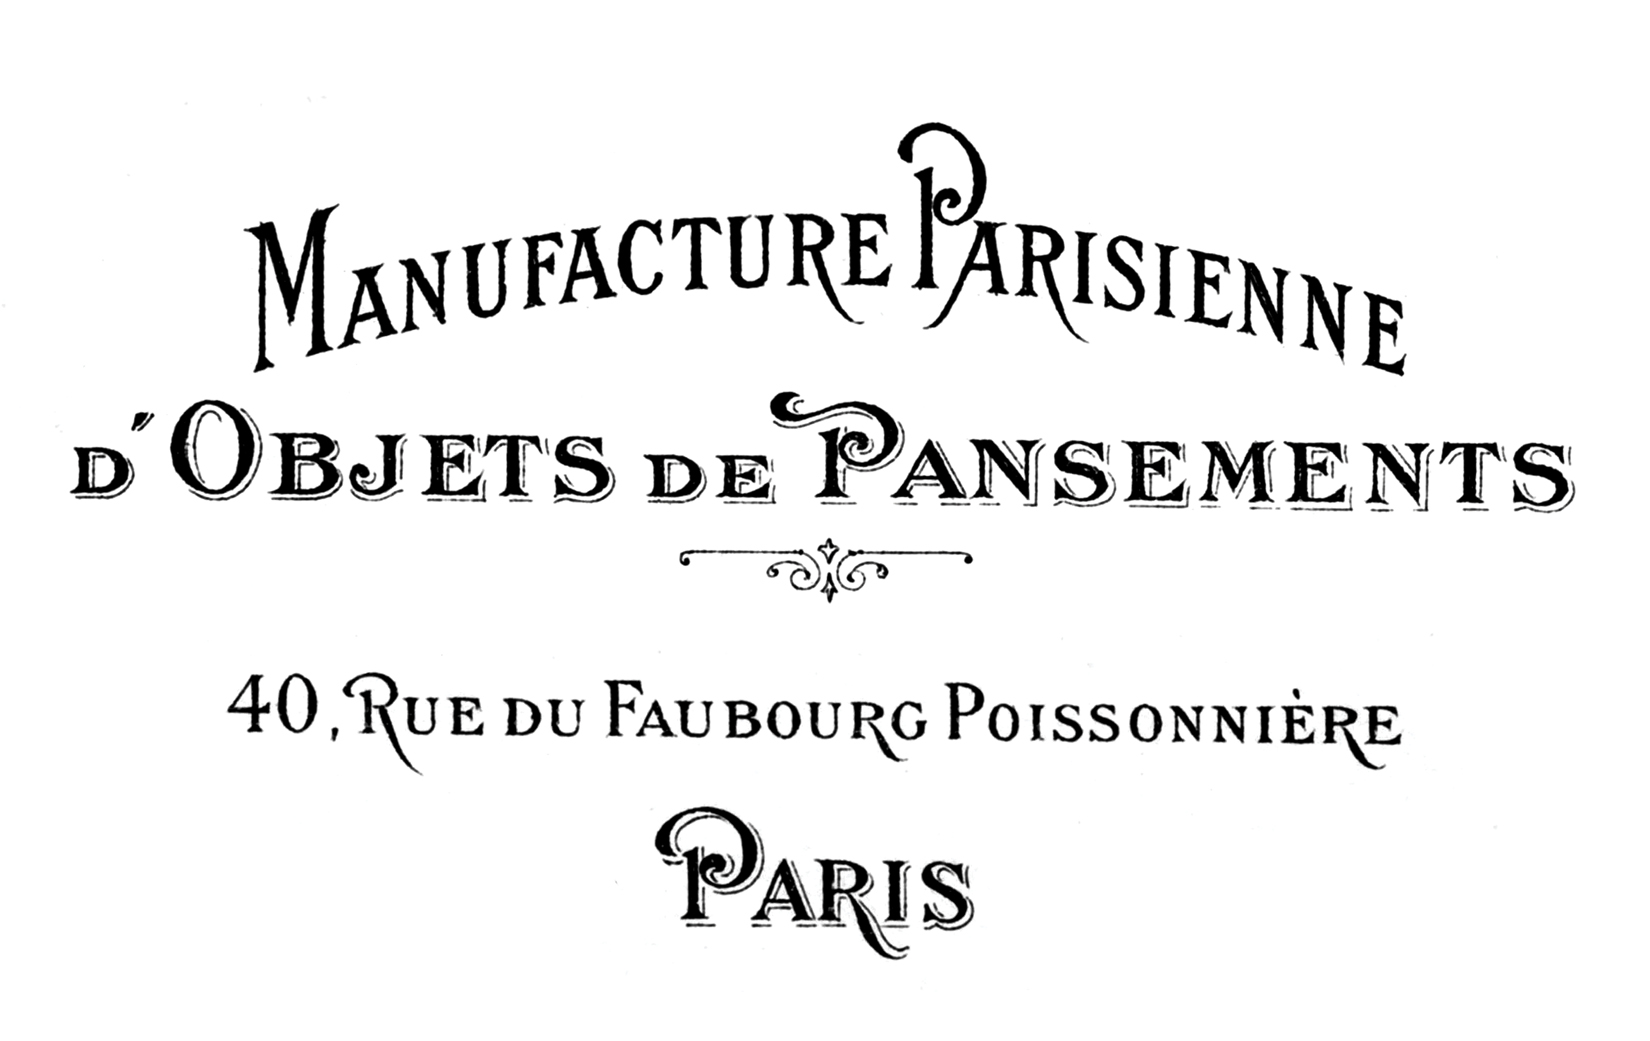
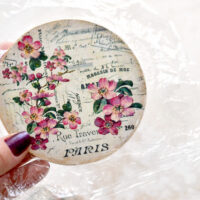
I used a French Transfer, which you can find at the bottom of this post) for this project but you can use any graphics or artwork that you like.
DIY Transfer Paper Step by Step Tutorial
Supplies:
Table Runner or other Fabric Project
Image of choice (find the transfer that I used in this project, at the bottom of the post)
Inkjet Printer
Scissors
Cardstock
Please Note: I have not tried this with Laser Printers so I do not know if it would work or not, I would be concerned that it might damage that type of printer
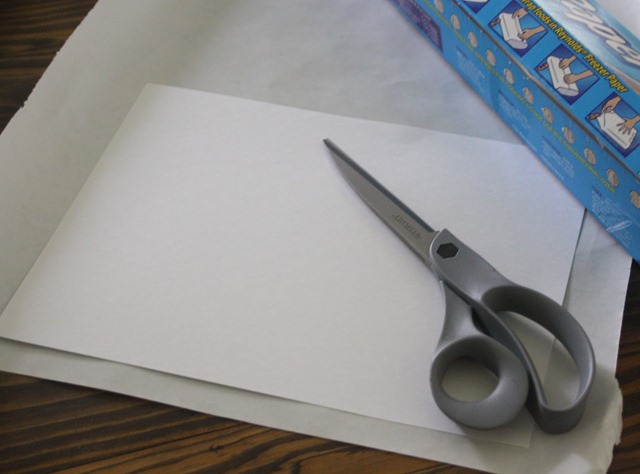
Step 1: First you need to cut your freezer paper to the size of a sheet of paper. I had cardstock on hand, so I used it as a template and cut with scissors. You could also use a mat and cut it 8 1/2 x 11. Either way works great.
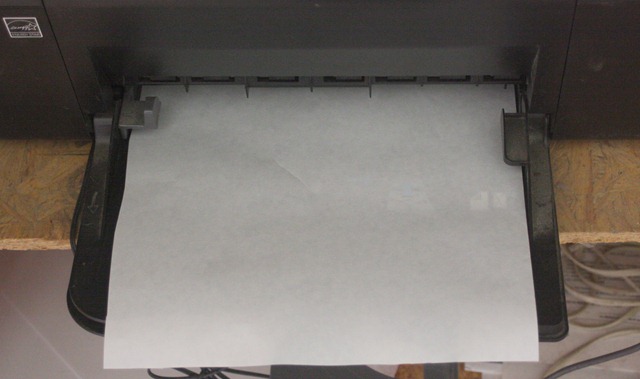
Step 2: Now put the cut piece of freezer paper in your home printer – you’ll want it so that the plastic side will receive the ink. {Please excuse my messy cabinet!} Make sure you stay close to your printer so that you can guide it through.

Step 3: If you are using an image with text or Typography on it then print your image in reverse, and be careful not to touch the ink. It will stay wet until the next step and you don’t want it to smudge.
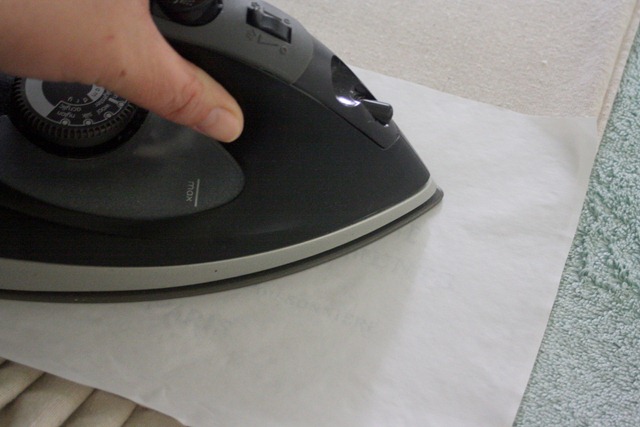
Step 4: Carefully lay the printout down on the fabric where you want the graphic and iron it down with your household iron. Make sure your iron is set on NO steam. I ironed about 60 seconds, just to make sure that everything was in place.
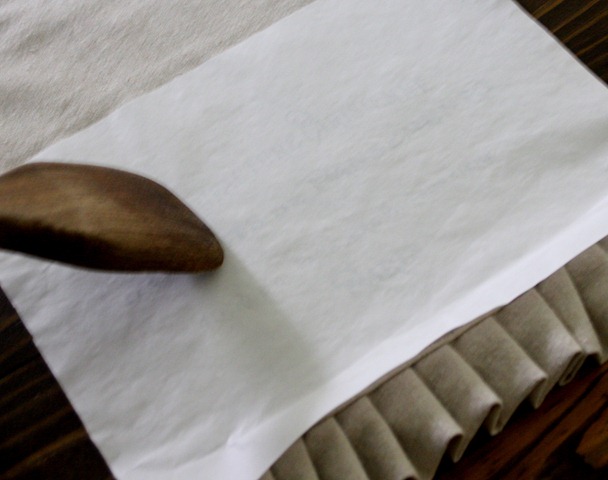
Step 5: After you’ve ironed it down, put the runner on a hard surface (like a table) and use something to burnish down the paper even more. (I used a wooden spoon for this) I did it with and without this step – it really does make a big difference! Just rub, rub, rub and make sure that you’ve went over all of the graphic.
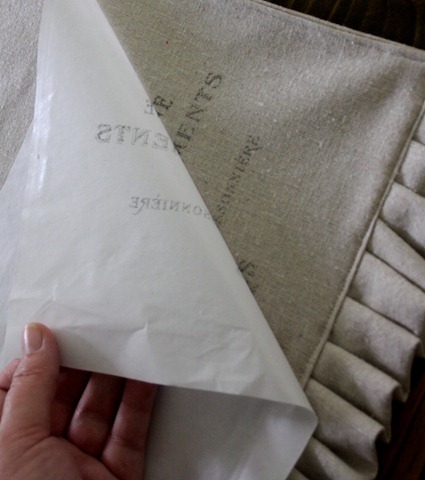
Step 6: Then peel off the paper – and you are done! It’s like magic! The ironing makes the paper grab to the fabric, so it will be a bit like peeling off tape.


Trayne1837 says
Oh, this is fantastic. I do lots of things for the theatre… and I can use this method for transferring a pattern and then using the dimensional paints… so great
Heaven's Walk says
LOVE this project, girls! Thanks for the great tutorial and fabulous graphics!!!! 🙂
xoxo laurie
Becky Green says
WOW! You ladies are GREAT! Asking ALLL the RIGHT QUESTIONS! I don’t have any now!!!!!!!!!! LOL 🙂 Thank you for the printable & reverse! 🙂 (P.S. If you’d add the URL thingy to your Graphics Fairy blog, I’d leave you comments there too! 🙂 ) LOVE your blog!!!!!!! 🙂
Anonymous says
Is wax paper the same as freezer paper? We have different products in canada, just like i can’t find CitriSolve for doing transfers and was wondering if other orange solvents will also work.
Karen- The Graphics Fairy says
If you look in my right sidebar, in my “popular posts” section, you will see an orange button with “12 easy image transfer methods” on it. Click on the button and when you get to the post, you will see a method for wax paper. Also, some one from Canada told me that she had success with an orange solvent product that she found there, I don’t know what brand it was though. Have fun transferring!
Judie S says
A picture is worth a thousand words:
http://www.reynoldskitchens.com/product.asp?prod_id=1798
This is the freezer paper I found in the grocery store. I believe the difference between freezer paper is that freezer paper is coated on only one side with wax and wax paper is coated on both sides. Also, looks like freezer paper is made with heavier paper.
Anonymous says
link to 12 easy image transfers (I didn’t find Karen’s link on her right sidebar) http://www.graphicsfairy-diy.com/2012/01/12-easy-image-transfer-methods-for-diy.html
Anonymous says
How do you print it in reverse? Is there a printer setting?
Karen- The Graphics Fairy says
Actually, I’ve already made a reverse version of the image, it’s the last one on this post, just above Gina’s name. I hope that helps!
Auntie Bliss says
LOVE this!!!! Oh yay oh yay oh yaaaaayyy!
William says
Great to have another fabulous crafter showing off all the wonderful images that Karen shares with everyone. Said it before-this is the BEST site out there for artists/crafters. Amazing that we have this resource.
Karen- The Graphics Fairy says
Hi everyone. Gina used an inkjet printer that uses waterproof ink. I use a similar type of printer. If your printer does not use waterproof ink, then I would make sure to only use this technique on projects that you won’t be washing. This method works great on wood too!
Glamour Bomb says
Hello, cool tutorial. I’m just unclear if this is a laser or inkjet printer. Thanks!
M. Santos says
Hola , muchas gracias por el tuto y por la explicacion
Besos
Sherrie says
Hi girls! Love your collaboration! Genius!
Gina did you use an inkjet or laser jet printer?
Can’t wait to see what you come up with next :0)
Gina Luker says
Hi Anon,
The type of ink your printer takes determines whether or not it is permanent. My printer is permanent, but there are a few brands out there that are not. A quick google search can tell you if yours is.
Thanks so much!
sarah says
There is a liquid you can buy that you can use to make inkjet printer ink permanent. From memory you soak the fabric in the solution for 5 minutes and then let it dry, then do the image transfer as per this tutorial, then let that dry and then you wash it to remove the solution residue and it is permanent. I actually make labels for my business using this solution.
Nancy Humble says
Do you know what it is called or where you bought the solution to make the ink permanent?
Sandy says
Bubble jet 2000 and Bubble Jet rinse
Judy Burrington says
Any Inkjet printer will work wonderfully. You just have to iron over the applied ink for a minute to set it permanently.
This doesn’t not work with laser printers, it must be an inkjet.
Sarah (Blog Guidebook) Bradford says
I wish I could find freezer paper around here…I’ve looked at Target and Walmart and cannot find it. Any sources?
Karen- The Graphics Fairy says
Sarah, Did you try your grocery store? Mine has it in the same section as Aluminum foil.
Judy Burrington says
I had a hard time finding it, too. Bashas didn’t carry it and we didn’t find it at our Walmart either. My husband end up finding it at Costco.
Gina Luker says
Hi Sarah, I found mine at Walmart, in the area where the aluminum foil is. You can also try your local grocery stores, too. I found it “hidden” on the very bottom shelf 🙂 Hope this helps!
Kimberly says
Costco has a big roll of freezer paper (we use a lot of it for quilting) for around $40 give or take. You can also get it at grocery stores in smaller rolls or walmart in smaller rolls – it will be with the foil and saran wrap. It is great for applique patterns because you can iron it over and over using the same pattern many times.
Anonymous says
Wal-mart does have it. You’ll find it in the area where the canning jars are. I found some there. THe freezer paper is not with the freezer bags, etc. Their way of stocking just blows my mind!!
Judy Burrington says
Good to know! Who would have guessed.
One Brave Soul says
Thanks! Being a logical person I don’t understand Walmart at all! Now if I can just find that area of the store!????
Viikkie says
I would bet wax paper would work
Judy Burrington says
Wax paper would work, but it is waxed on both sides so you need to set your iron hotter and put thin material between the wax paper and the iron so you don’t ruin your iron. I’ve read that freezer paper works best, but I have not tried them both to know for fact.
graphicsfairy says
Thanks Judy!
Judy Burrington says
I think wax paper would work much better for transferring onto wood. I tried the freezer paper method on wood and didn’t like it because the ink looked smeared and the ink is too light so I ended up having to paint the letters. But, at least the freezer paper method did make a wonderful stencil template for me to paint over. Which is really great because you are guaranteed to have your letters spaced evenly.
As for printing on fabric if the fabric is thin I apply Wonder Under to it, cut it out to regular paper size and put it right in the printer and print directly onto the fabric. I absolutely LOVE this method, the ink is nice and dark this way. Then iron it for a minute to set the ink permanently. That is how I do my clothing labels and quilt labels. The Wonder Under has a peel off backing so you can iron your printed fabric onto something else, like quilt, clothing, towels, etc. It is found in the fabric section of the store.
Connie Robbins says
May sound stupid.But just occurred to me.Did you iron on your wood?
graphicsfairy says
This method was used to transfer to fabric. Are you referring to another project?
CeeJay says
Wax paper has more of a waxed surface. Freezer paper has a plastic surface. When you iron freezer paper the plastic melts and adheres to the fabric but doesn’t melt INTO the fabric like wax will. Wax paper WILL work but freezer paper works best.
Nancy Humble says
I bought mine at a large Walmart.
Judy says
I think it the same as wax paper
Karen Watson says
It’s a little different, Freezer paper has a shiny side and a papery side. I don’t think I would try wax paper in a printer, the wax might come off and gum up the machine.
Jann says
I printed today on wax paper for wood transfers and it worked ok. It is not very user friendly while cutting the wax paper to size though.
graphicsfairy says
Yes Jann, that can be tricky but glad it worked for you!
Anonymous says
This is so cool! Is the ink permanent? How does it stand up in the wash? Thanks for sharing!!
Nancy Humble says
I love this method of transfer but cannot find any way to make it permanent. I’ve looked for information on permanent ink cartridges and can’t find anything. I want to make purses with this method but the ink rubs off. Help!!!!
Karen Watson says
Hi Nancy, the type of printer that you buy matters. I don’t think you can just buy permanent ink for any printer. I use an Epson, which uses water resistant ink. You can find my post about that here https://thegraphicsfairy.com/the-best-printers-for-crafting/ I hope that helps!
Judy Burrington says
Heat sets the ink. After you iron your design onto your fabric let it set for a little bit, 15 minutes or so, then go back over the ink on the fabric with the iron on cotton setting for a minute or two. That will set the ink permanently.
I know it works because I do it all the time for my labels.
graphicsfairy says
Thanks again Judy for your wonderful advice 🙂
Judy Burrington says
My pleasure. Thank you for giving me an opportunity to share my experience.
Karen says
When you iron your image the 2nd time, do you leave the freezer paper on or do you iron it after you’ve taken it off? Thanks!
Judy Burrington says
The ink will not stand up in the wash and is not permanent unless you do this: after you have applied the lettering to your fabric let it sit for about 10 minutes, then go back over the fabric with an iron on the cotton setting for about a minute, don’t let the iron sit in one spot for more than two seconds, though, to avoid burn marks. That sets the ink permanently.
Ms. Redo says
Love your table runner, Gina – and such a great clear tutorial, I think I will finally try to make a transfer onto fabric. Thanks so much for sharing, can’t wait to see what you’re making next week. Mary