
Acrylic Paint Image Transfer Technique
Acrylic Paint Dabber Transfers
This is a fun (new to me) way to transfer our TGF images to paper, canvas, cardstock, book pages, and so much more. The steps are loaded with Tips for you. The transfer medium in this tutorial is Acrylic Paint from Dabbers by Ranger, which are no longer available. You should be able to do this technique with other acrylic paints as well, some formulations may work better than others.
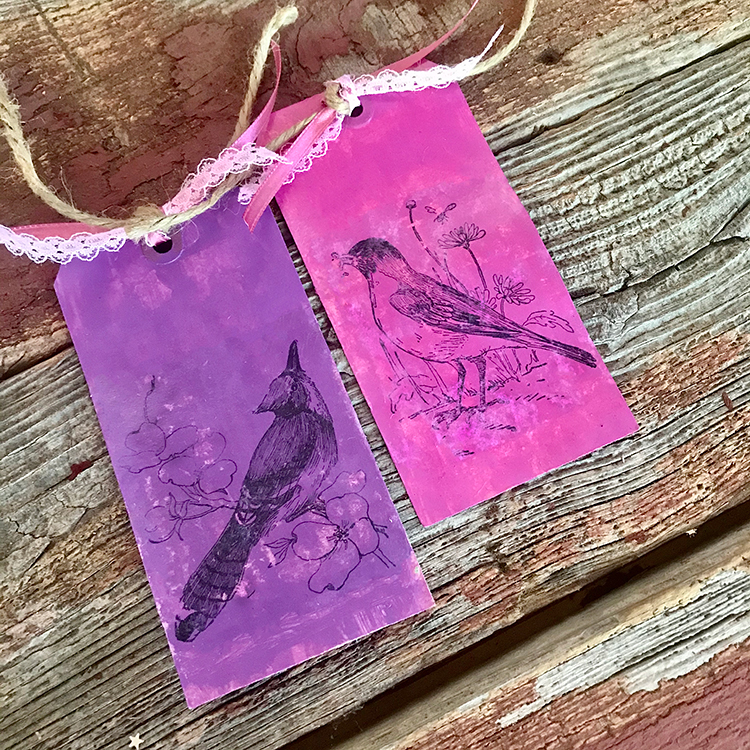
A word about trimming the image: With a transfer you have choices. You can trim closely around the elements of the image or just make a square or rectangle cut. There are two schools of thought on this. Personally, I don’t like too much paper to remove around my image. So I usually trim close to the image shape. Sometimes it is more desirable to have the rectangle or square shape of the image. NOTE: You will always be able to see the edges of the transfer with this method because of the paint color behind the image. It is just part of the process. You can see the edges in my final image below. It is really just a personal choice about the final look.
Supplies
Mod Podge Gloss
Acrylic Paint Image Transfer Technique – Step-by-Step Directions
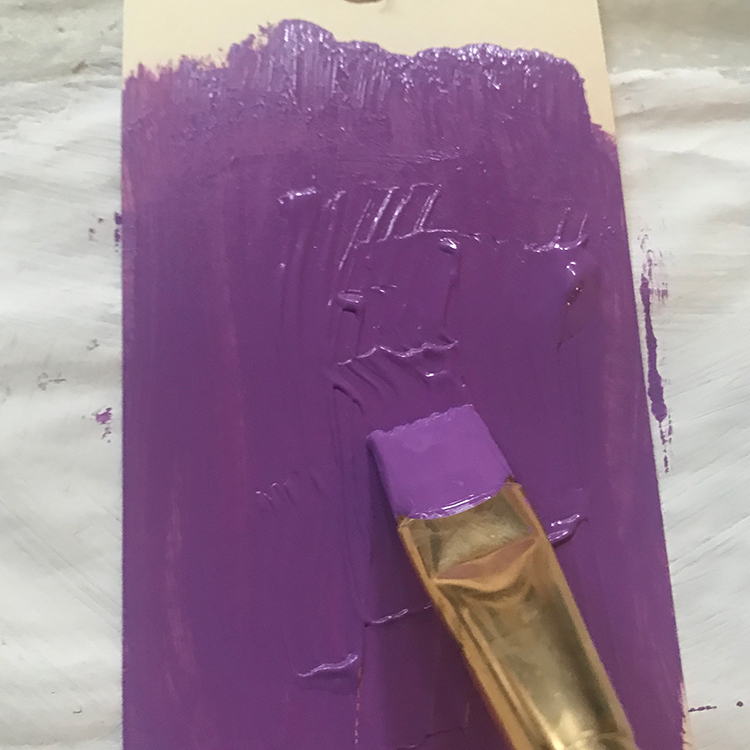
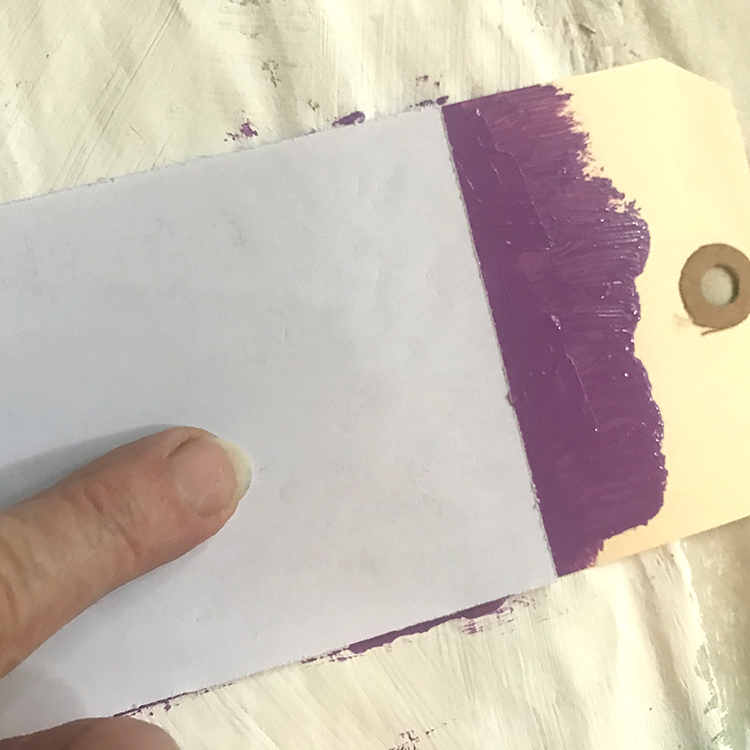
Step 1 – Apply Paint: Apply paint liberally in east to west and north to south directions to ensure you get good coverage. I utilize this application method so as not to miss a spot on the surface. Again, another experiment taught me that if you miss a spot, the transfer will not properly adhere. DUH! Apply a thick coat of paint to both your printed laser image and also to your surface, which in this case is a cardstock gift tag. Please view the image at right to see where I missed an area on a card.
Step 2 – Place Image in Paint: Move quickly and place the image side down onto the wet paint. Gently press it into the paint making sure it’s smooth and not wrinkled with your fingers. TIP: I usually burnish it down carefully with an old credit card from center to edges.
HINT: If you are applying the image to a book page or paper surface, flip the page or paper over and burnish it on the back as well. This ensures that the image will properly adhere to the paint. Allow the paint to dry fully. I allowed it to dry for one hour, ‘just because.’ OPTION: You can try to speed up the process using a heat gun or hair dryer. Results may vary if you do. It is best to be patient!
Step 3 – Wet Paper Backing: Only begin this step when you are positive that your paint is completely dry! With a mister, spritz water to the back of the paper. You do not want it to be overly wet! TIP: Allow water to soak in for a minute or two.
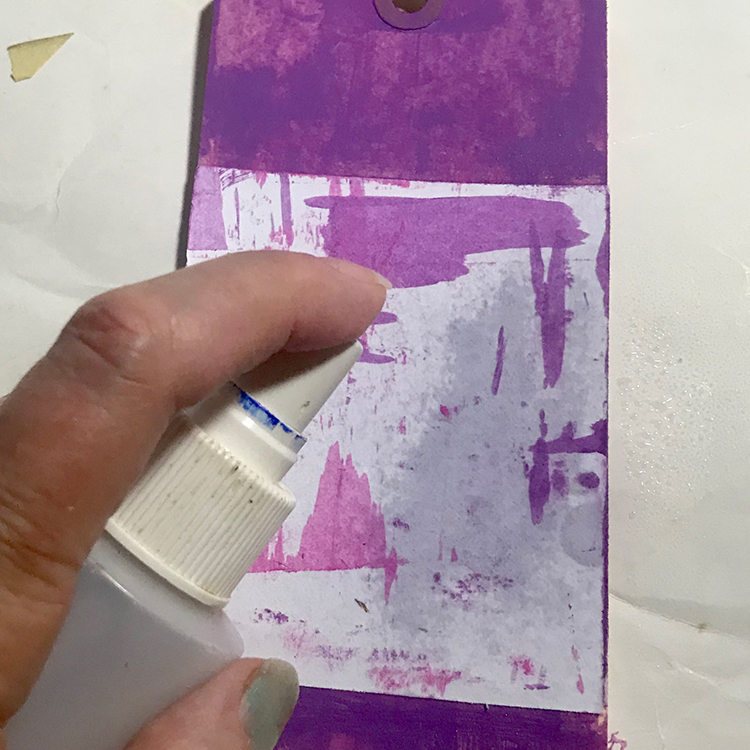
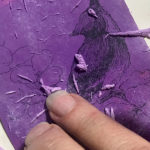
Step 4 – Remove Paper Backing from Image: Rub the paper very gently with your fingers, starting in the middle. I do the middle because the edges are sometimes fragile. TIP: I work very gently and slowly at the edges, generally moving from the inside of the image over the edge without coming back.
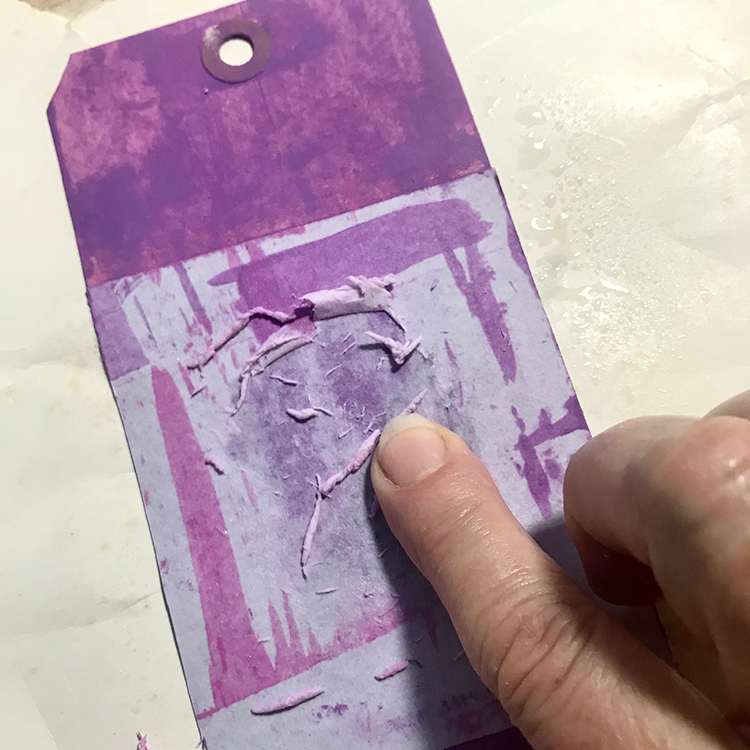
Keep rubbing while adding extra water as needed when the surface dries out. TIP: AT this point, I use my ring finger because that finger has the least pressure. It takes a little patience, being careful not to rub so hard or much that the image is rubbed away. It can happen before you know it. Trust the impatient me on this!! WINK

Some of the paint rubs off in certain spots. Do not be alarmed. I like the rustic look it brings to the project. There will be a little haziness to your image, but not to worry. We can remedy that with the next step. Or you can stop here and leave it a little hazy and rustic. There are so many choices with this mixed media technique.
OOPS! You can see what happens when you rub too hard below. You can also see a white line in this image. That is where I didn’t apply enough paint.
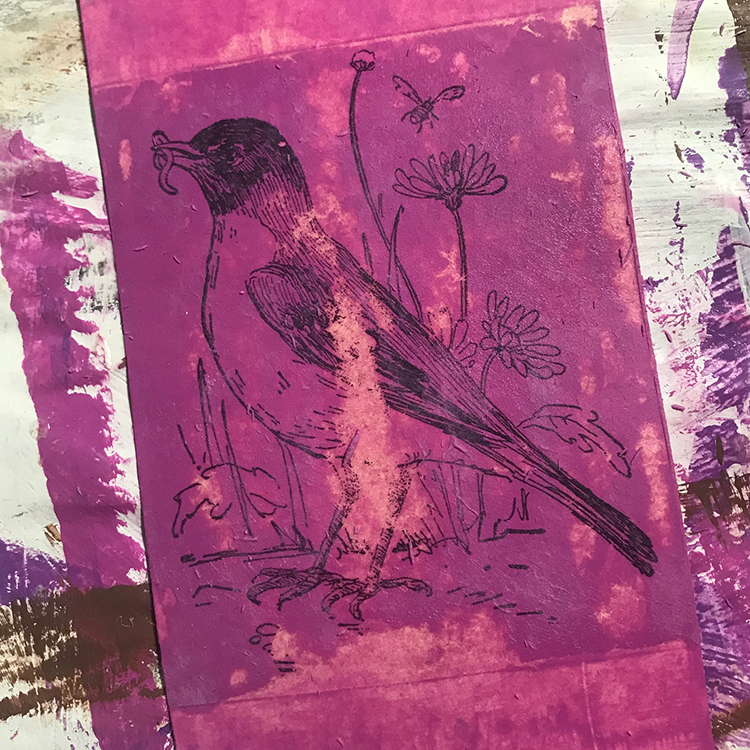
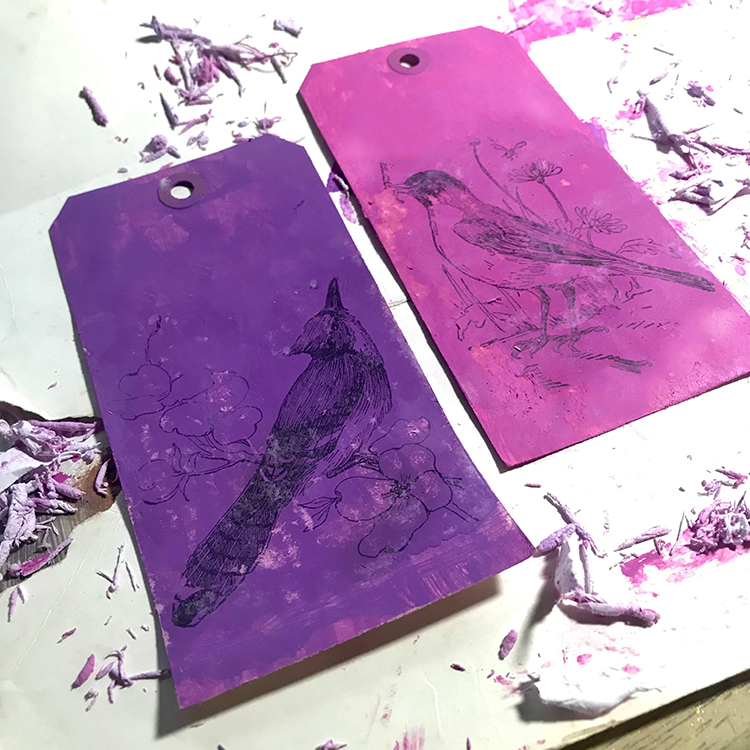
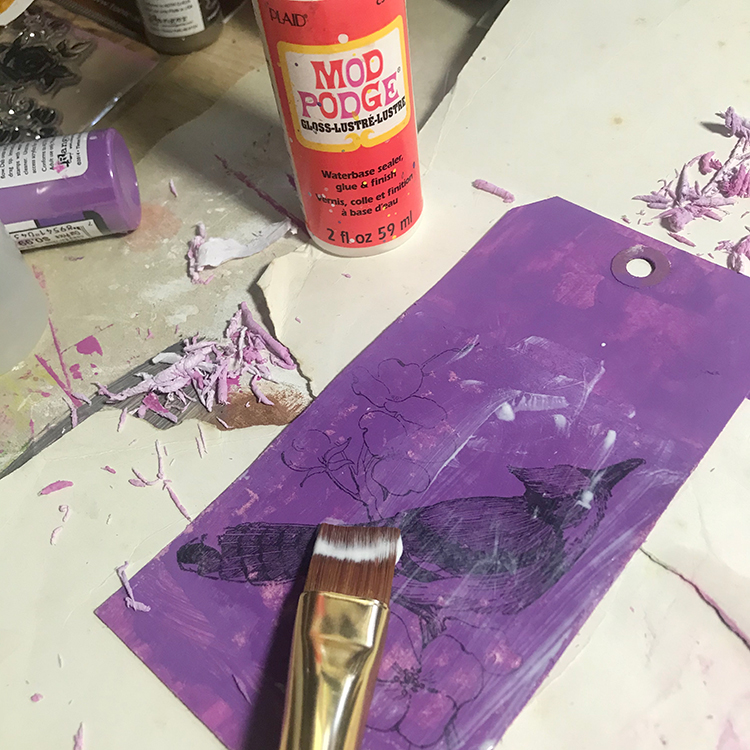
Optional – Apply Gloss Mod Podge: Liberally apply a coat of Gloss Mod Podge over the transferred image. Gloss Mod Podge does two things – 1- it seals and protects and 2- it also makes the image ‘pop’ more. How does it do this? It takes away some of the haze, and makes the blacks darker as you can clearly see below. If you use a color image, it makes the colors more saturated. Bottom line, I simply like the look, and always love the protection in case I want to create more layers over the transferred image! And I always want to do more over the transferred image! HA HA
You might also like my Transferring Images onto Paper Technique HERE for another fun method!
I hope that you had fun learning How to do this Acrylic Paint Image Transfer Technique with me!! When I am not exploring with new and old Techniques for Mixed Media in my Graphics Fairy sandbox, I also create Photoshop Elements tutorials and craft project videos over on The Graphics Fairy Premium Membership site. You can find even more of my books, junk journals, mixed media art, classes, and whimsical shenanigans on Rebecca E Parsons .


Rk says
I had bought ranger dabber paints but didn’t use them much. By then, Other distress paints and sprays had come On the market. Good that I have them now that you’ve shown a great technique. TFS!
Karen Watson says
That’s great that you already have them in your craft supply Rupa! I think we all buy a lot of interesting things, that don’t always get used. It’s so hard to resist all those gorgeous supplies! 🎨