Gel Skins Mixed Media Transfers
Hey y’all – It’s Rebecca E Parsons here to share a cool Gel Skins Mixed Media Transfers Technique! You can use these with The Graphics Fairy images for your artwork, Mixed Media pieces, Junk Journals, etc. While I get that Gel Skins don’t sound very romantic, I assure you the effect is swoon worthy!! The best part is that it takes just 3 Steps and a few materials that you already have in your stash. Come play with me in my Graphics Fairy sandbox.
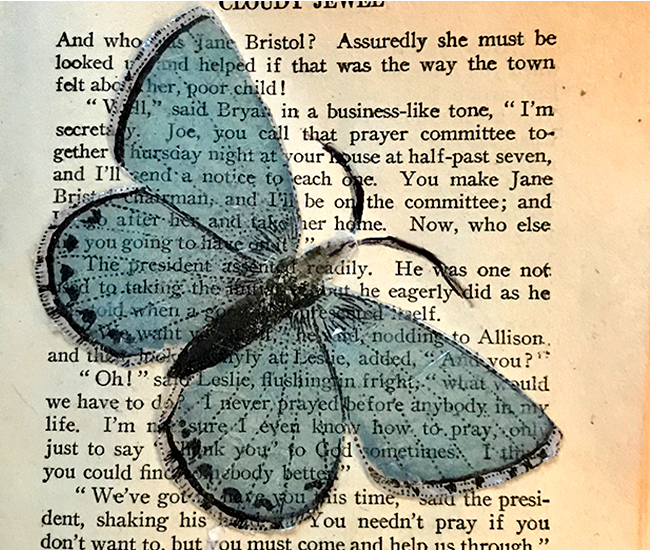 Just imagine turning any image into a transparent flexible piece that you can overlay onto book pages or collages, or even glass! Oh the possibilties!
Images Used
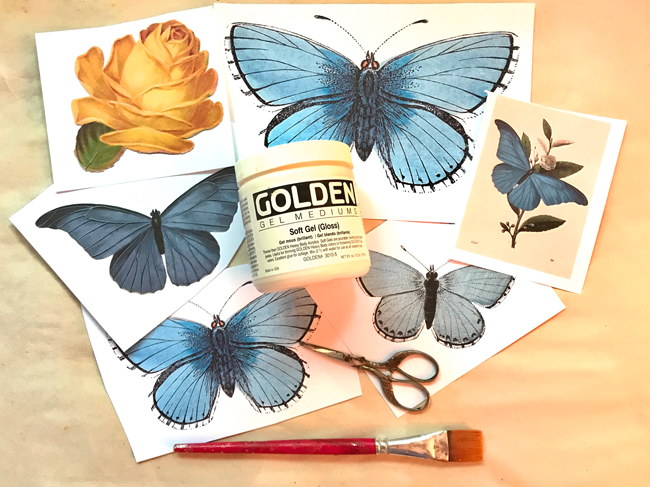
Our project uses some of the beautiful Graphics Fairy Blue Butterfly images and a Yellow Rose Victorian Scrap. Karen prefers monochromatic looks and I think she was spot on for this project. She’s a very savvy crafter!
Supplies for Gel Skins Mixed Media Transfers:
Images printed with Laser printer
Golden Gel Medium – Soft Gel Gloss
Old Brush
Flat Palette Knife
Silicone Mat or Non Stick Surface
Scissors
Sandpaper
Water Container & Water
Make Gel Skins
There are just three Steps to make Gel Medium Skins. It is fairly easy as far as transfers go. Plus it is a user friendly technique that even children can do. Gel Medium Skins are also called Gel Image Transfers and Indirect Image Transfers. In essence, the image melds into the gel and and forms a translucent polymer skin. It is flexible and reminds me of the clingy plastic thingies that you could attach to windows. I just Googled it and found they are called ‘Static Clings’ or ‘Window Clings.’ Soooo, hopefully you can take my less than eloquent description and make some sense of it. WINK
3-Step Process
All kinds of experiments were tested when performing this process so I could share my results with you. Single layers and multiple layers were and cut the images out before I applied the Gel Medium, then I left them to cut after they dried. I applied the gel with a brush and palette knife. Hot and room temperature water were tested. I share my thoughts on these so you don’t have to experiment as much. Of course, I am a huge proponent of playing and experimenting. I hope you discover something I missed. TEE HEE
Step 1 – To Cut or Not To Cut!
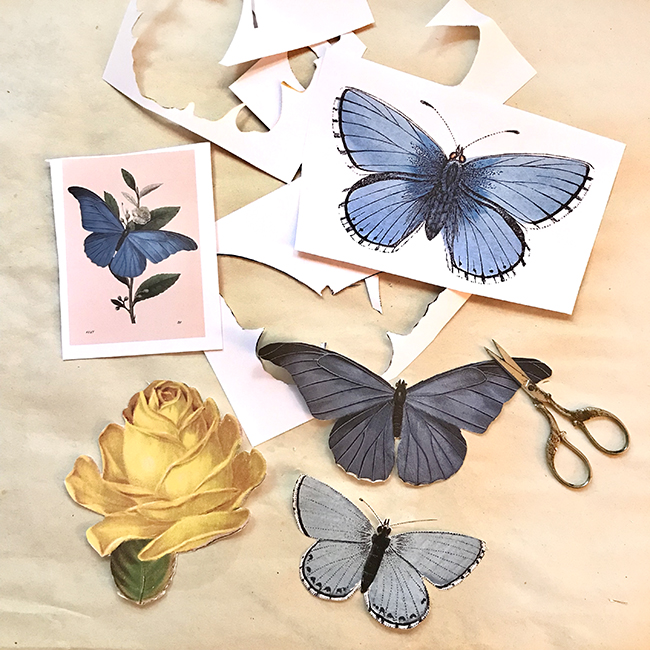
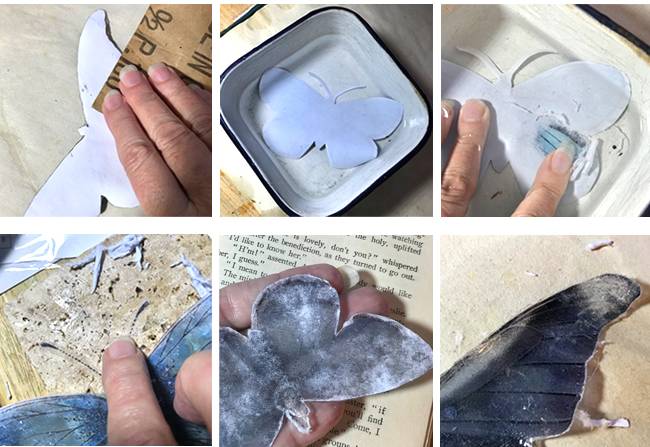
I started out by fussy cutting two of my butterflies and the rose scrap. Then I started to reconsider and left the small Natural History print and large Blue Clip Art Butterfly uncut. Although it is a bit more challenging to coat the cut out images with gel, the end result is the same. TIP: For me, I would leave them attached in the future.
Step 2 – Applying the Gel Medium
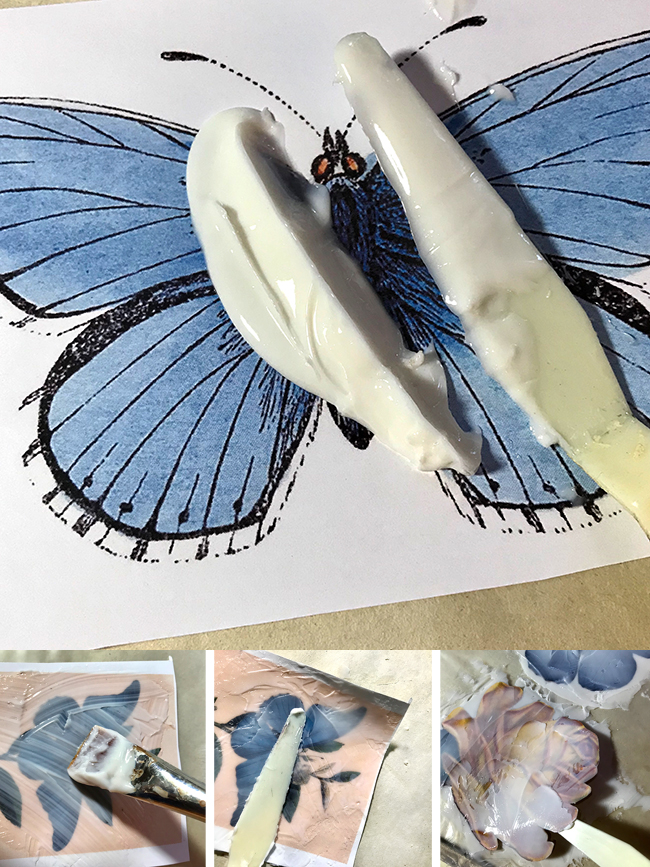
I first brushed the Gel on, then thought about the brush marks. Oh My!! So I switched to a palette knife for a smoother application. After they dried, I realized that I liked the brush marks as it gives an added texture. So I hope you will do both and see what you like. Then there is the decision about how much gel to apply. I applied a moderately thick coat. That means about 2 tablespoons for the large Blue Clip Art Butterfly image. I also only did 1 coat on this guy. It turned out pretty well, although it is noticeably thinner than the others with 2- and 3- coats of gel.
Place images face up on a non stick surface. Apply a thick coat of Gel Medium. Let dry until the gel turns clear (overnight or 6-8 hours at least). It is not a rush project, so patience is necessary. The images that are fussy cut curled. TIP: I also lost the antenna off the fussy cut butterflies at this stage. So I recommend that you use solid images without delicate edges for this technique. The butterfly I did not trim, which kept the antenna attached! YAY! TIP: If you do not use a non-stick surface, gently remove the coated images and place them on wax paper or glass. If you leave them on an absorbent surface to dry they will be glued to it. YIKES!
Step 3 – Remove Paper
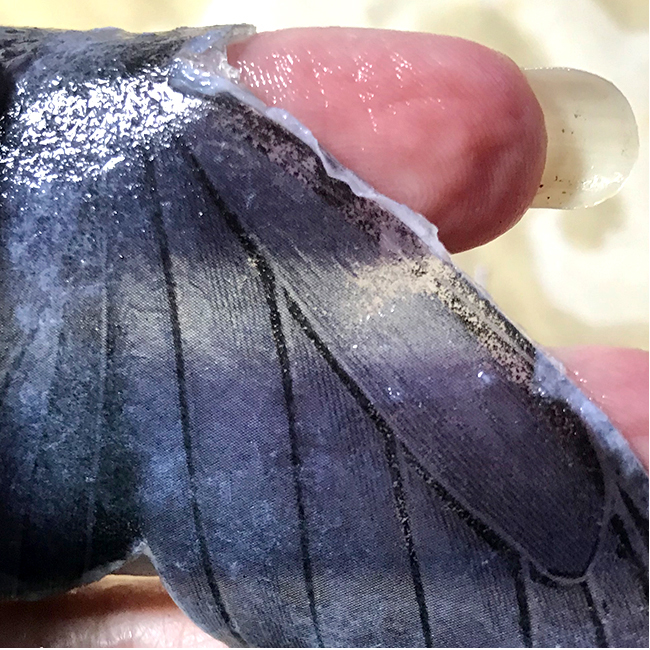
Lightly sand the back of the image with sandpaper. I used 150 weight. Cut out the image if not already cut. Fill a flat container with about 2 inches of water. Temp does not matter. Drop image into water face down. When the paper is saturated (maybe 30 seconds max), begin to rub paper gently with your fingers. The paper will become pulp. This process goes quickly.
TIP: Be careful as the skin is flexible. I didn’t tear mine, even the 1-coat piece. However, I imagine you could if you went at it really hard or with an abrasive sponge. As is normal with transfers, there will be a white haze on the back when it dies. You can wet it again and rub off more of the paper haze.
TIP: I found that the darker images lost some of the color at the edges. So be careful how long you rub as well. They will be very flexible and bendable. Let them dry and they are ready to attach to your artwork.
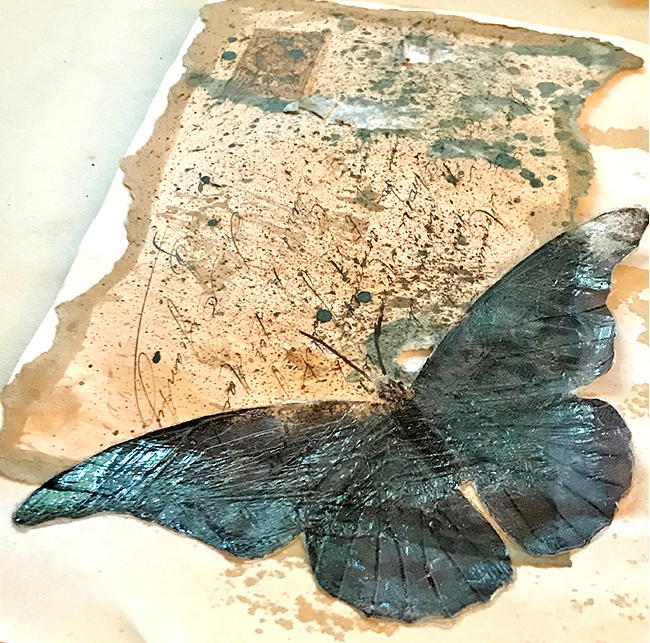
TIP: There will be a little build up of the gel at the edges if you cut the image before you apply the gel medium. You can see this clearly in the large image above. It can be trimmed after the paper is removed. Do Not try to pull it off!!
Making Art with Gel Medium Skins
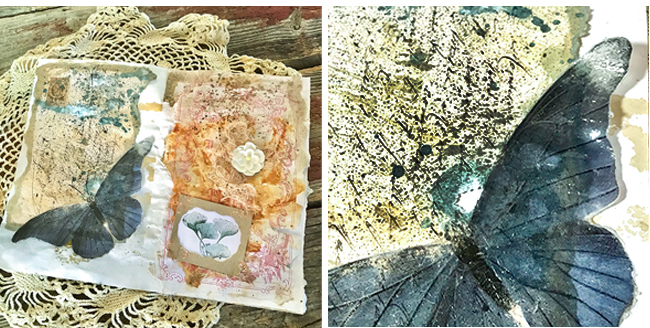
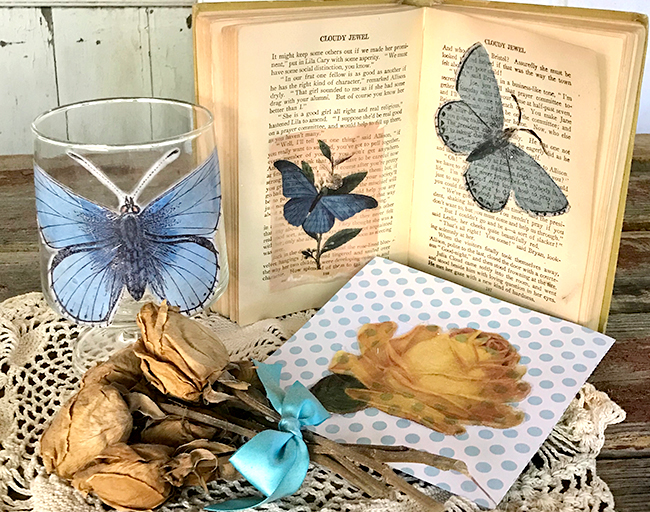
Using the gel medium or adhesive of choice, adhere the skins to artwork, Junk Journal pages, or even glass. Below you can see that I attached them to book pages, a Mixed Media Artwork, Junk Journal pages, and a glass footed bowl. I am happy with the results, and will be doing more of this in future books.
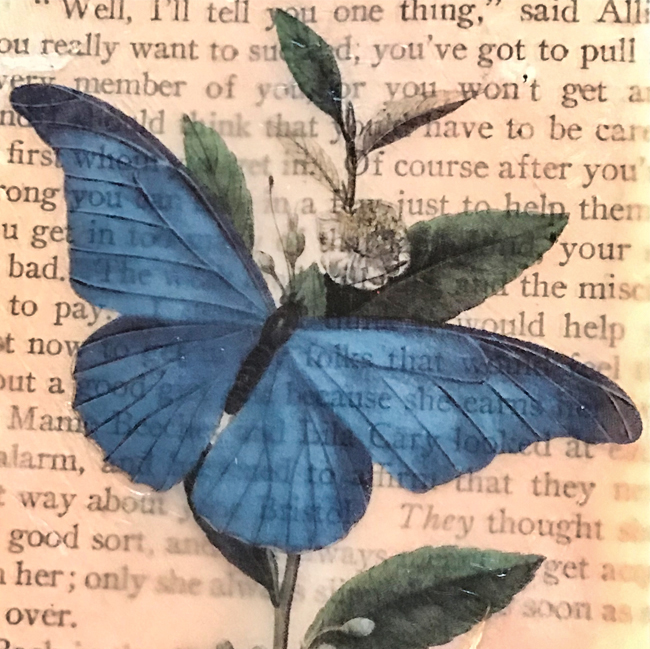
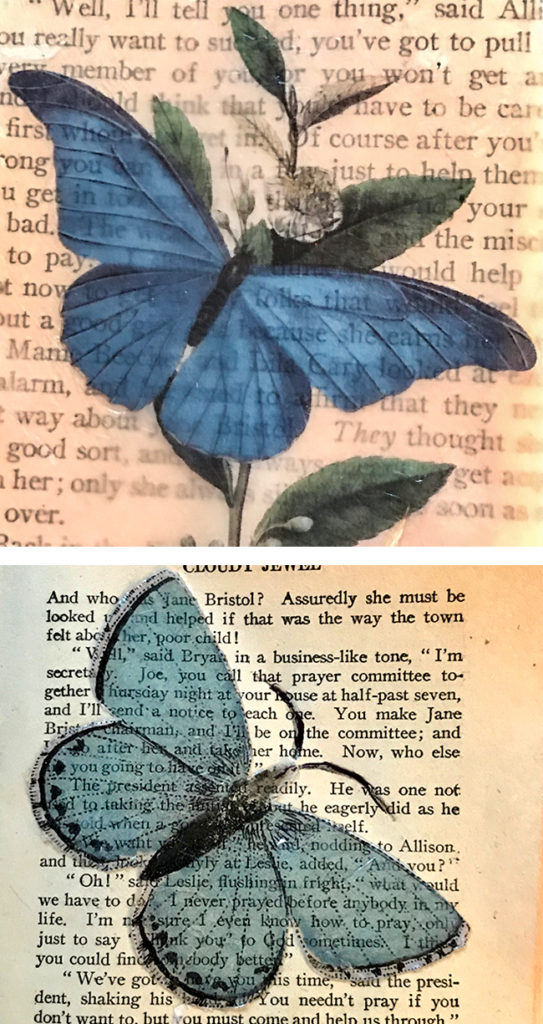
They are lovely on the book pages. See how transparent they are?
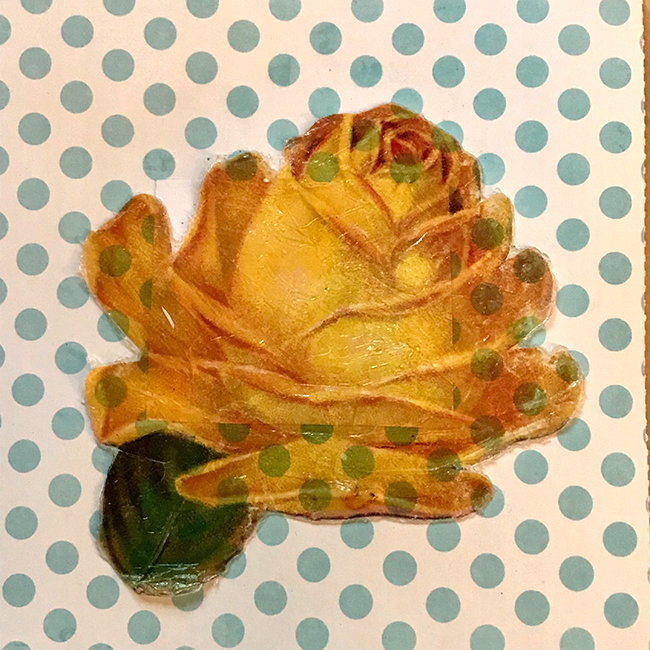
I applied the rose to a card over polka dots. It looks amazing. You can clearly see the texture of the pallet knife strokes on this one.
This Junk Journal spread makes my heart sing. The tip of the wing flows over the edge of a pocket. It is translucent and adds depth to the page. Don’t those brush strokes make it even more interesting?
Gel Skins Mixed Media Transfer Butterfly on old Script paper. Such a lovely effect!
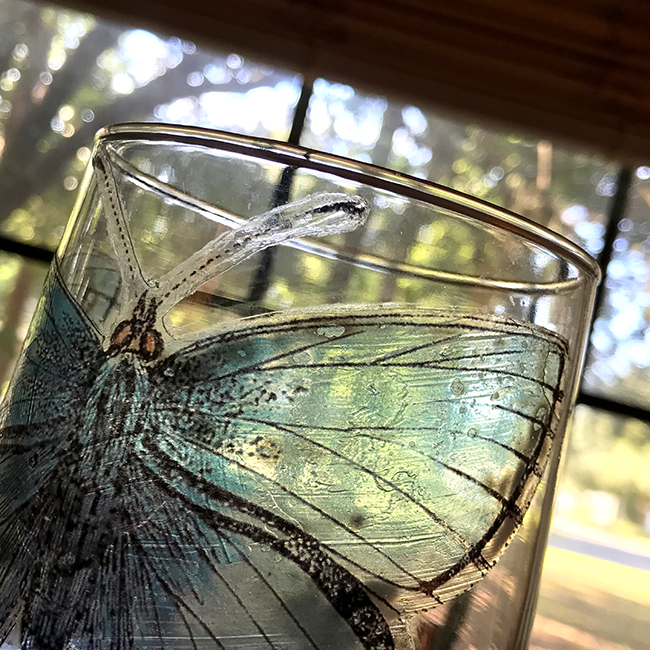
The glass is perhaps my favorite. I used gel medium gloss to attach it. It did take a couple of days for the gel medium to cure and turn clear. But the results are spectacular!
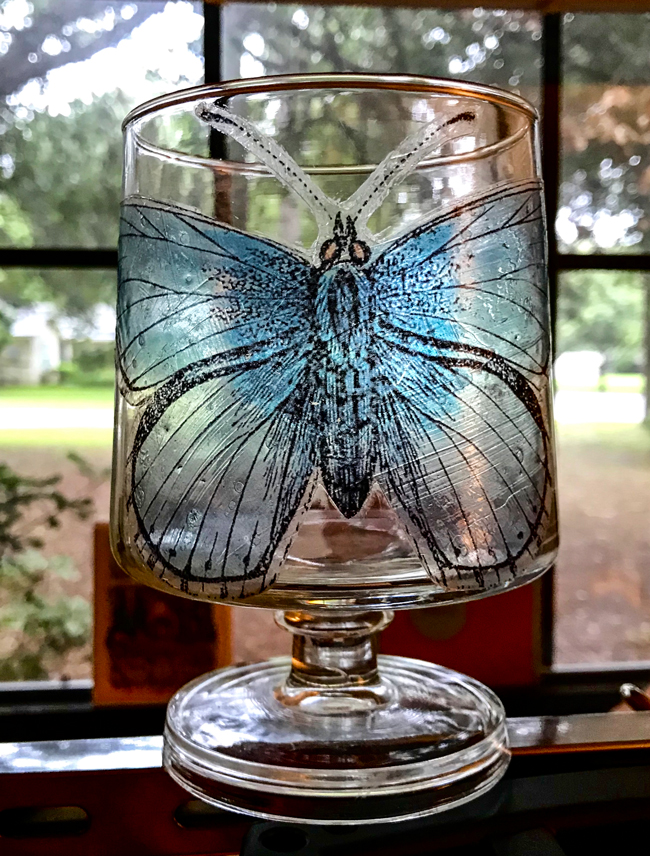 So many possibilities with this one. You could add them to old bottles, jars or even glass cloches!
Thank you for visiting The Graphics Fairy today! I hope you enjoyed playing with me in my Graphics Fairy sandbox! This Mixed Media Transfer Technique: Make Gel Medium Skins is so much fun to do. I also create Photoshop Elements tutorials and craft project videos over on The Graphics Fairy Premium Membership site. You can find even more of my art, DIYs, books, and whimsical shenanigans on The Bookery


Tammy says
Very nice! Would this work with inkjet printers also? So is the glass just for decorations or will image come off? It is spectacular!
graphicsfairy says
Thanks Tammy but this one does call for Laser prints, you can always go to your local supply store and have them make laser copies for you 🙂
Linda Wyatt says
Love the idea of the gel transfer and can’t wait to try it! Thanks for the excellent tutorial
graphicsfairy says
Thanks Linda, have fun!
Debbie Borthwick says
Oh my this is an awesome technique, the results are gorgeous!! I will definitely be trying this, thank you so much for sharing.
graphicsfairy says
Thanks Debbie, have fun!
Denise says
Thanks!!
graphicsfairy says
You are very welcome Denise 🙂