Paper Clay Techniques
Hello, my wonderful Graphics Fairy Friends! Heather from Thicketworks, here to show you a wonderful way to add texture to your projects! These Paper Clay Techniques are one of my go-to ingredients for surfaces that are richly detailed, but a breeze to create! And because we’ll be using the Outlaw Approach to this simple Embossing Technique, it’s FAST!
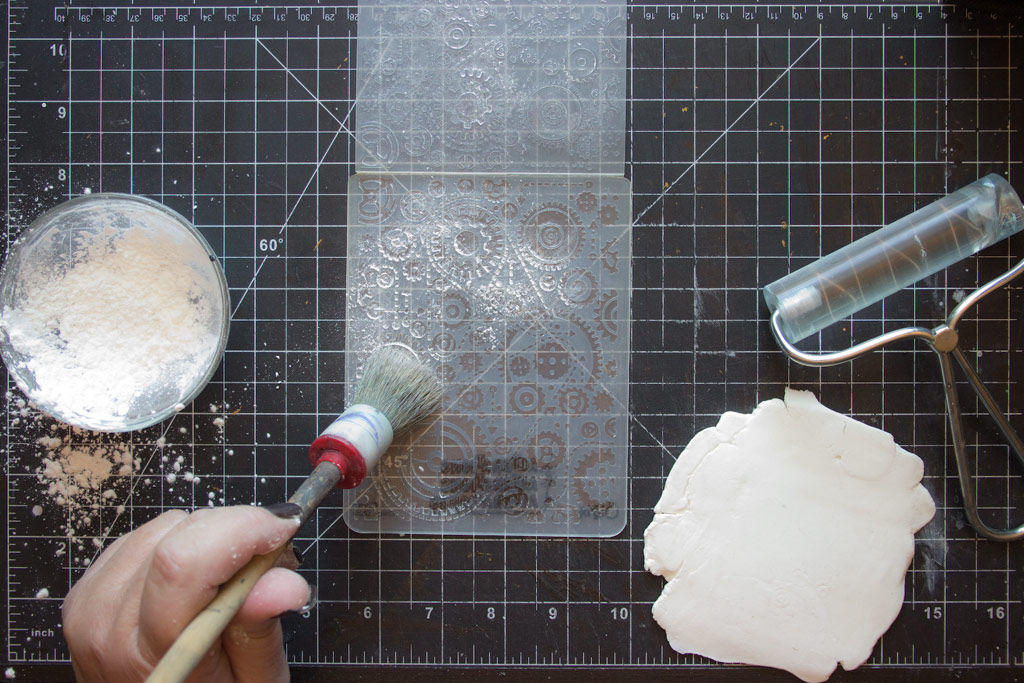
If you’d like to add a quick ‘n easy layer of texture to your project, you’ll need a few simple supplies!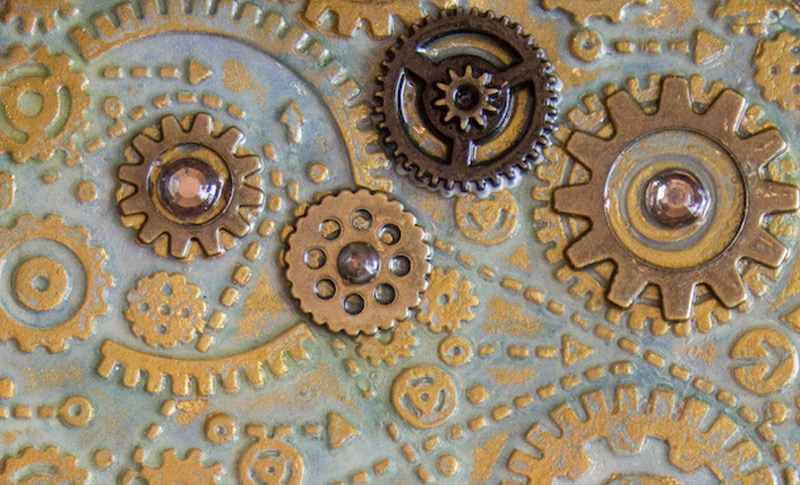
Paper Clay Techniques Supplies:
- Paper Clay
- Acrylic Brayer
- Embossing Folder
- Cornstarch in small container
- Fluffy Brush
- A Heat Tool
- Distress Stain: Evergreen Bough
- Distress Stain: Old Paper
- Distress Oxide Ink: Broken China
- Distress Oxide Ink: Peeled Paint
- Blending Tool
- Spray Bottle of Water
- Inka Gold: Old Gold
- Altoid Type Tin
- Aleene’s Quick Dry Tacky Glue
- Flat Artist’s Brush
- Scissors
- Metal Ruler & Craft Knife
- Soft Cloth
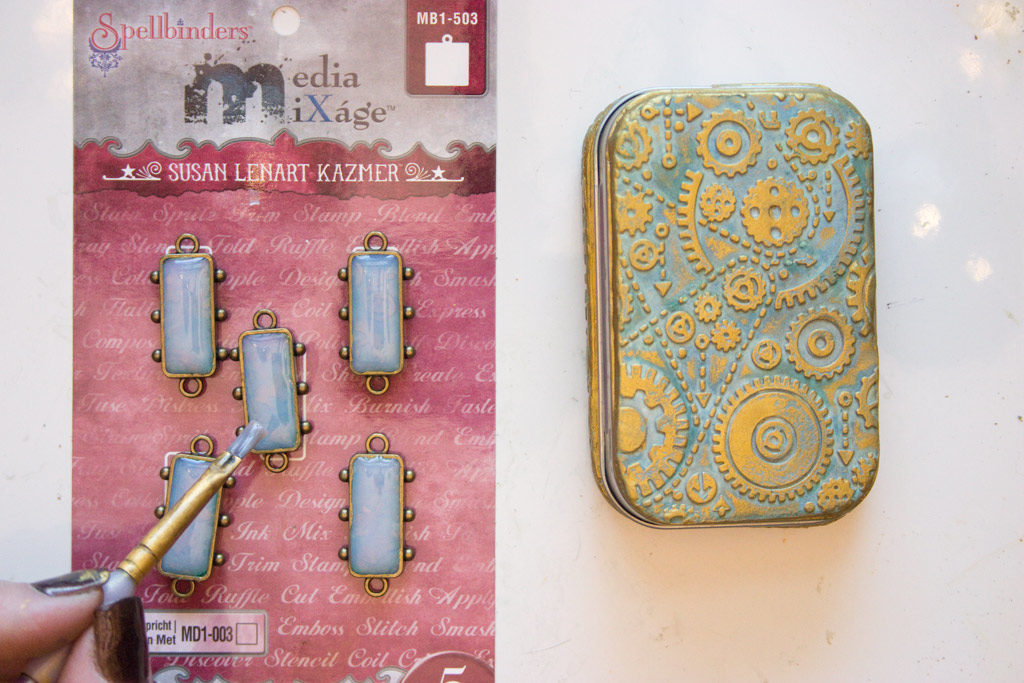
- Spellbinders Rectangular Bezels
- Triple Thick Gloss Glaze
- Gear Embellishments
- Rhinestones
How to create Embossed Paper Clay Panels:
Begin by applying a light dusting of Cornstarch to the surface of your embossing folder. A fluffy brush is a good choice for this step.
Condition your Paper Clay by kneading it with your hands until it becomes smooth and easy to work. Flatten the clay with your hands.
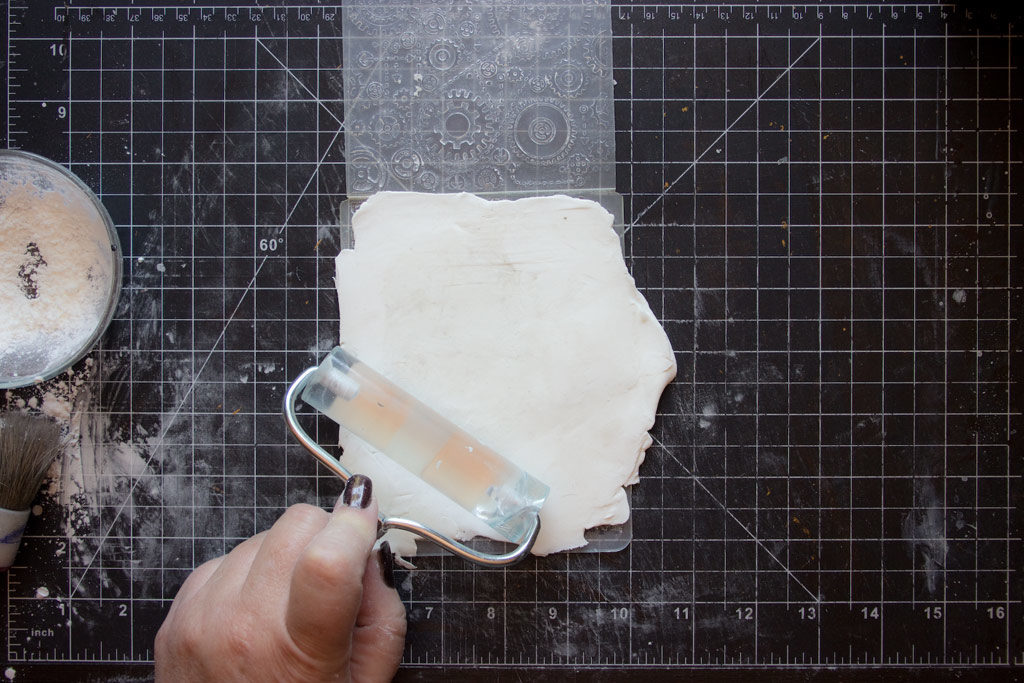
Place the Paper Clay onto the surface of the Embossing Folder.
Apply a light dusting of Cornstarch onto the Paper Clay.
Use an acrylic brayer to firmly roll the Paper Clay onto the surface of the Embossed Design.
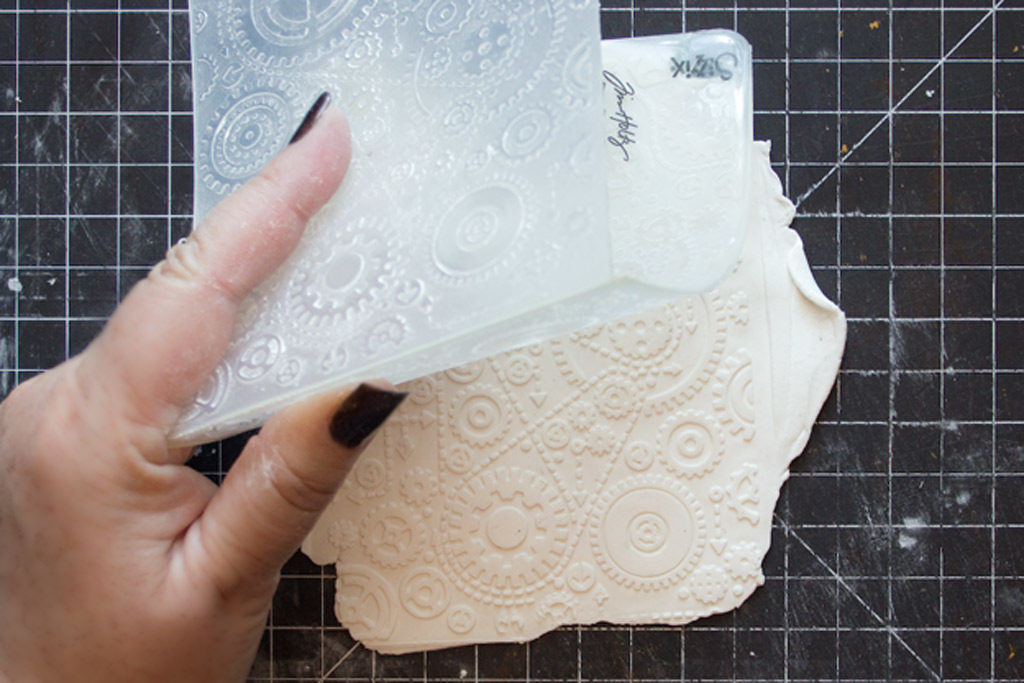
Flip the Embossing Folder over, and deposit the Embossed Panel onto your work surface.
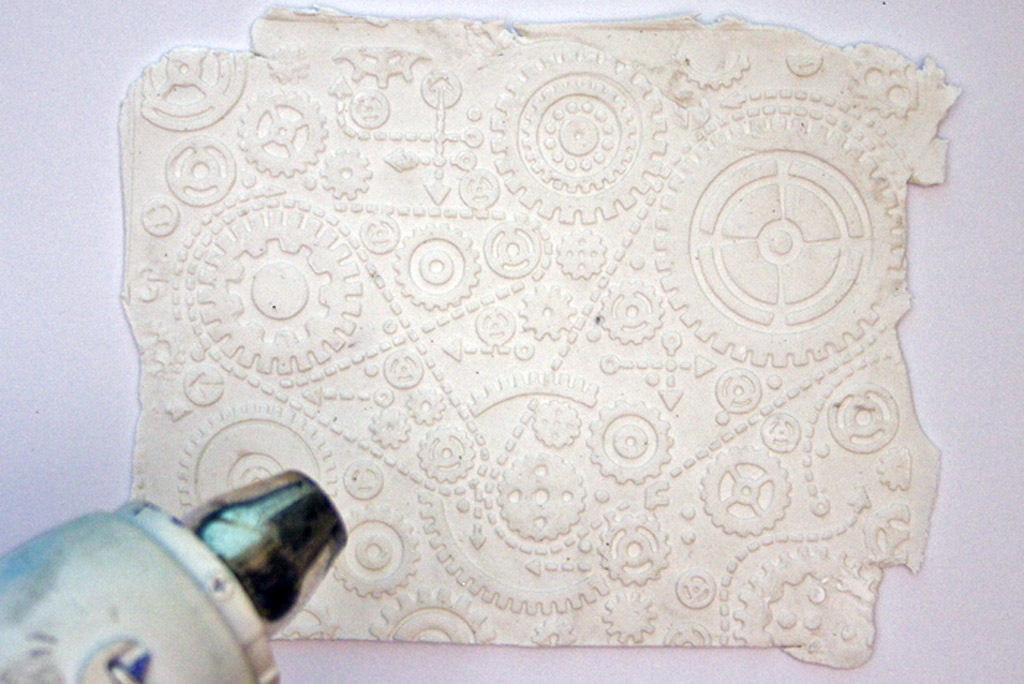
Use a Heat Tool to create an ‘almost dry‘ surface on the Embossed Panel.
Note: we will be working with the Paper Clay while it is still damp – the goal is to create a kind of ‘crust’ on the embossed surface before proceeding.
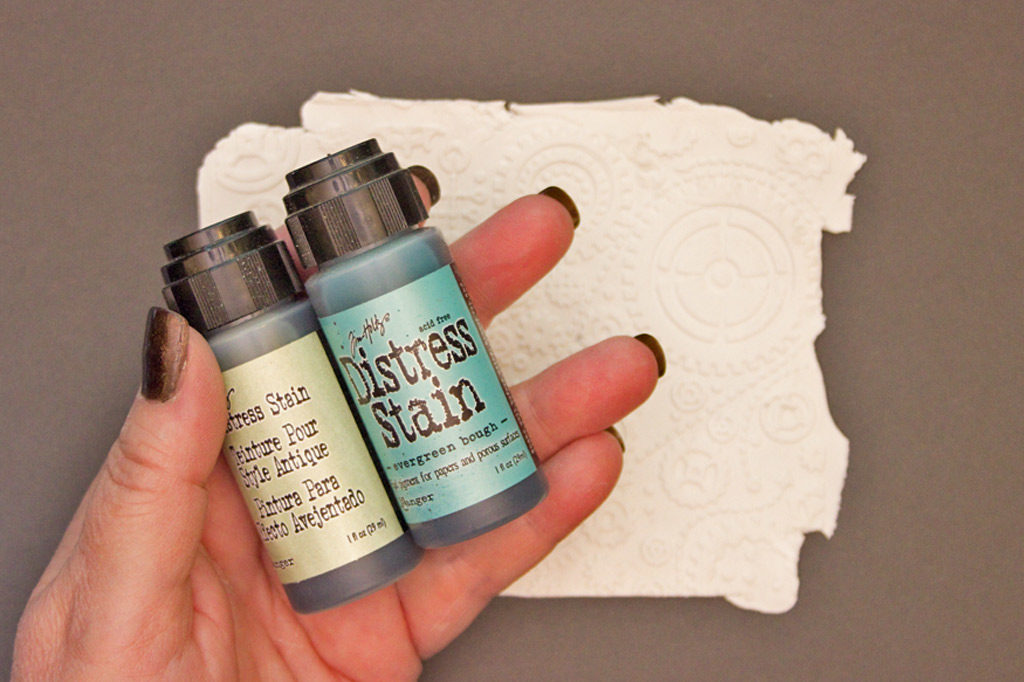
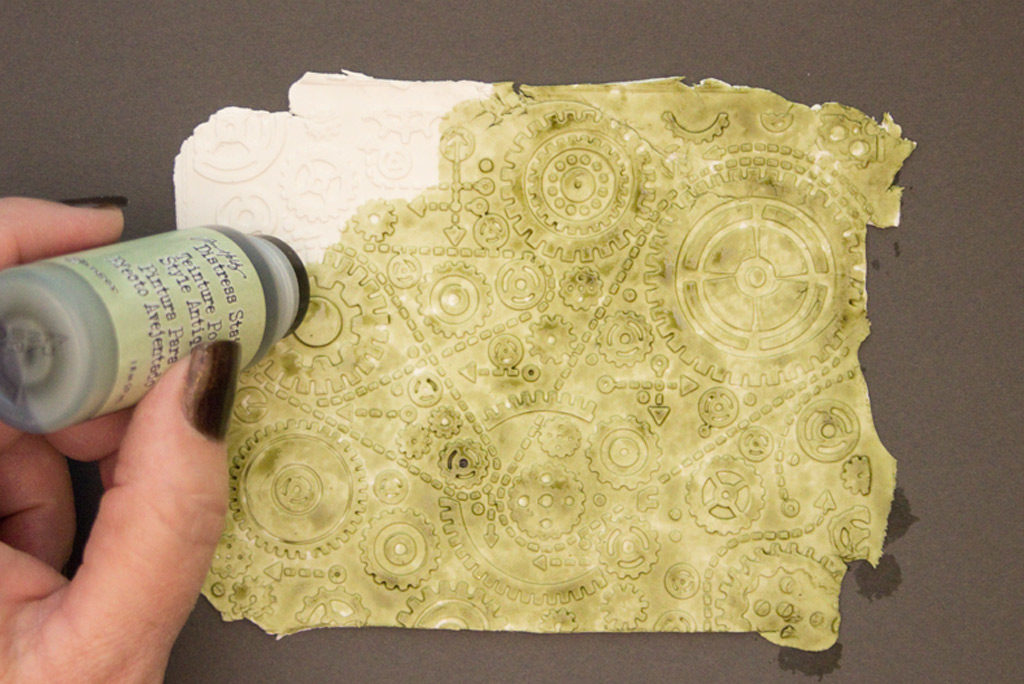
Grab your favorite Distress Stains! These watery tints will penetrate the surface of the Paper Clay, without creating a ‘skin’ of paint that might obscure the texture.
To create a Verdigris vibe, I’ve selected Evergreen Bough and Old Paper.
Begin by applying the lighter tint over the entire surface of the Embossed Panel.
Yes, this will ‘reactivate’ the Paper Clay to some extent – but not to worry!
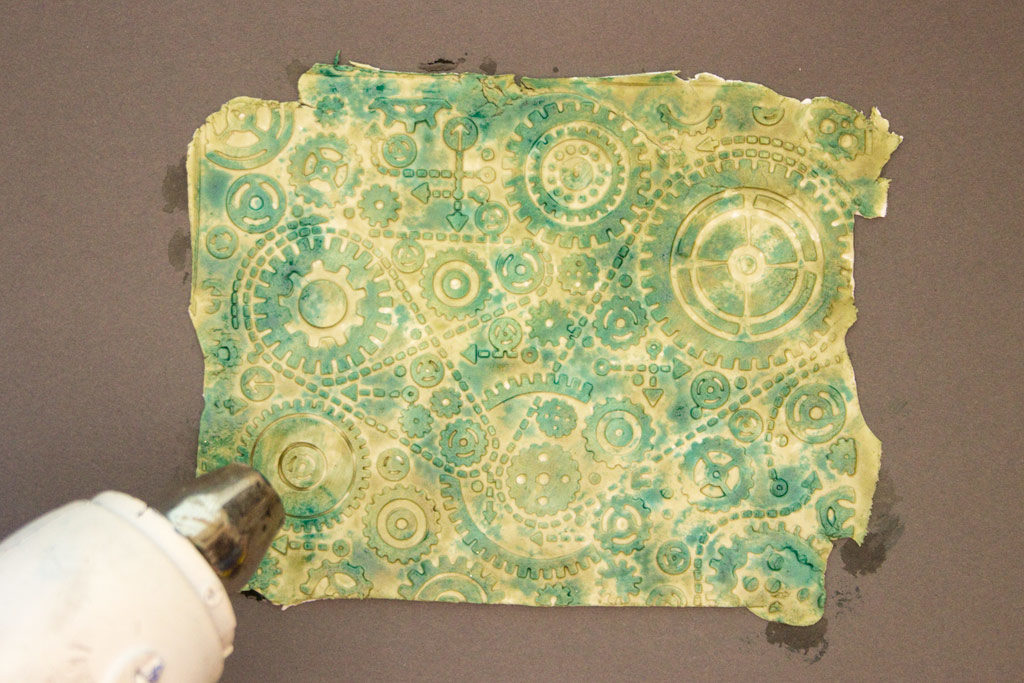
Dab a pleasing pattern of the darker Distress Stain right over the first layer, then dry the surface with a Heat Tool.
No need to dry the entire thickness of the Paper Clay – we want it to remain flexible!
Once the upper surface has dried, you can add even more pigments!
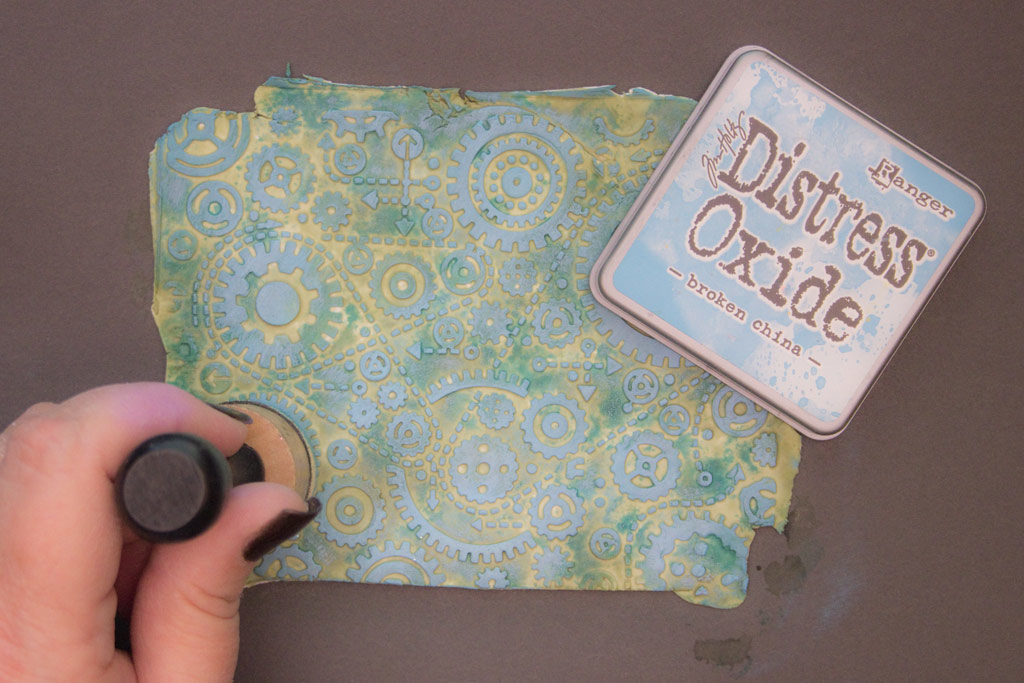
This time, I’ve selected Distress Oxide in Broken China to add that powdery blue tint that we often see on actual Verdigris details.
By using a Blending Tool, you can add the Broken China to only the upper level of the Embossed Paper Clay Panel.
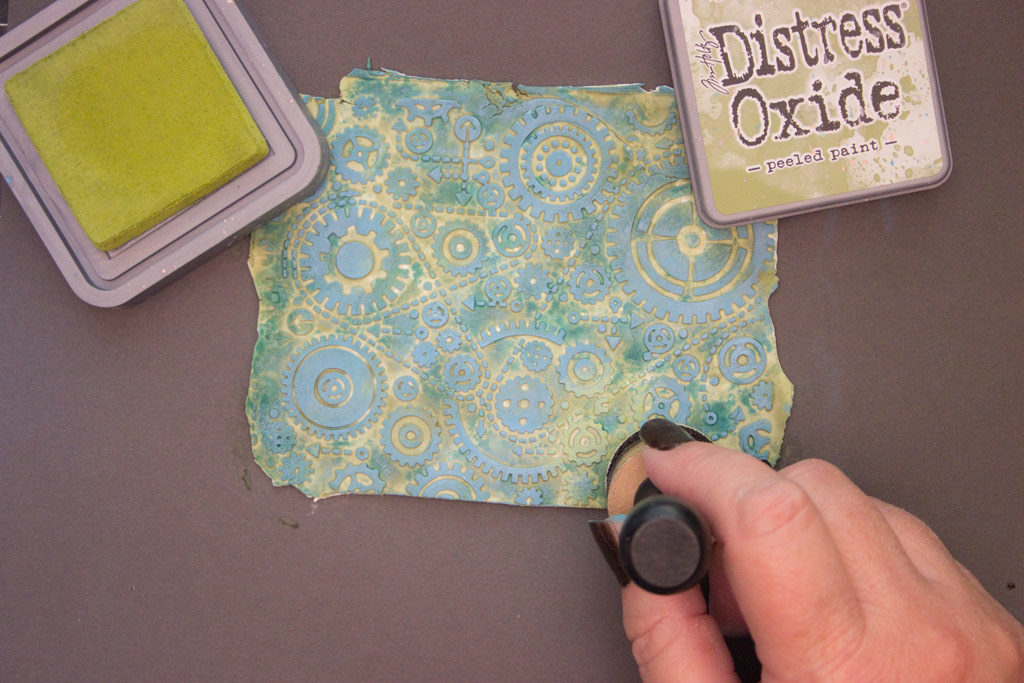
Touches of Peeled Paint Distress Oxide add to the richness of the resulting finish.
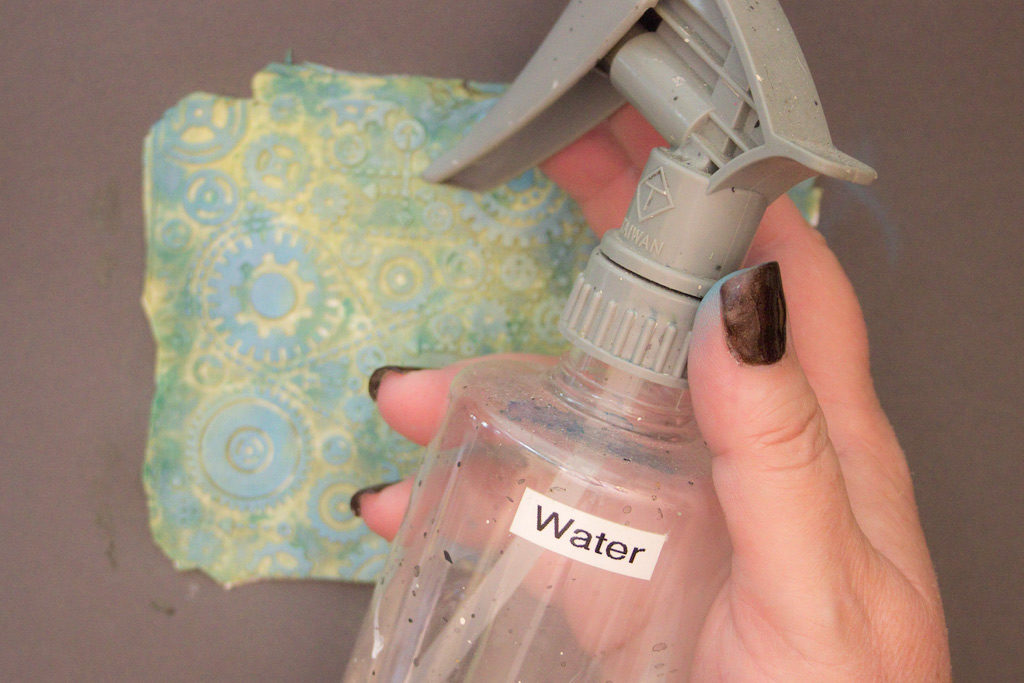
Distress Oxide Inks become ‘activated’ when they are dampened with water…so spritz away!
Dry with a Heat Tool…
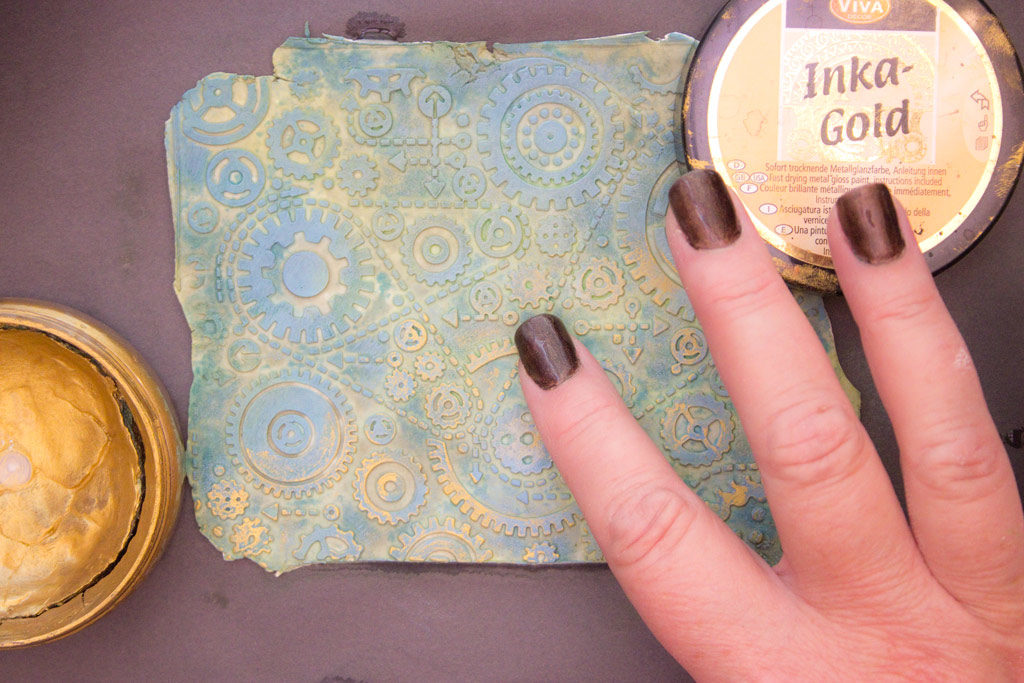
Then add touches of Inka Gold: Old Gold to the uppermost surface of the Embossed Paper Clay Panel with your fingertips.
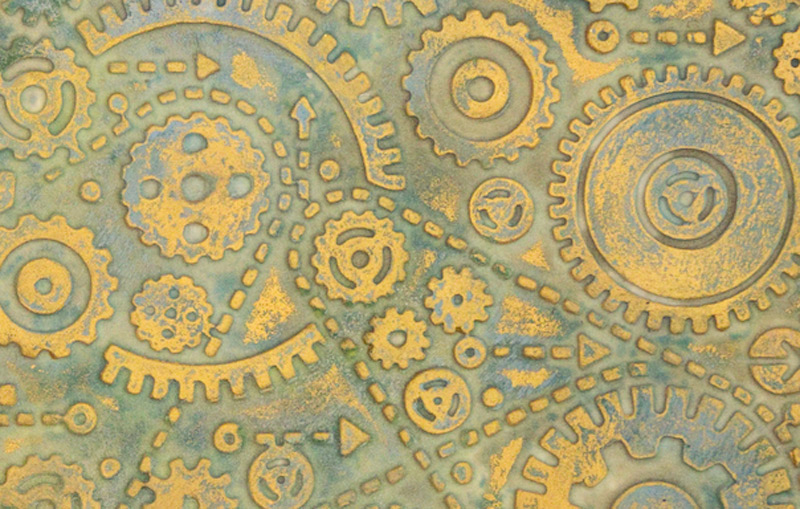
Here’s a close up of the resulting Embossed Paper Clay Panel:
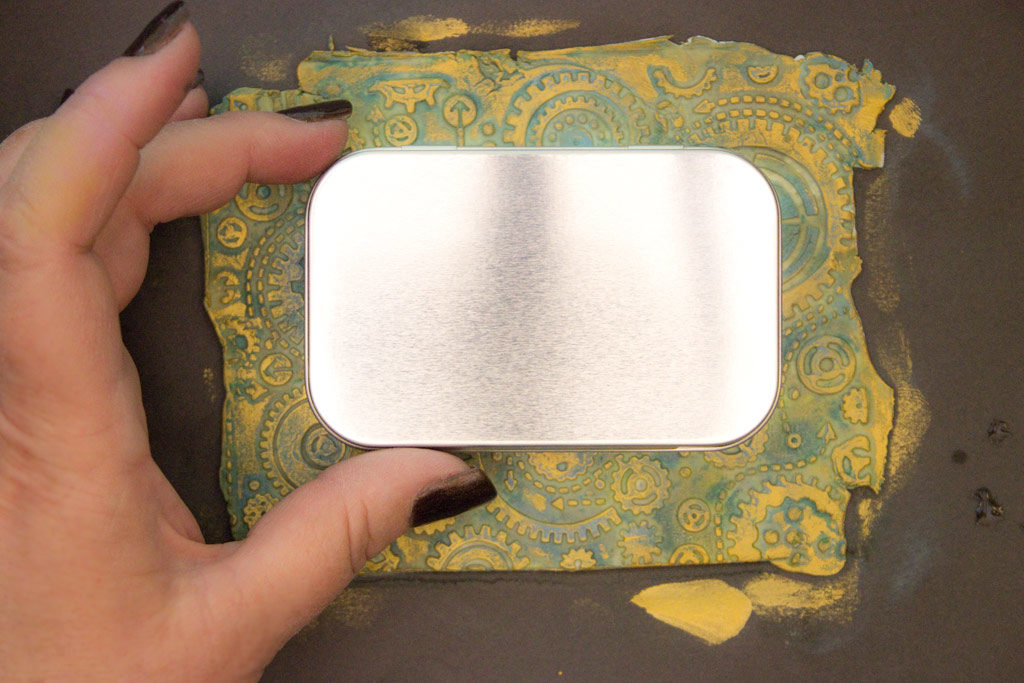
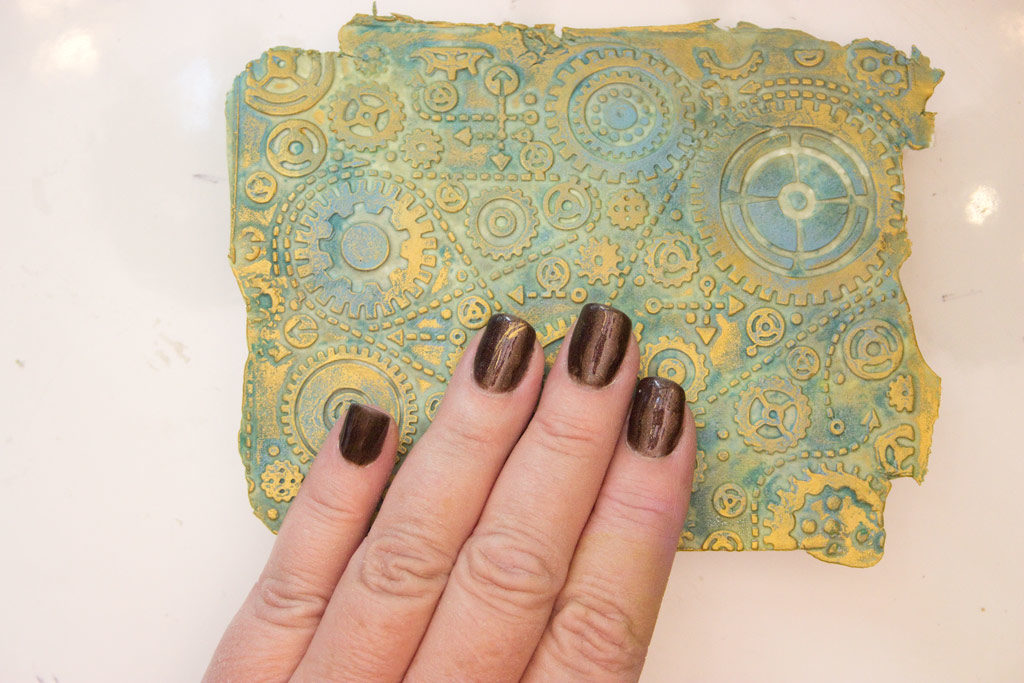
Now, make sure that the Embossed Paper Clay Panel will comfortably fit on your chosen item.
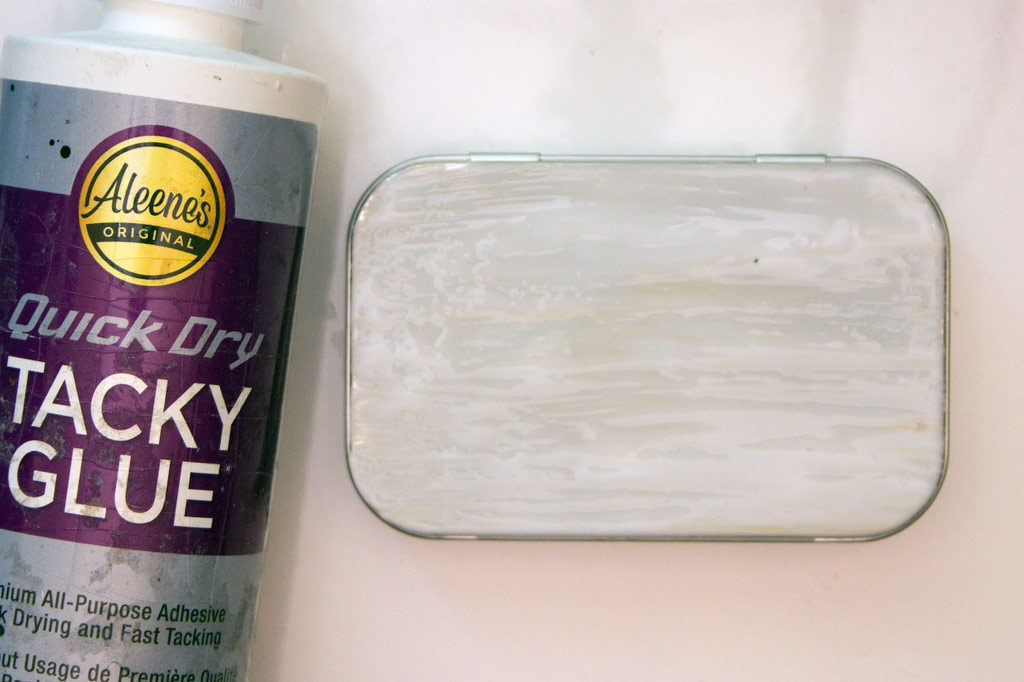
Apply an even layer of Aleene’s Quick Dry Tacky Glue onto the surface:
Firmly press the still-damp Embossed Paper Clay Panel against the adhesive.
Note: it should feel a bit like leather at this point.
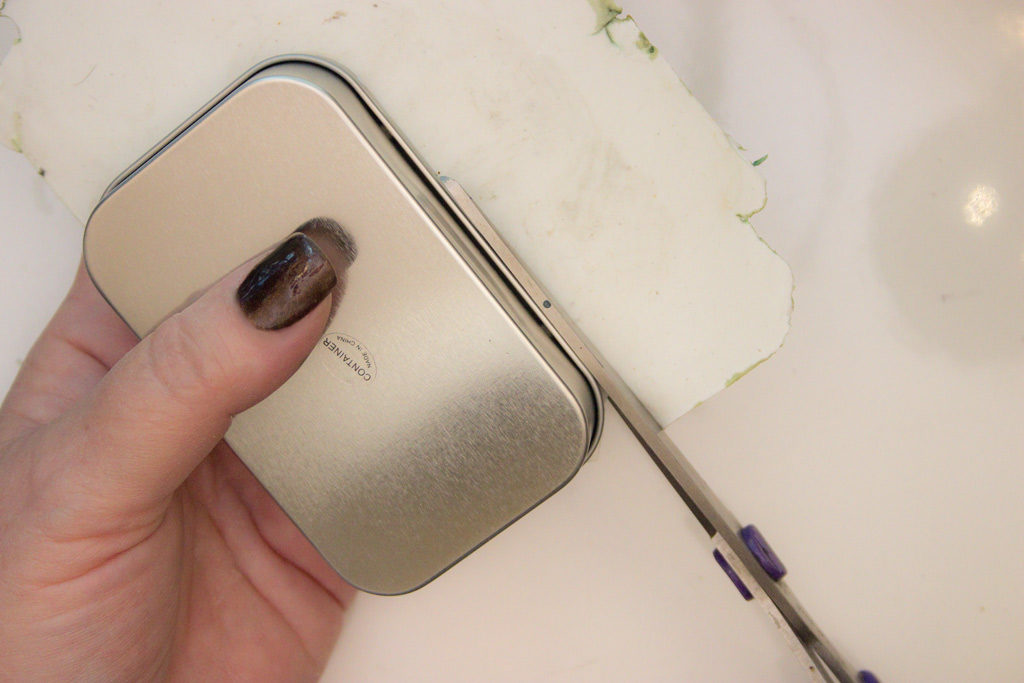
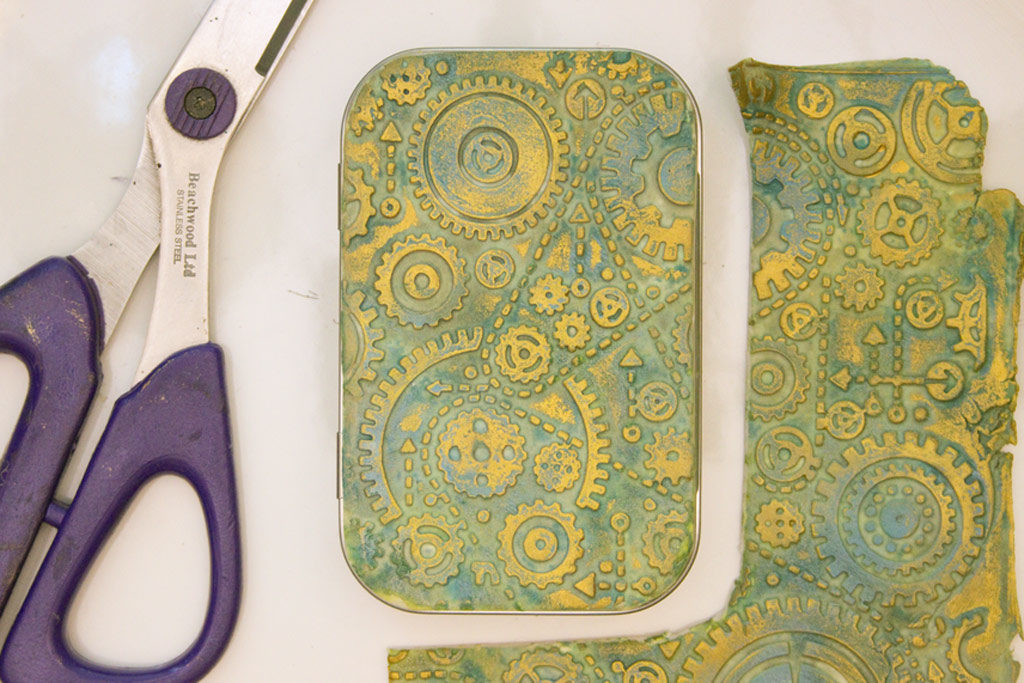
Flip the piece over, and carefully trim away the excess Embossed Paper Clay with ordinary scissors.
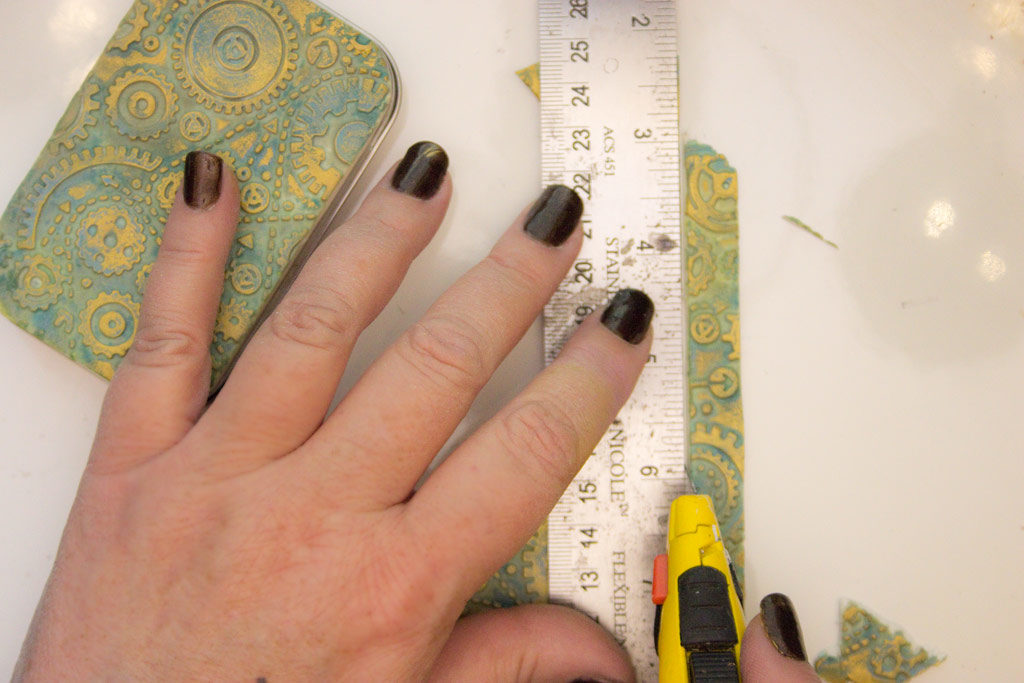
Next, cut strips of the Embossed Paper Clay sized to fit the sides of your project:
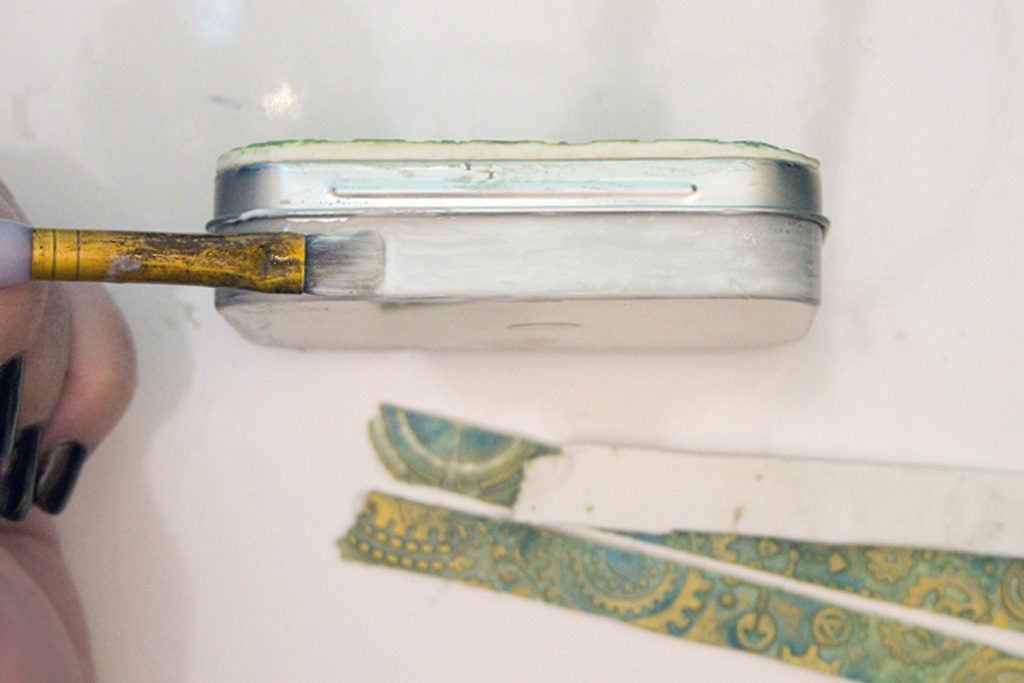
Apply an even layer of Aleene’s Quick Dry Tacky Glue to the sides of the tin…
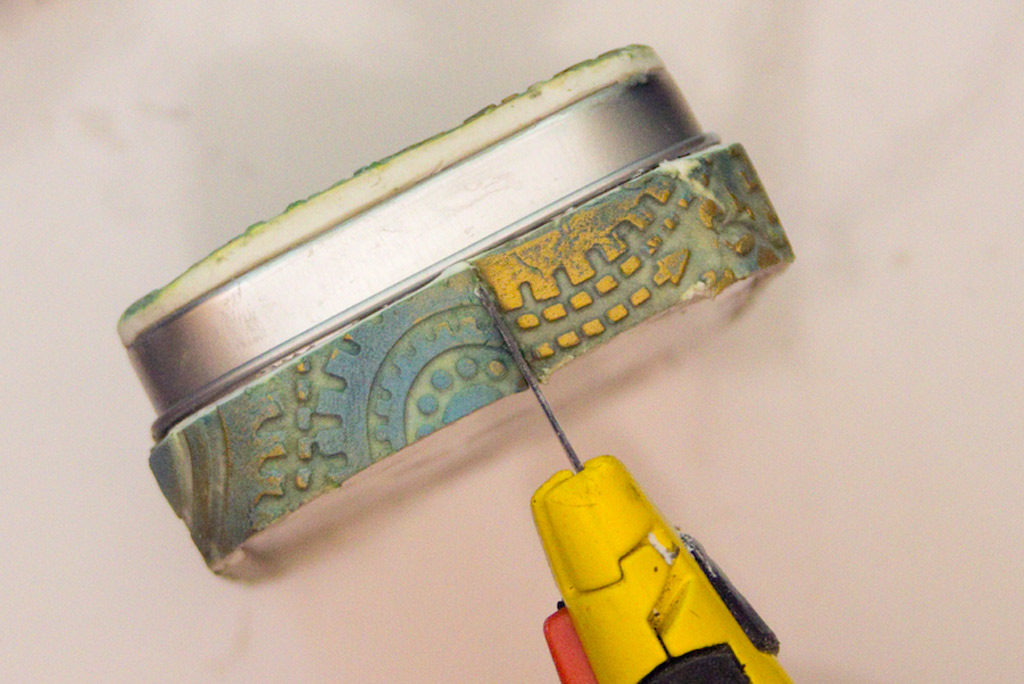
Wrap the Embossed Paper Clay Strip around the sides, and trim to fit.
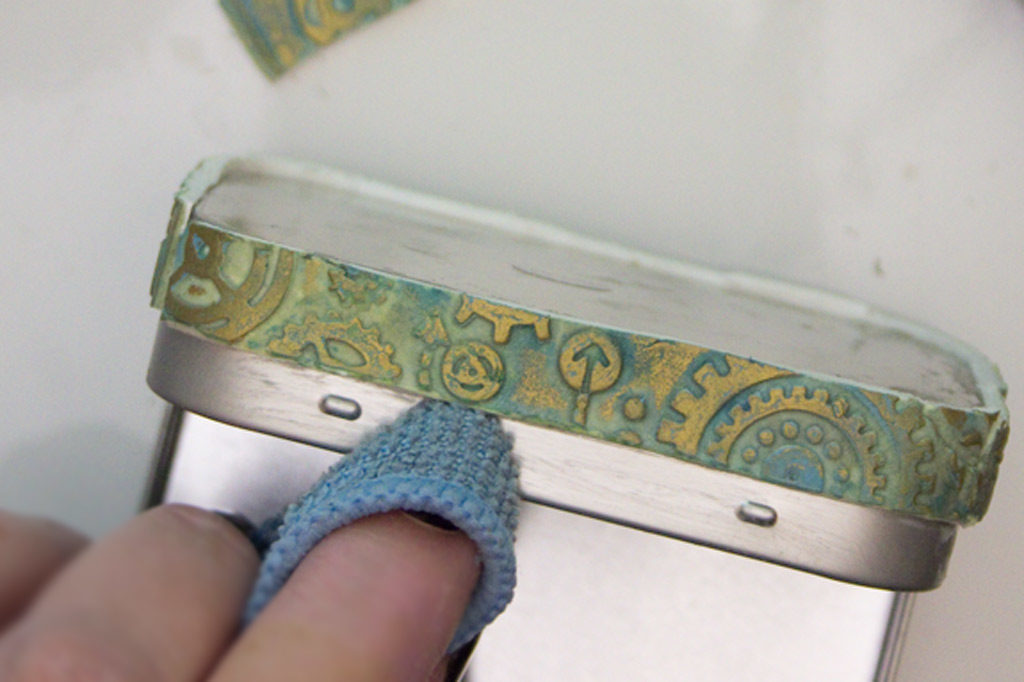
Use a dampened cloth to firmly wipe away any adhesive that has transferred to the bare metal.
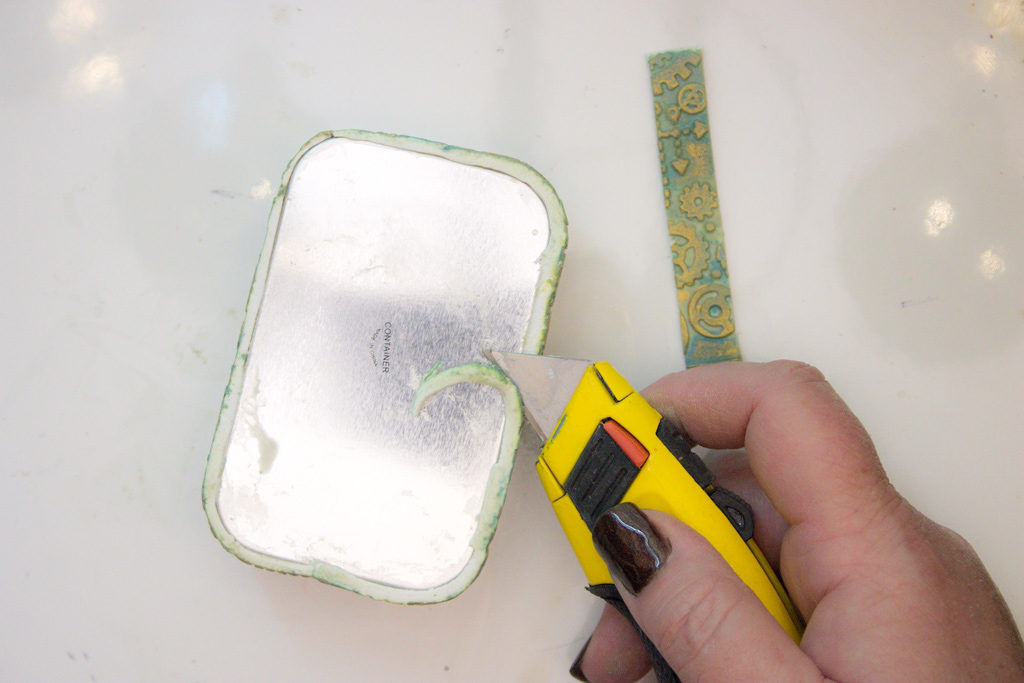
Trim the bottom of the piece flat with a sharp blade.
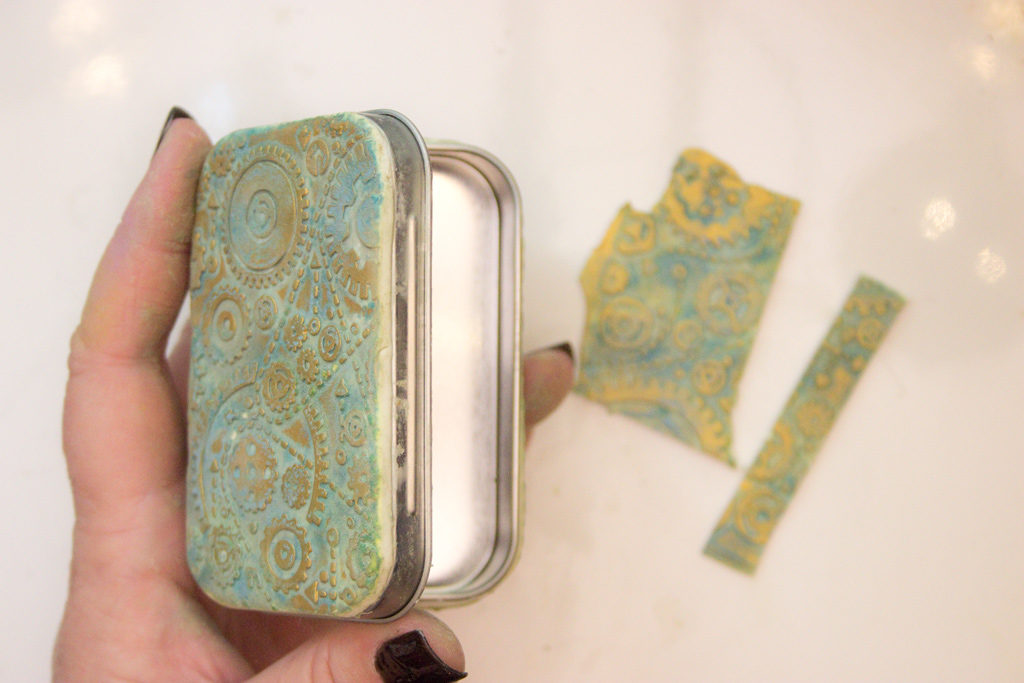
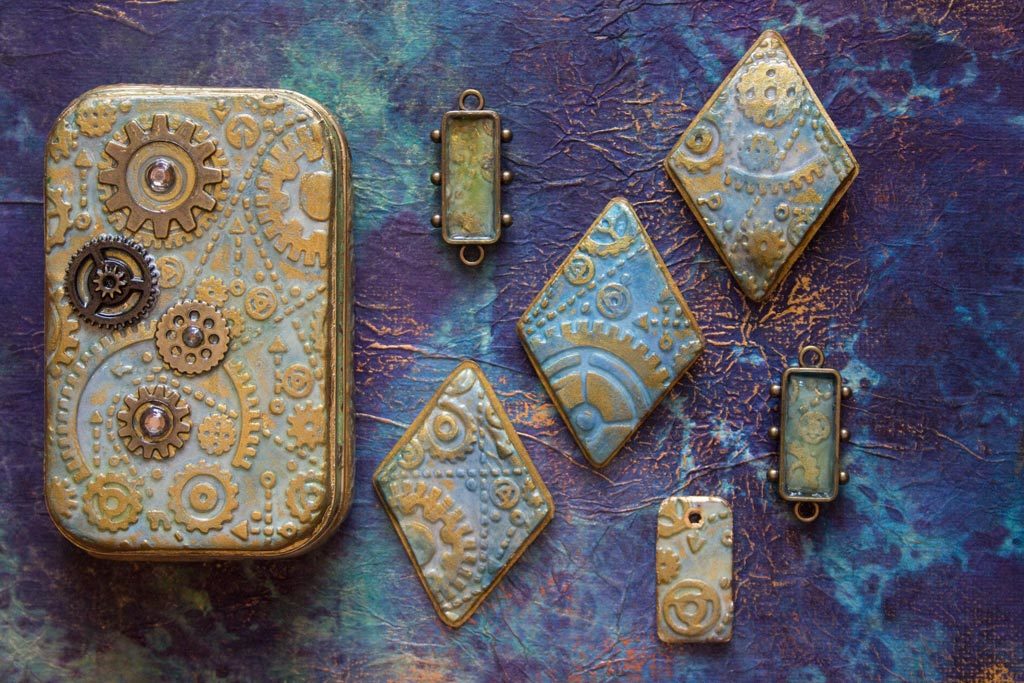
And that completes the Embossed Paper Clay panels on this piece!
Embellish and tint the remaining surfaces to your heart’s content…
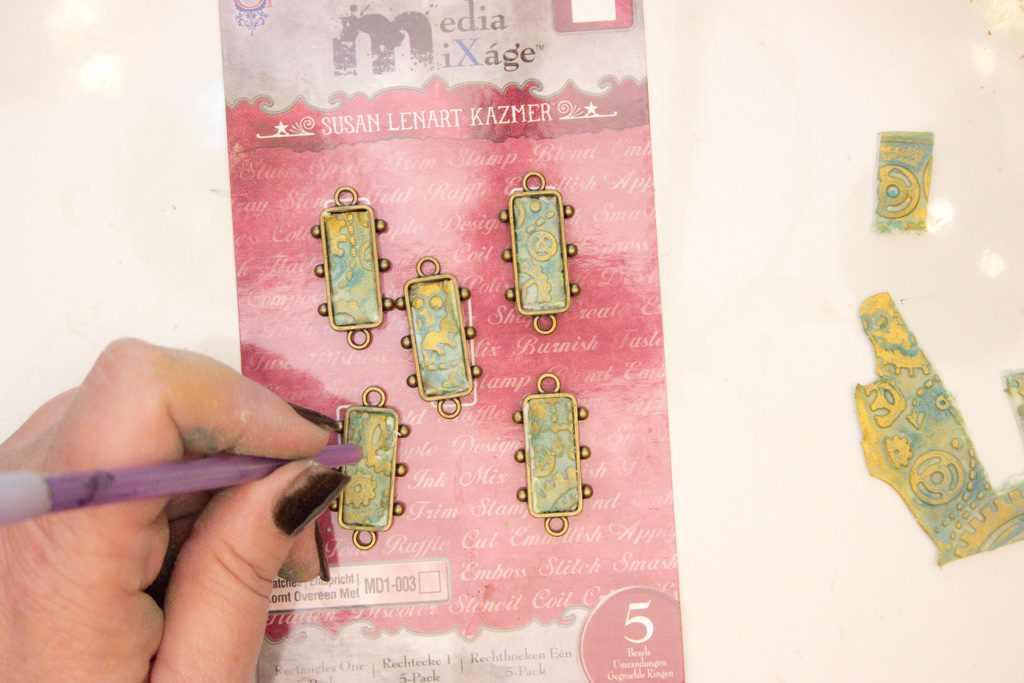
Create jewelry components with the scraps of Embossed Paper Clay that remain!
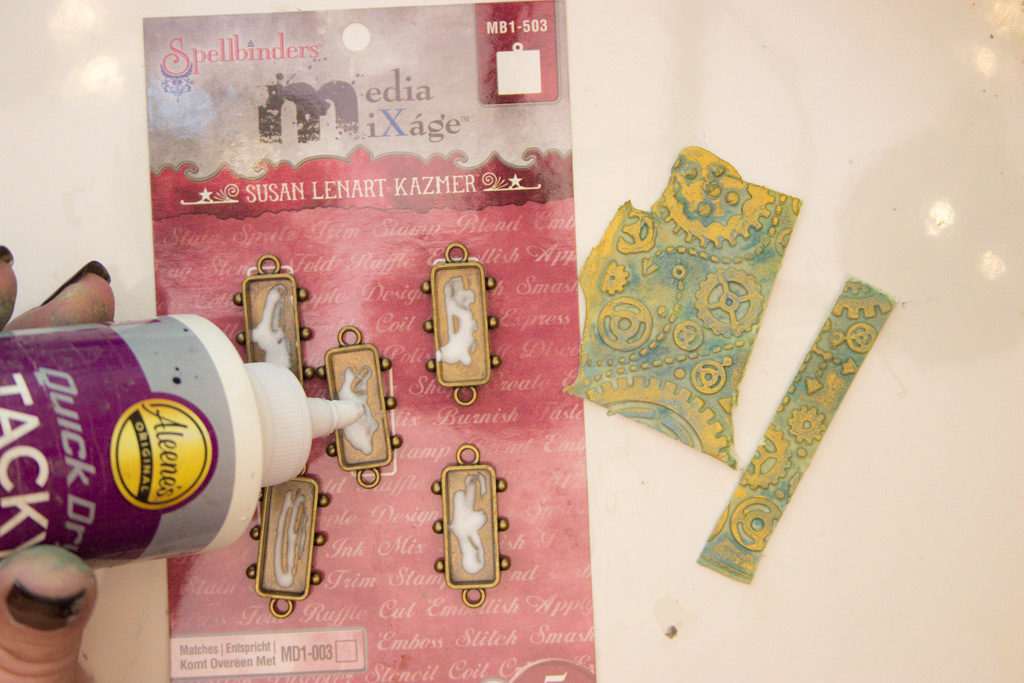
Apply Aleene’s Quick Dry Tacky Glue to the bottom of your chosen bezels:
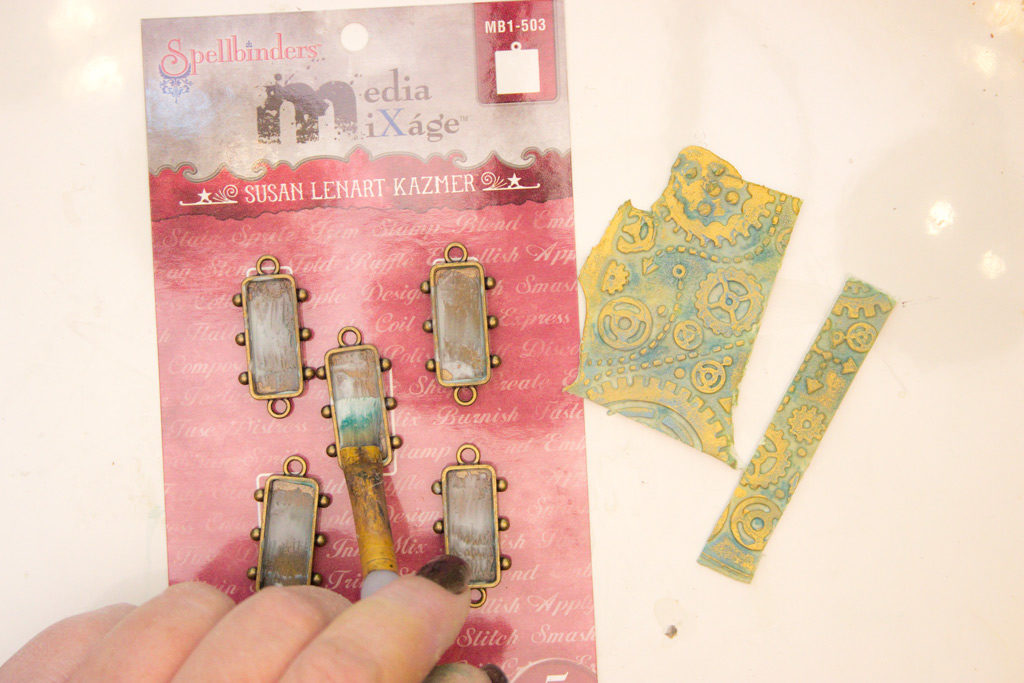
Smooth the adhesive with a dampened flat bristle brush:
Cut the scraps of Embossed Paper Clay to fit within the bezels…then firmly press them against the adhesive coated base.
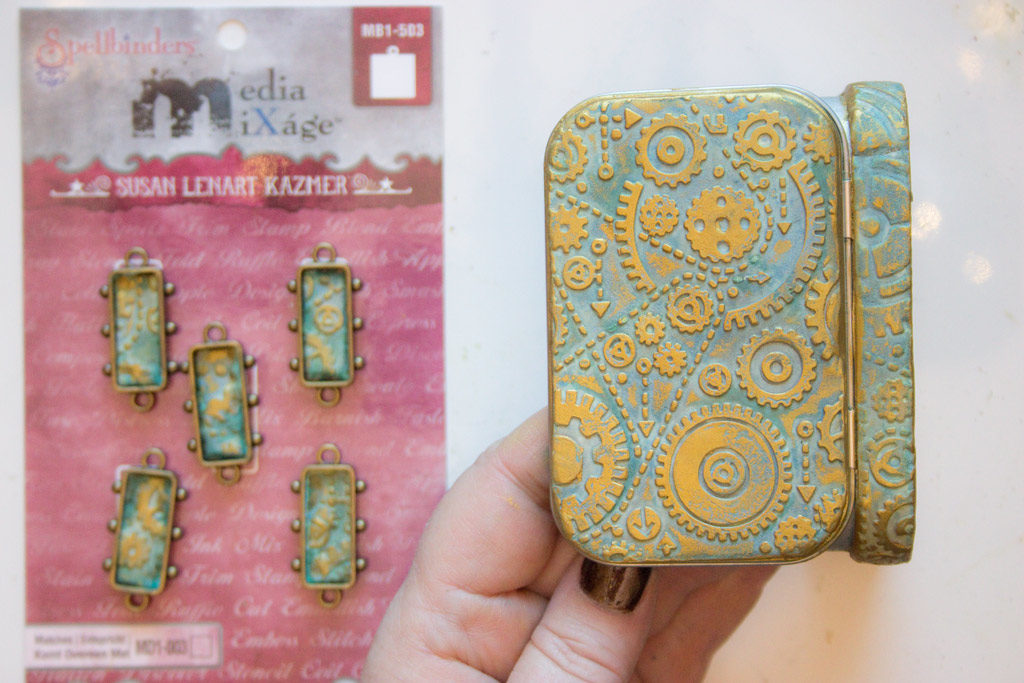
Looking good so far!
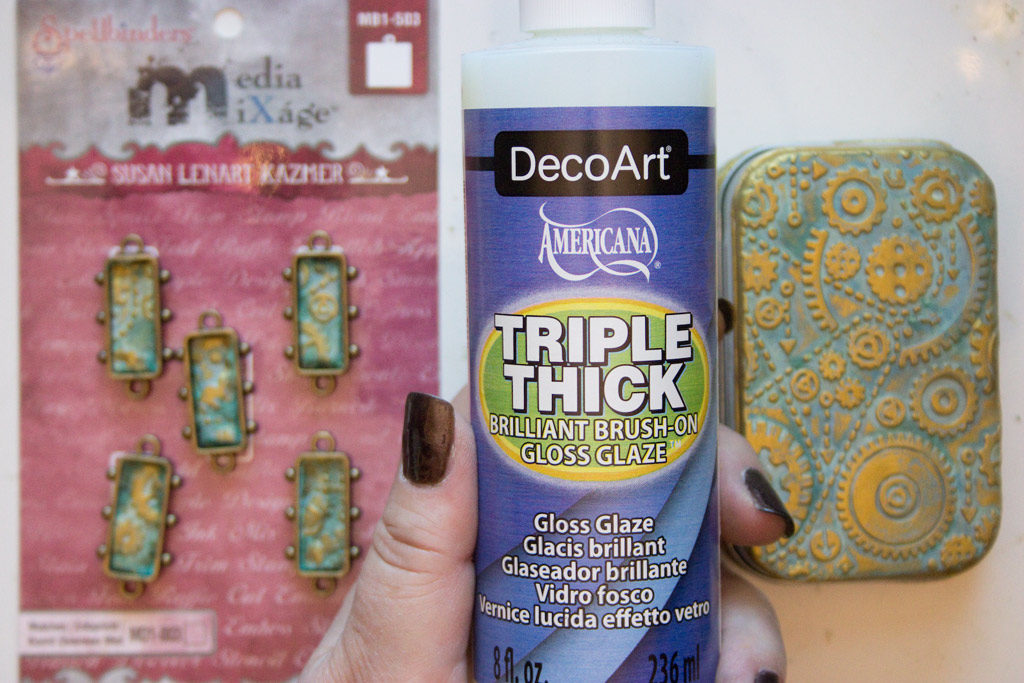
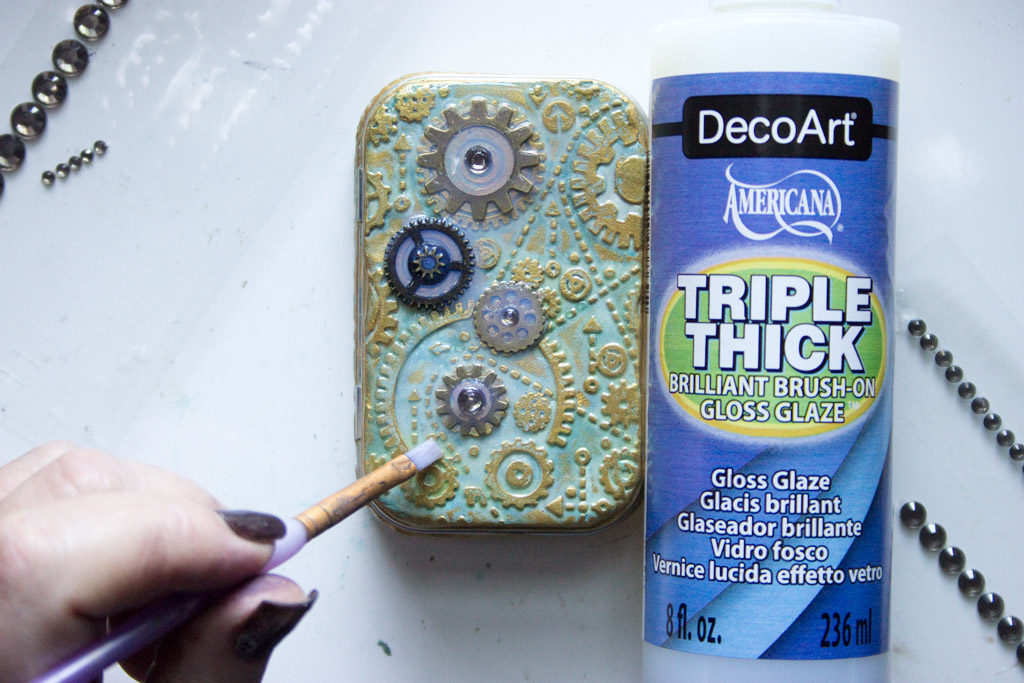
Reach for Triple Thick to add a crystal clear and sturdy layer of protection over your Altered Tin & to fill the bezels!
Note: we are STILL working with the Paper Clay while it has not fully dried – and that’s okay!
Thus the Outlaw reference to this method…it breaks the ‘rules’!
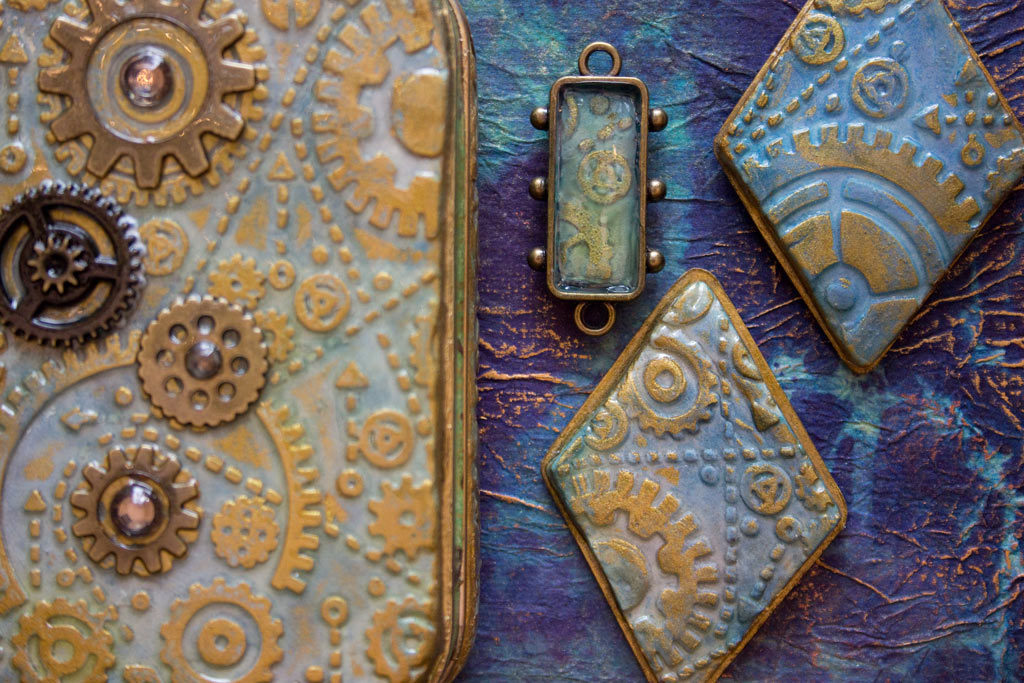
Add Gears, Cogs & Rhinestones if you wish…then seal them in with a generous layer of Triple Thick.
Note: even though this entire process was completed prior to the Paper Clay curing – there were NO cracks or warping in the final, hard cured finished piece! Yay!
Fill the bezels with Triple Thick!
It will remain ‘milky’ for several days – but not to worry – the haze will dissipate, and they will cure to a crystal clear finish!
Note: it can be easier to work with the bezels while they remain attached to the packaging. Just remove them once the items have cured!
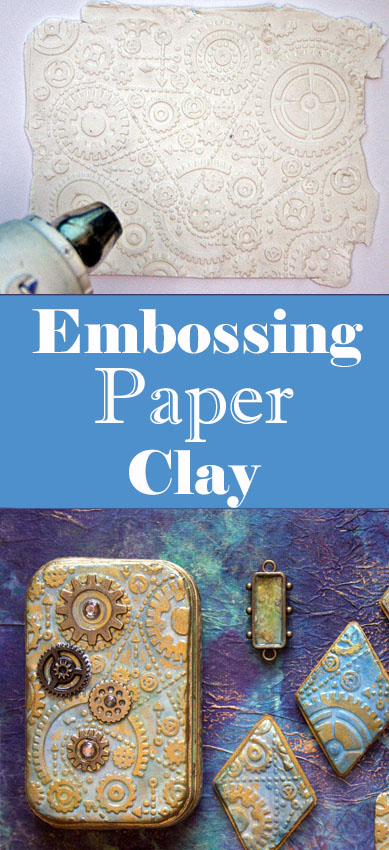
The final results are richly textured, tinted with a complex mixture of pigments, and ready to assemble into a gift for a dear friend!
Working with Paper Clay is fun and easy – and the resulting pieces are not as fragile as you might imagine…once coated with Triple Thick, these pieces have the look, feel and sturdiness of Polymer Clay – without the need to bake!
I hope that you have found these Paper Clay Techniques useful – it can be applied to many different surfaces – working with the Embossed Paper Clay while it is still damp gives you endless flexibility in design! You might also like the Easy Paper Clay Recipe HERE.
Thank you for visiting The Graphics Fairy today!
Come see me on my blog Thicketworks,
Heather


Erin Winslow says
Thank you a millions times over for this tutorial! I’ve been meaning to try this sort of thing for a while and now, with step-by-step instructions, I have the courage to do so. 🙂
graphicsfairy says
That is awesome Erin, I am sure you will do an amazing job, enjoy!!
Julie says
Could you seal this with something else, like a satin varnish?
Heather Tracy says
Absolutely, Julie. The important thing is just to get it sealed – use whatever materials you prefer. xox
Rupa says
Oh, I meant to ask if we could just covered the non-clay covered tin parts with alcohol inks? This to me would be an easy way to cover the tin without having to deal with clay near the hinges etc and still close the box easily? Thanks!
Heather Tracy says
See – you already knew one of the ways that I would approach this, Rupa! Alcohol Inks are a wonderful way to tint the metal without interfering with the functioning of the hinges. Woo hoo! xox
Rupa says
Heather, I am just catching up on GF posts now. Your technique is just amazing! It’s simple and yet, only your genius brain could’ve conceived this idea and explained it so well. You have no idea how many of us have learned so much from you and expanded our skills in so many ways. I don’t know what we would do without you. I keep going back to that same feeling I had the first time ever I encountered your post/blog. Just the uncolored clay looks so gorgeous! Even the choice of your embossing folders/colors are so fantastic every time. Thank you, thank you, thank you to the queen of techniques!! I do have two questions: can we use distress inks instead of oxides although they have slightly diff properties? I don’t have oxides and don’t want to buy them till I use more of my DIs I already have. Also, I see that you covered the top cover and the sides of the bottom with the clay. How about the sides of the top lid? Covering the entire sides of the bottom wouldn’t allow you to close the lid I presume? I seem to need to know the details, I am like that, sorry 🙂
Heather Tracy says
Hi Rupa! You do me too much honor, my wonderful friend…and I love you for it! Okay, now let’s get to those questions:
1- Yes! You can totally use Distress Inks for this technique. Oxides not required!
2- In an effort to keep the weight down, AND to ensure that the lid closes correctly, I ended up covering the areas NOT covered by paper clay with handmade background papers in a harmonious color palette. I just cut a strip for the edge of the lid, and a panel that fit over the bottom. Looks beautifully finished, and was coated with Triple Thick, too.
2a- Alcohol Inks will tint the exposed metal if you like, too!
Thank you for making me BLUSH with happy, my friend! xox
Rupa says
Thank you for always taking the time to answer any number of questions raised by everyone! You are an angel, yes you are!!
Heather Tracy says
Rupa! Takes one to know one, my darling friend. xox
Meg says
Fantastic project Heather – thank you so much. You are amazing
Did your MM course 1 & loved it
Heather Tracy says
Hi Meg! Yay! I’m so happy that you enjoyed Mixed Media for Beginners – that makes my heart sing, my friend. Glad you like this one – hope it’s useful! xox
Carmen says
Hello, gorgeous technique, my question is I can use it on leathers, thanks
Heather Tracy says
Hello Carmen – Thank you, my friend. Because the paper clay will become brittle once it cures, it’s not suitable for applying to leather. But there are wonderful leather embossing techniques – if you search Google or YouTube you should find some fabulous ideas! xox
Eileen says
Wonderful project and directions! Thank you, Heather and Melissa.
Heather Tracy says
Hi Eileen! We’re glad you like it – thank you for your kind words – Karen will be pleased (I think that’s who you mean: The Graphics Fairy) xox
Hellen Edwards says
OMG—what a gorgeous project–can`t wait to try it- -tomorrow. Off to my warm little bed now and very sleepy. Thankyou Heather.xxx
Heather Tracy says
Sleep well, Hellen! I do hope you’ll enjoy this technique. It’s one of my favorites…xox
Julie Lee says
What a great idea! I actually have all the tools and materials to do this! Yippeee! It looks great and you have explained it so clearly. I will be giving this a go soon! xx
Heather Tracy says
Hello Julie Ann! Isn’t it fun when we realize we have all the ‘stuff’ for a new technique? Yay! I know you’ll make magic, my friend. xox
Rosemary says
You did it again such clear instructions
And a great project to inspire us with. Thanks for sharing it.
Amazing lady.
Heather Tracy says
Well, Hello! It’s Rose Mary! I’m so glad that this looks useful to you…I have such fun with it, I hoped others would too! Thank you for being so kind, my friend. xox
Daphne says
I will never again have to worry about where to find another project idea. All I have to do, Heather, my dear, is look at your techniques and a new idea pops into my head! Now I just need to find some time to try all these wonderful projects! Thank you!!!
Heather Tracy says
Hello, Daphne! How lovely of you to stop by The Graphics Fairy – thank you! And I’m of the belief that we are here to inspire each other, in whatever way comes most naturally…you inspire me, and I’m so happy to return the favor. xox
Beth Norman says
Wow, what a wonderful project. I’m definitely going to try it.
Heather Tracy says
Hi Beth! Yay! I hope you enjoy it as much as I do…so much complex texture for such a small investment of time and energy – a lazy girl like me really appreciates how easy this is! xox
Gunnvor Karita says
Dear Heather!
I can only second Linda’s comment above! You continue to present us with such fabulous options, I’m fully indulging in the luxury of being super-inspired and backlogged on projects…lol Thank you as always for sharing your amazing ideas and creative projects 😀 😀 😀
Love&Light
Gunnvor Karita
Heather Tracy says
Hi Gunnvor! It’s lovely to hear from you, my friend…it makes my heart sing to think that I’ve helped inspire you. Sharing is my joy! xox
Linda Knox says
ErrrrT! Now how can I complete my Mixed Media project when you keep posting these wonderful ideas for me to start working on? Come on now girlfriend 🙂
Heather Tracy says
You crack me up, Linda! Never enough hours in the day, are there, my friend! But this one is quick – I’m sure you can sneak it into your schedule somewhere…xox
Dorthe Hansen says
Dear Heather, what a stunning box, and bezels, you are creating so beautiful pieces, and so extraordinaire , too. This technique surely gives stunning results, Thank you , dear. <3
Heather Tracy says
Hi Dorthe! For such a simple process, the results can be quite complex…thank you for being so kind, my friend. I hope you find it useful someday. xox