Embossing with Toilet Paper
Hello my sweet paper crafters. It’s Rebecca back today with a super easy and oh so fun Mixed Media technique tutorial – Embossing with Toilet Paper! Who knew we could use Toilet Paper as a mixed media tool? Embossing folders have always added wow to any of our junk journals, books, card making, scrapbooking, and every other art and craft that we enjoy here on The Graphics Fairy. The TP looks and feels like a high end fabric… soft and flexible. It reminds me of fine, embroidered Irish linen that has been starched to perfection! I hope you enjoy this embossed paper tutorial with TP. And PS you can Emboss paper without a machine… I’ll show you how at the bottom of this post.
Who Knew Toilet Paper Could be so Pretty?
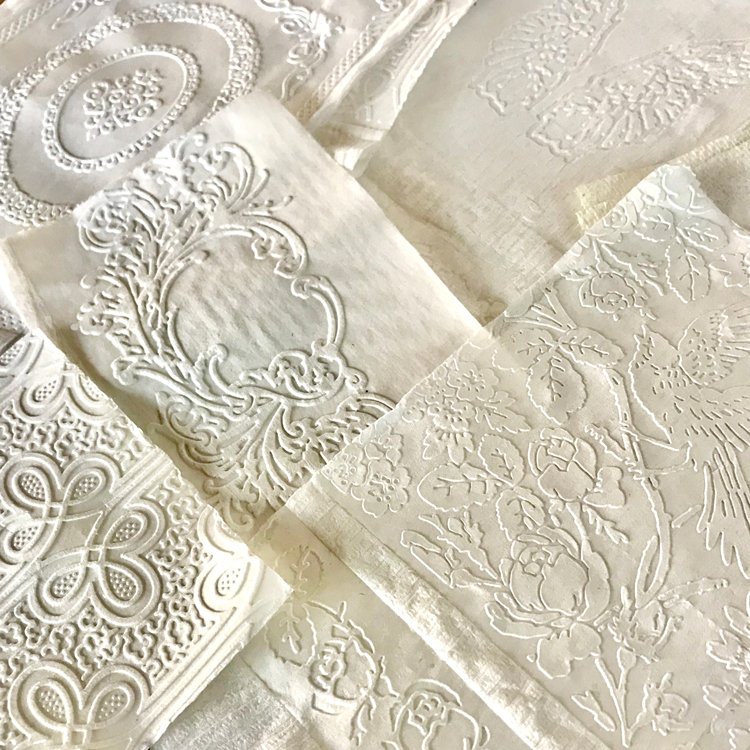
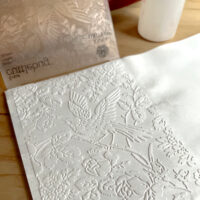
Embossing with Toilet Paper is one of those magical techniques that you could do for hours and still be delighted! You really must do it to believe how gorgeous these images are. I love the simple look of the plain white toilet paper with an embossed pattern.
How can you use these Embossed Papers?
The toilet paper molds so easily to embossing folders. These little wonders would be so pretty as a background page in a junk journal or on the front of a handmade card. You could also use them in a Collage or Mixed Media type art project. Who knew?
Supplies
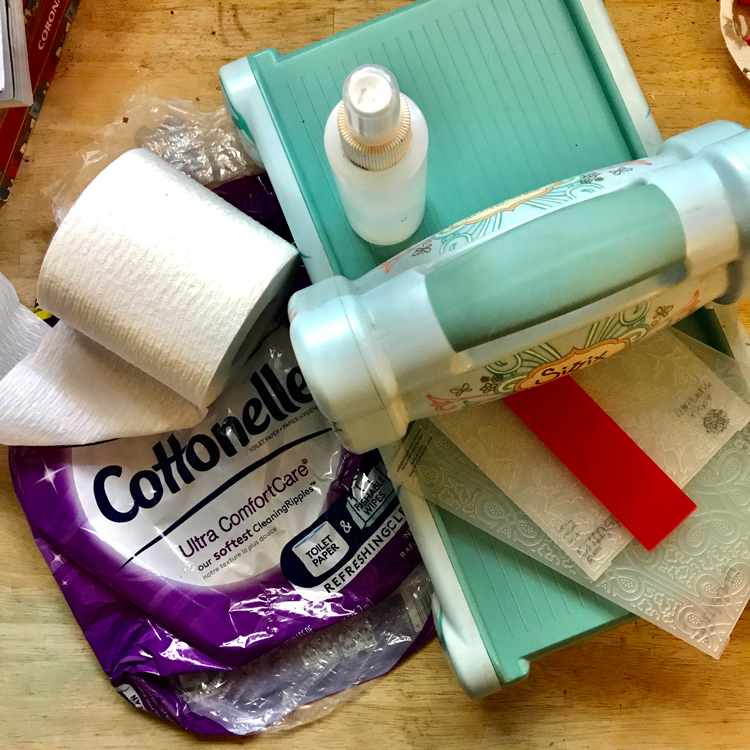
Toilet Paper – any kind. I use Cottonelle® Ultra Comfort Care
Embossing Folders – all seem to work
Spray Mist bottle of water
Embossing Machine
Step-by-Step Directions
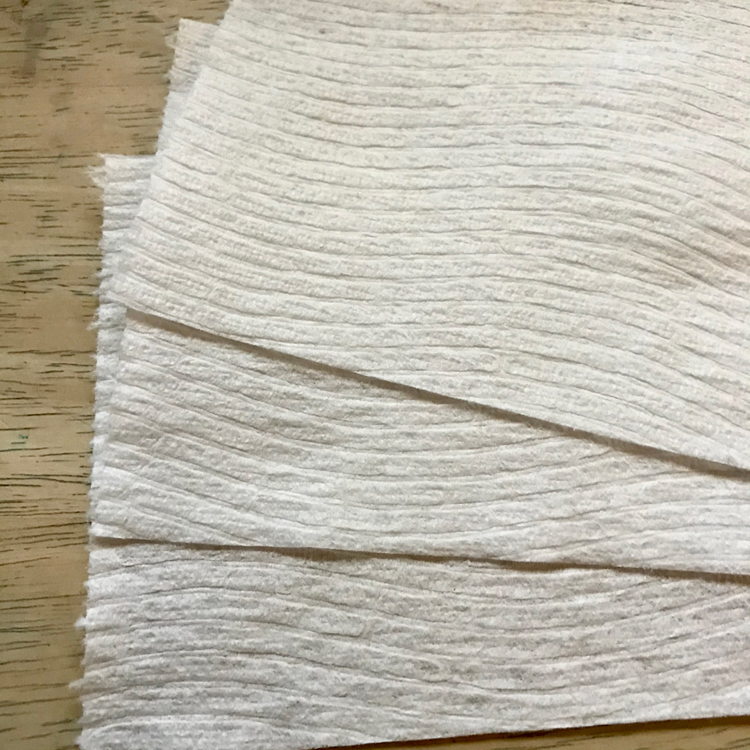
A word about brand of toilet paper. I assume that any brand will work. For this article, I used Cottonelle® with ripples. It is 2-ply. I also tested paper towels and white high-quality napkins as well. They all worked beautifully. I love the Cottonelle because it is thick, super soft, and the results blew me away!! At first, I was concerned that the ripples would be a problem. However, they disappeared and I believe that they actually added an element of texture to the overall look of the embossed toilet paper images. Wait until you see below!!
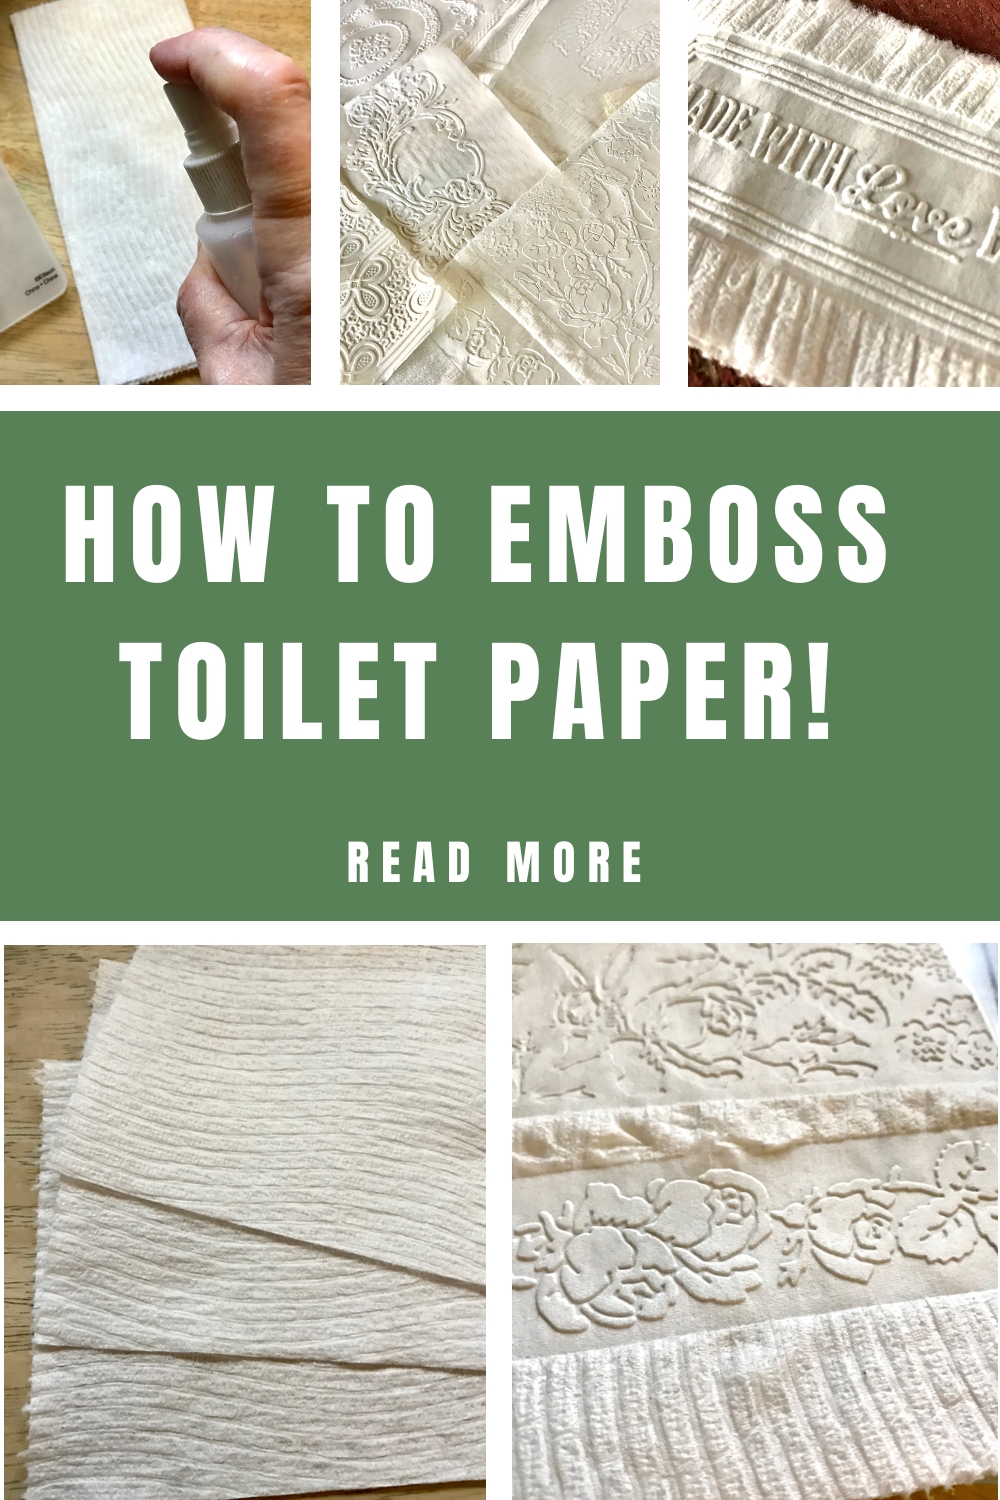
Step 1 – Prep the Toilet Paper: Tear toilet paper into strips of three squares. You can do any size, but this length fits most of my embossing folders. Use your best judgement for fit.
Step 2 – Layer the TP: I found that three layers of the 2-ply TP was ideal for my projects. You can also use two layers for a nice look as well. The 2 layer image is a little less sturdy, so it may be good for some applications.
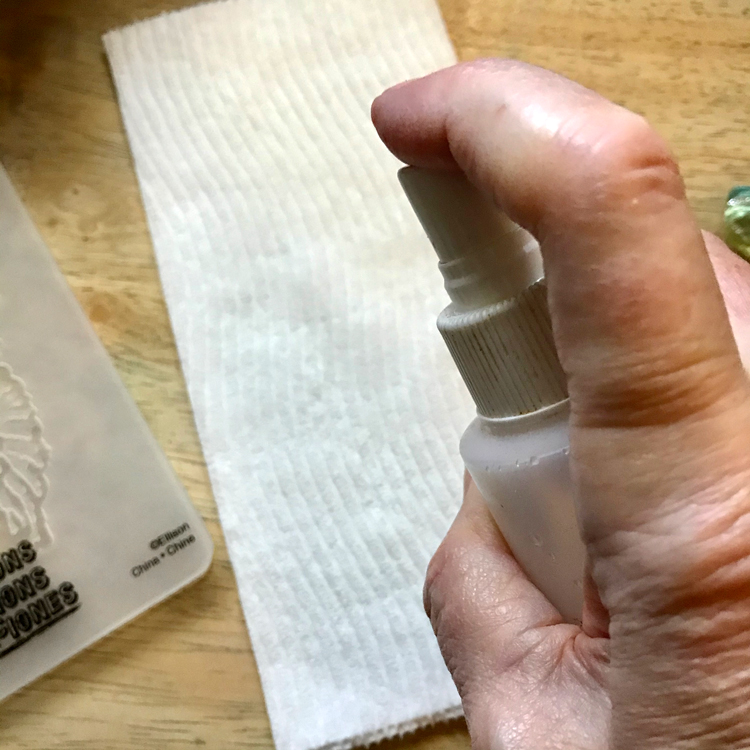
Step 3 – Mist the Toilet Paper: I have a fine mister. I found that 3-5 squirts of water on each side was good for moistening the TP. You want it slightly damp, not dripping wet! It can tear if too wet.
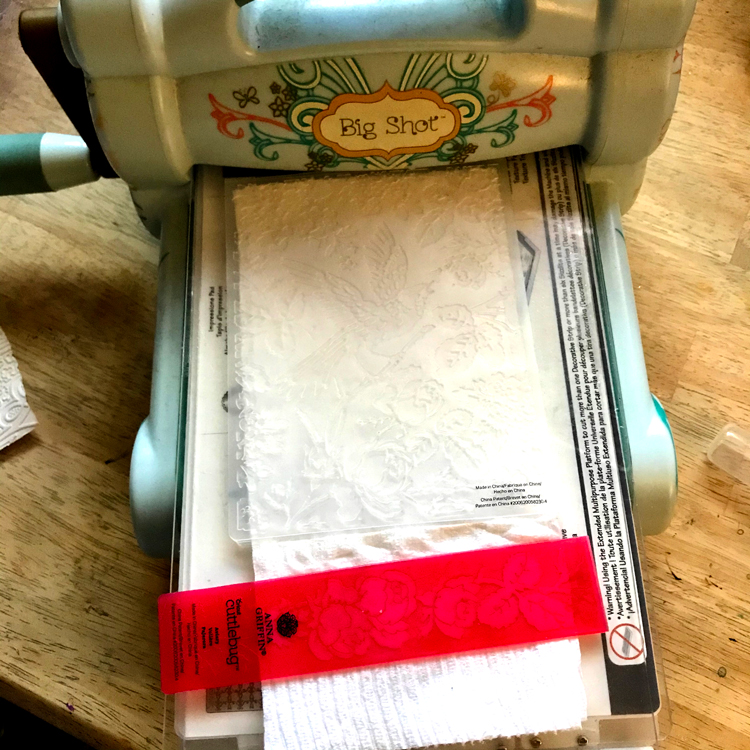
Step 4 – Embossing: Lay the damp TP into an embossing folder and close it. Place it between the layers of acetate and run it through your Embossing and Die Cut Machine. There are so many different machines out there today. I have a Sizzix® Big Shot Pro, a CuddleBug®, and Sidekick®. Others are Gemini, Anna Griffin, Tim Holtz, Spellbinders, and Evolution, to name a few. Let the embossed images air dry. It takes 15-30 minutes typically. TIP: As you see below, I used 2 folders at once so I would not waste any of the TP.
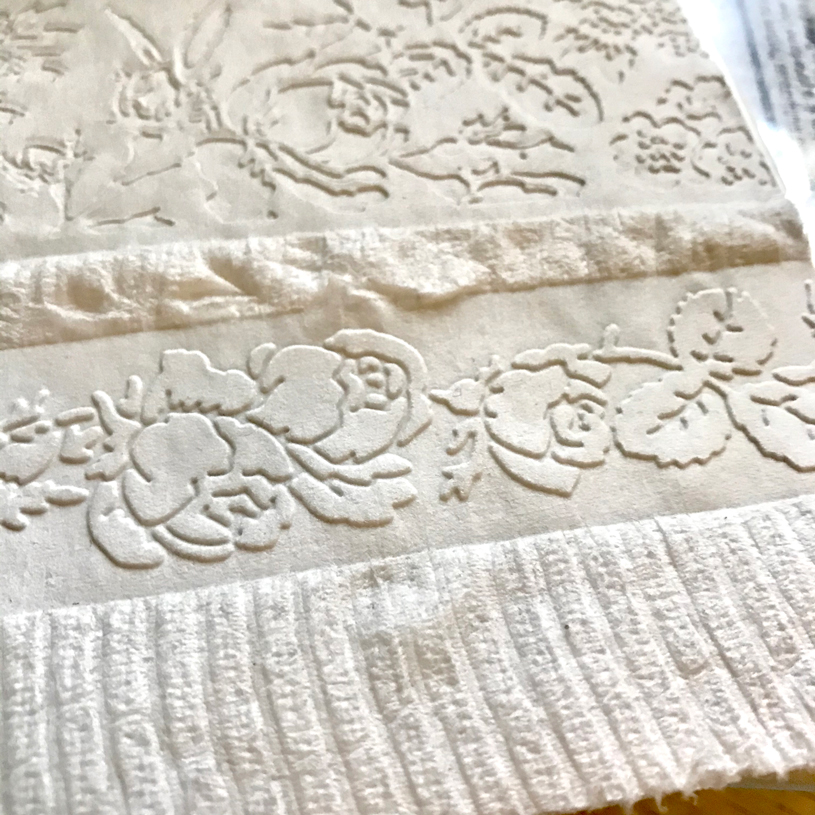
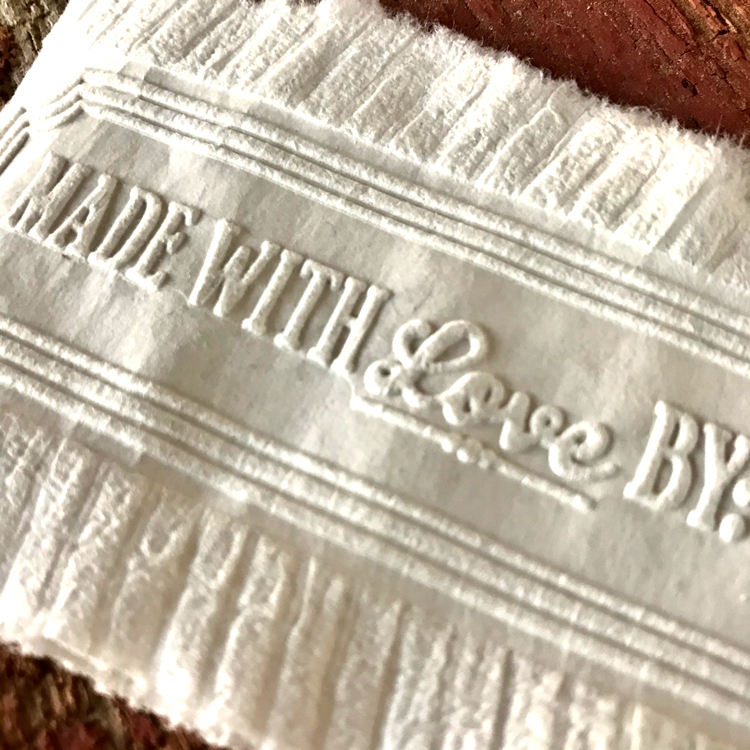
The stamped Toilet paper embossed like a dream. Here you can see the deboss side on the top section and the embossed side at the bottom. See how lovely the piece is with the ripples in between? SWOON! This look was a happy accident. I was pleasantly surprised and have so many ideas for using this look!
Letters and words emboss beautifully as well.
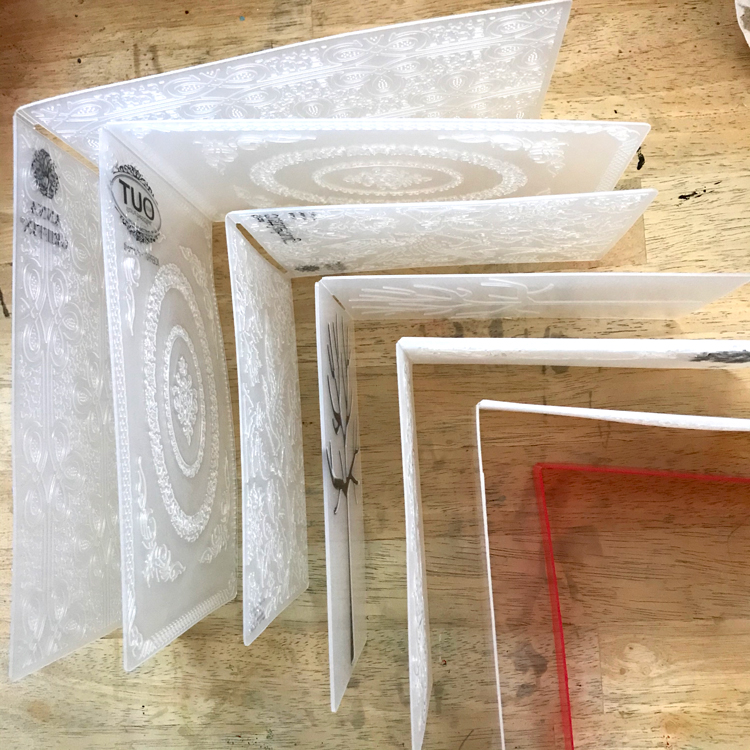
Allow the embossing folders to dry before putting them away. I stand mine up like this:
How to Emboss Paper without a Machine
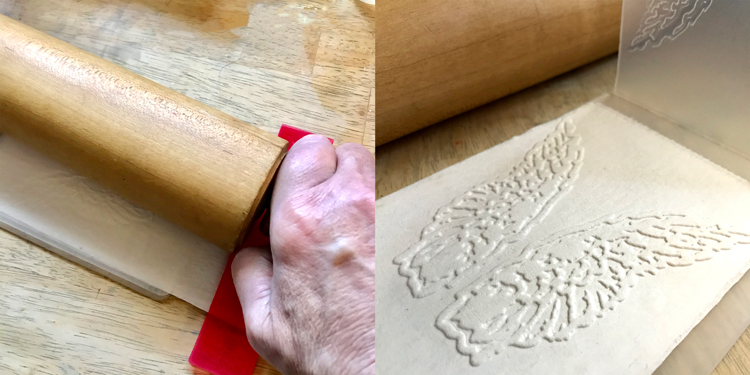
Did you know you could emboss paper without even owning an embossing Machine. Well you can with a rolling pin! Yep! It works almost as well, depending on how strong you are! HA HA I have pretty weak hands and you can see my results at the right!!
Finishing Options
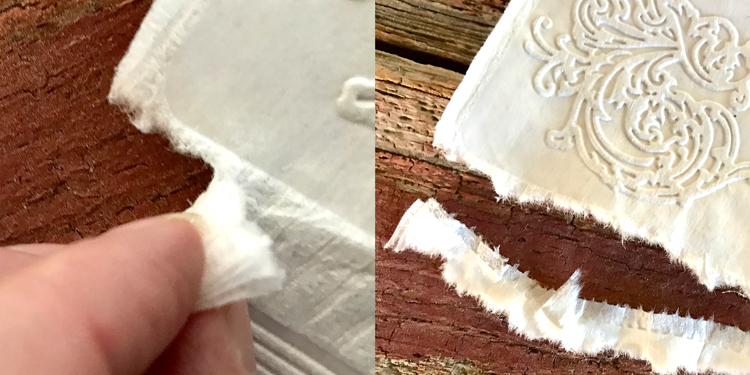
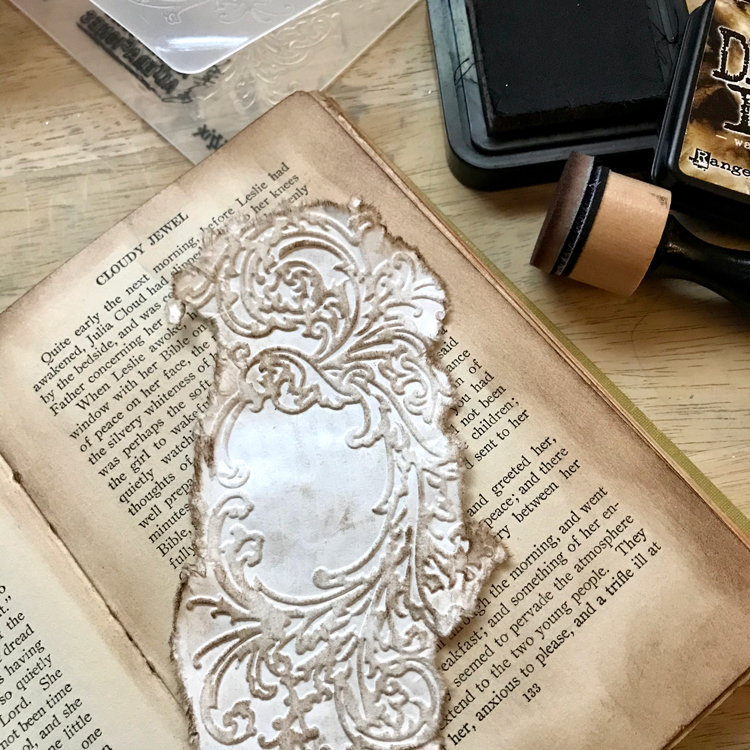
When you finish embossing with toilet paper, you can punch it, die cut it, framelit it, and more. The edges can be torn beautifully. TIP: Don’t throw that torn piece away. It can be used to embellish!!
You can also stain, paint, distress (age), and ink them.
I hope that you had fun learning How to Emboss Toilet Paper with me!! When I am not exploring with new and old Techniques for Mixed Media in my Graphics Fairy sandbox, I also create Photoshop Elements tutorials and craft project videos over on The Graphics Fairy Premium Membership site. You can find even more of my books, junk journals, mixed media art, classes, and whimsical shenanigans on Rebecca E Parsons Dot Com.



Cate says
Thanks. Sorry for the naive question. But that’s what life is about–search, participate and succeed. Thanks for responding.
Karen Watson says
No worries Cate! We’re always happy to help with questions! 😊
carole neider says
Rolling pin and TP. I have those!
Karen Watson says
Woohoo! Sounds like you’re ready to get crafting Carole!
Marilyn Austin says
What an unique idea!! I’ve got ideas flowing. You could mount on signs, add a simple word and use as a wall hanger, put on a card, spray with water color, spray with a sealer, … can’t wait to try. Thank you so much for this idea. Marilyn Austin, Milton, FL
Karen Watson says
Hi Marilyn, Yes, those are all great ideas! Have fun creating with TP!
Gen says
This is a wonderful idea. Here in Australia there has been panic buying of toilet paper(!), so I will have to wait to try this out!!!
Karen Watson says
Oh my, I had no idea! I hope they stock you guys back up soon.
Cate says
WOW! I never heard of this before nor did I know about embossing machines. Silly question, but how do you get a text for a sentiment?
Rebecca E. Parsons says
Hi Cate. There are thousands of embossing folders on the market today. They have so many phrases that you should be able to find some that you like.
Marina says
I guess you would have to make your own.
There is a website Avery where you can create and print out yourself any label, sentiment or address free of charge. And just glue it to your creation as you would do on any paper.
Have fun.
Yolande Bergeron says
OH!la la, que c’est beau.
What a beautiful finish. I was wondering, would the sheet of TP will separate after a while? Merci for this tutorial.
I enjoy your weekly blog very much.
Yolande
Rebecca E. Parsons says
Dear Yolande…I don’t think it could separate after embossed. It really gets smashed together in the machine. I think it would tear before it separated! Glad you like the tutorial. Hope you try it.
Wanda Liliedahl says
TP embossing is so unique. I did machine embroidery tp. When I read this on my forum, I thought those women were crazy, using TP to embroider on it. Next, I found myself in Walmart sorting through TP. I waited until my husband was gone and tried it and make tons of embroidered TP which sold easily at work. I handed words as requested. So now, seeing the embossed tp is so neat….what will creatives think of next?
Karen Watson says
Hi Wanda, wow that’s so cool! I have not heard of the embroidery tp technique, I will have to look into that. Thanks for sharing!
Rebecca E. Parsons says
WOW! Actually embroidering TP sounds fascinating! I will have to give that a go! Does the TP dust up the gears easily?
JoAnne says
Thanks for the tutorial! How would you attach these to a card?
Rebecca E. Parsons says
Hi Joanne. I would treat these just the same way you do with bulky embellishments. Glue, glue dots, etc. should work well. I use Fabri Tac for adhering mine!!
Sue says
I never would have thought to try toilet paper! Great tip and wow, it looks soooo good. 🙂 Thank you for sharing! and also thank you to Lis for the tip on plain napkins too. 🙂
Karen Watson says
Have fun embossing your household papers Sue! 😀
Rebecca E. Parsons says
Hi Sue. Glad you have found a new way to play! Yes, I tested napkins and paper towels. I do prefer the Cottonelle® TP the best!!
Penny says
How elegant this is! Simply gorgeous! I’ll never look at toilet paper the same way again! Thank you so much!
Karen Watson says
Elegant is the perfect word Penny!
Rebecca E. Parsons says
Ha Ha Penny. I guess I won’t either!! I hope you have fun with this technique!
Susan Tipton says
Interesting technique and your examples look beautiful but I don’t understand what you mean where you said to put the listed TP in the embossing folder then place it between layers of acetate and run it through the machine. Where do you put the acetate? Thank you.
Rebecca E. Parsons says
Hi Susan. The acetate sheets come with an embossing machine. They surround the embossing folders to make it the right height to perform the task. If you are embossing with a rolling pin, you would not use acetate.
Me says
So you emboss the TP then what? Lay it around the house. I do not get it. I can see if you can do a whole roll of TP without tearing it off. That would be real pretty in a bathroom. Doing napkins would be awesome for guests to use but TP why? Thanks the embossing does look beautiful
Karen Watson says
Hi there, no it’s not for toilet use! It’s for crafts. It changes the texture of the TP and makes it more durable. Then you have beautiful textured paper that you can add to the front of a card, or to an Art Journal etc.
Debbie Vernor says
Was wondering if you could mod podge the embossed tp to a surface??
Karen Watson says
Debbie, give it a try and let us know the results! The materials are cheap at least, so worth experimenting with. Melody, who also posted here used a glaze medium on hers, which made it hard and shiny and then she made earrings with it. So cool!
Rebecca E. Parsons says
Me. I use these the same way I use any embossed paper – in my journals, junk journals, cards, and art pieces. It makes lovely embellishments!!
Teddee Grace says
Wow! This is impressive and I love the fact that you have pointed out that you don’t need an embosser. Thanks for sharing this beautiful idea.
Karen Watson says
We’re glad you enjoyed this tutorial Teddee! Yes, you can definitely save some money, by just using a rolling pin instead of the embossing machine.
Rebecca E. Parsons says
I know Teddee. Embossing with a rolling pin is awesome. Wait until I share a trick for die cutting without a machine!! WINK!
Lis says
I played around last year with embossing t.p. But preferred 3-ply napkins the best. Once dry, I carefully hand painted them. First I put a layer of sealer on, then painted them. Then sealed. It was fun.
Yours are just beautiful. Great post, thanks so much.
Karen Watson says
Oh wow, thanks for the great tip Lis!
Rebecca E. Parsons says
Thank you Lis. I believe that the Cottonelle® is the most successful for the look and feel of fabric. I tried that napkins too. I would love to see yours!!
peggy gatto says
Just simply fantastic!! thank you! Love your blog too!
Karen Watson says
Thanks Peggy! It’s so cool, isn’t it?!
Rebecca E. Parsons says
Thank you Peggy!!