
How to Print on Tissue Paper
Hi everyone…how are you! It’s Andrea from The Cottage Market. It is always wonderful to see you here at The Graphics Fairy! Today we have a very simple but fun and very useful little tutorial. How to Print on Tissue Paper. There are so many things you can do with sheets of printed tissue paper…from personalizing wrapping paper for a pretty little present to decoupaging it on something special and having it be transparent and a million other things that I am sure you can think of. We will go over how to print and then next time we meet I will have some DIY’s with the printed tissue paper for you to get you started!
Supply List for Printing on Tissue Paper
Your supply list is very short. You need tape…an iron…standard computer paper…8 1/2″ x 11″ or 8 1/2″ x 14″ and then you need tissue paper …I just used the tissue paper you get in a big pack from the dollar store and cut it to 8″ x 10″ so I could safely attach the tissue paper to the computer paper. Of course you need a computer and printer also.
 DIY Tissue Paper Printing Tutorial
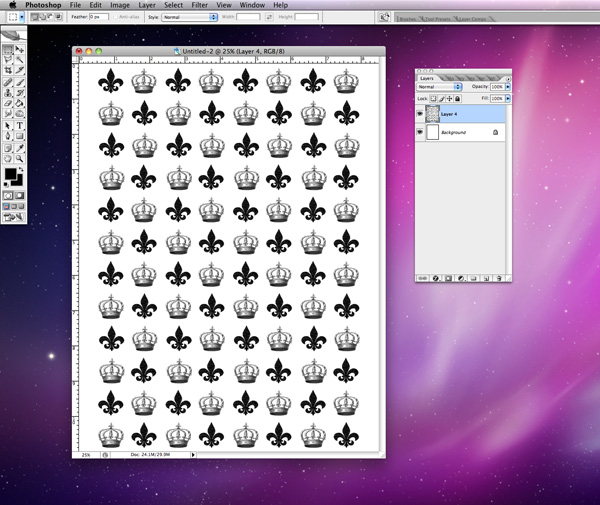
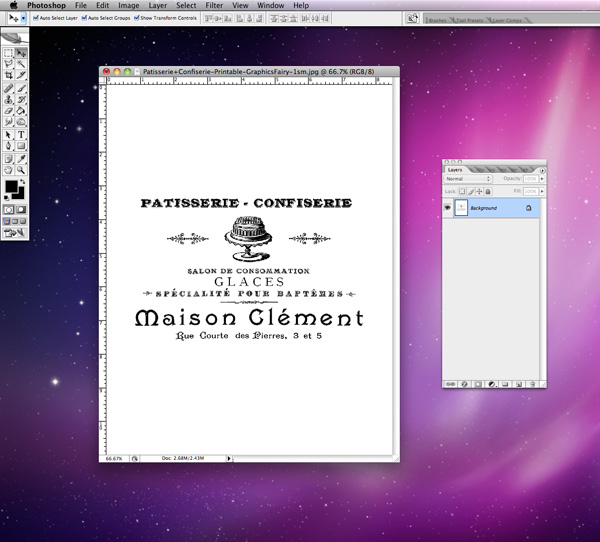
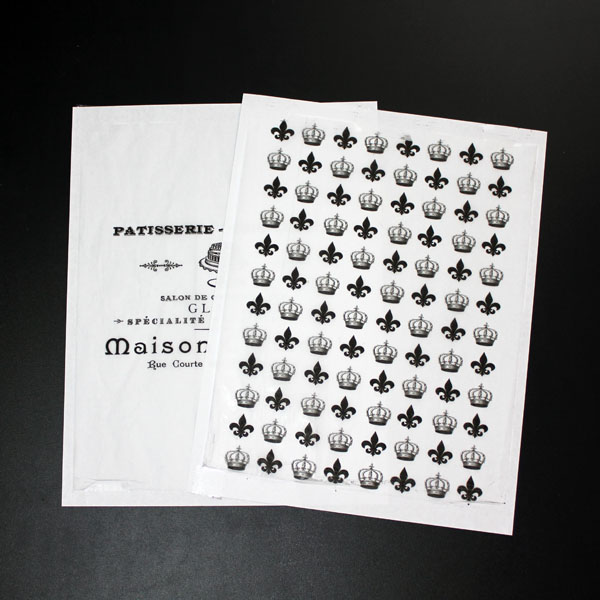
Now it is time to create your design…use your favorite computer paper and place the design you pick where you would like it on the tissue paper…you can also pic some images and make a pattern to cover the whole sheet! There are so many graphics and designs here at The Graphics Fairy you can come up with unbelievable creations!
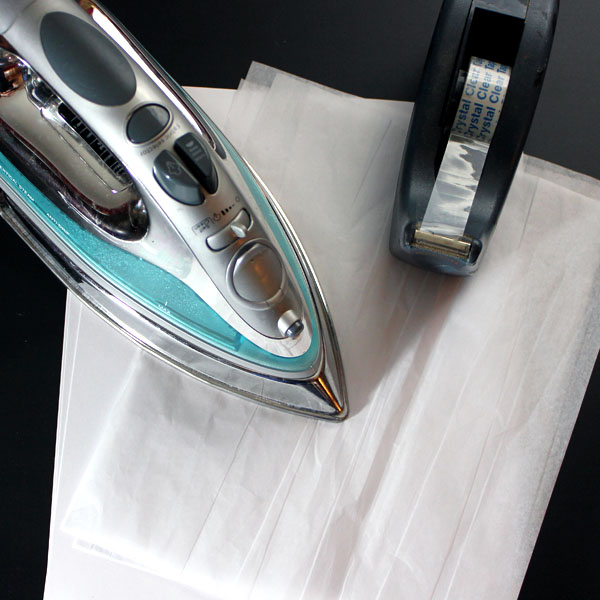
Now cut your tissue paper the size you need it to be and lightly iron it…you will never get it totally smooth…but you will want to take a few of the wrinkles out so it goes through the computer easily. Just remember to keep the iron on low so the steam does not automatically trigger! Remember…it will not be totally smooth…just a little precautionary measure.

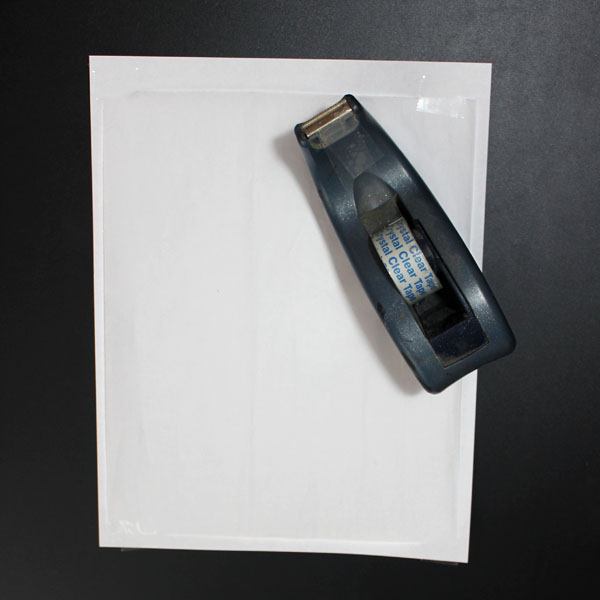
Then tape your tissue paper to the standard computer paper…make sure you smooth it out so there are not any bubbles. And tape secured on all 4 corners is a must.
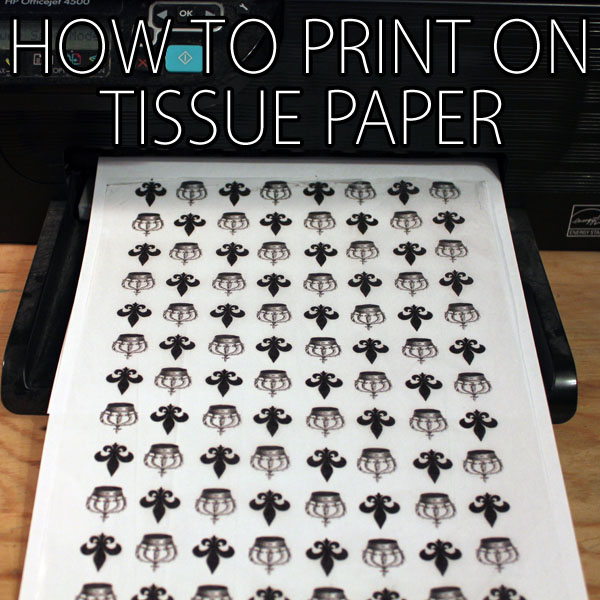
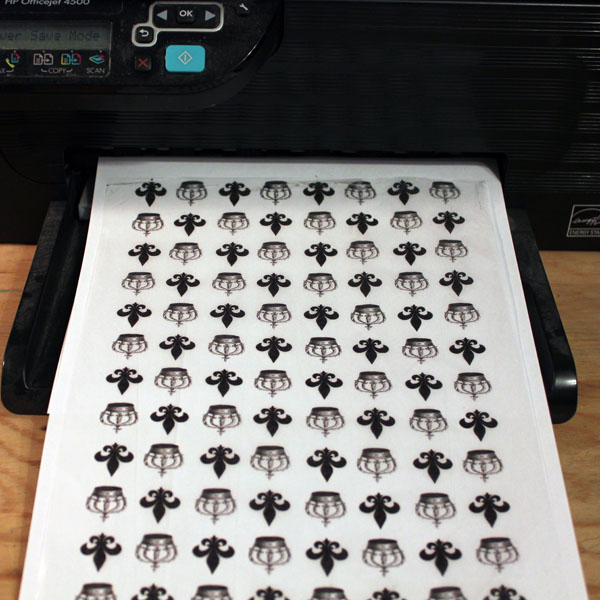
Then load your printer according to the type of printer you have and print! Make sure you remain by your printer in case you need to guide the paper out.
It’s that easy!
I sure hope you enjoy playing around with all the design possibilities and that you enjoyed learning how to print on Tissue paper! Think Napkin Decoupage that’s customized with your own designs! The beautiful Decoupages Coasters HERE are a great example.
Oh and in case you missed it…last time we went over How to Print on Brown Paper Bags! Also, be sure and check out How to Print on Fabric as well! And to learn about What Printers are the Best for Crafting click HERE, for an informative post! Is there anything you can think of that you would like to print on but you are not sure how? Let me know ok! I will see you again really soon but if you want to see me for that…come and say hi over at The Cottage Market…it’s where I hang out!
Hugs…Andrea!


Sarah Blake says
Hi when I use tissue paper in my printer I get black smudges from the rollers maybe , please how can I avoid this ?
graphicsfairy says
Hi Sarah, I’m sorry you are having problems with your printer! Unfortunately short of trying it from another printer I can’t really give you any advise. Good luck 🙂
Hannah says
Took me a while to figure out “paler” was supposed to be “paper” lol
graphicsfairy says
🙂
Helen White says
Love the idea of printing on tissue paper. However, rather than using tape and and printer paper to carry the tissue paper into the printer, I would iron the tissue paper to freezer paper wax side. You can purchase freezer paper in 81/2 x 11″ on line. Quilters use it for printing on fabric by ironing fabric to freezer paper and sending through the printer.
Karen Watson says
Thanks for the tip Helen!
Jasper says
Beautiful tip, thank you!! I have never done any crafting at all with tissue paper, always put off by the need to buy a big package of expensive paper napkins that I’m only going to use ONE napkin. But being able to print anything I want onto a cheap tissue from the Dollar Store opens up SO MANY crafting possibilities!!
Very excited, thanks again, and thanks extra much 😀 to The Graphic Fairy for this page!! 🙂
graphicsfairy says
Thanks Jasper, I hope you have fun crafting away on your very own custom tissue paper 🙂
Kirsi Salonen says
This is a great tutorial, but can you use any kind of printer? Even laser-printer?
Karen Watson says
Hi Kirsi, I’m afraid none of us have laser printers, so we aren’t able to test that out. Sorry!
Heather says
Hey Kristi, this process works beautifully on a laser printer, with one caveat: rather than using tape to adhere the tissue, use a very sparing amount of repositionable spray adhesive to attach the tissue to the paper backing. (Tape can react to the heat that the printer uses to fuse the toner – not good)
Patty says
Thank you for that tip!! I would hate to ruin my laser printer! I might try my inkjet first, but I’m afraid the ink will run (I know 1gel says it works with inkjet, but in my trials it still blurred the ink). Maybe different luck with tissue paper?
graphicsfairy says
fingers crossed 🙂
Judi says
I print pretty designs and wrap them around candles then using a blow dryer on low melt the tissue paper into the candle ..they turn out to be beautiful designer candles..you can put pictures ,names ,dates,what ever you like…
Karen Watson says
Hi Judi, I love that technique! We have a tutorial for it here, that my friend Gina did a few years ago. Thanks for the reminder!
Arthur says
Had a go sorry to say but It did not work, tissue got ruffled and jammed so print now us till I can get it work again, in the process of taking to bits to remove tissue not again, other printing Idea’sare OK, regards arthur
Debbie says
I print on tissue paper alot, tried this method, worked sometimes but I found using repositionable spray glue worked much better. Just lightly glued the tissue to a piece of paper, printed and then carefully pulled it off…..works every time
Karen Watson says
Thanks for the tip Debbie!
Kim says
Do you think the same method would work to print on burlap?
Karen Watson says
Hi Kim, We have a how to print on fabric post here https://thegraphicsfairy.com/print-fabric-freezer-paper-method-2/! I’ll link it in this post as well.
penny says
I used a very similar technique to cover some ugly fireplace tiles to look like marble. It doesn’t get walked on but I’ve since heard if I would polyurethane it would be durable.
Sharon Alpert says
Terrific idea! Is there an index of all these swell ideas that we can use when we need them? Thank you
Karen Watson says
Thanks Sharon! If you click on “Craft Projects” or “DIY Tutorials” at the top of my blog you can find more posts like this!
Donna Wilkes says
Thanks, Andrea! I am usually printing on waxed paper or muslin. I will definitely try this.
Karen Watson says
Have fun with this new technique Donna!
Lori says
What type of printer? Laser or ink jet
graphicsfairy says
I use an ink jet Lori 🙂
catsavannah studio says
I have recently discovered your site and have to tell ya – – I AM LOVIN’ IT! Thanks & Hugs, cat
Karen Watson says
Thanks Cat!!
Sheral says
I am so excited to try this!! Glad I came across your site. It is going to be a fun time for me!
Thanks for sharing.
Karen Watson says
Thanks Sheral!
Paula says
Your timing is perfect! I just bought some bars of Ivory soap and wanted to put a Halloween image on them for the grand kids. I’m going to try decoupaging the tissue paper on the soap.
Thanks, Paula
Karen Watson says
That sounds like a fun project Paula! I’m glad you can use this tutorial for it!
Deb says
I would LOVE to learn how to put printed tissue paper images on soap! Do you place the tissue image on the soap then dip it in melted soap? What happens when you use the soap to wash up? I am so curious – hope your project works!
Sincerely, Deb
Karen Watson says
Thanks Deb, I’ve never tried that before. Maybe one of my readers will respond to your questions.
Mandie says
You could probably use a hairdryer to transfer the image from the tissue paper to the soap. Much like you would do with candles using either wax paper or tissue paper
graphicsfairy says
Interesting idea Mandie, thank you 🙂
pebby says
After the design has been applied to the soap, all you do is dip the designed side ( top) in Wax. Very easy, that way when you use the soap the wax protects the design
graphicsfairy says
Thanks so much Pebby 🙂
Jeannie says
Oh my goodness, thank you for sharing this!!! Just in time for the gifting holidays! I can’t wait to try this out :)!
Jeannie