How to Print on Fabric
Today I’m sharing a fun way and economical way to print on fabric, using your home Inkjet Computer! I think this is probably the cheapest method of all. I call it the Freezer Paper Method because … it uses Freezer Paper … and also because … I’m super creative like that when it comes to thinking up names for various craft methods. 😉
{This post contains affiliate links}
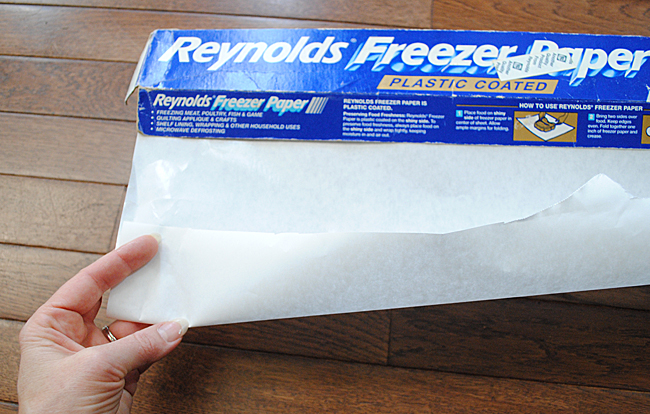
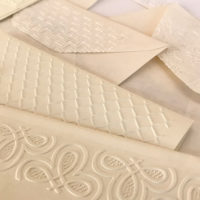
I thought I would show you a photo of the Freezer Paper, because I know in other parts of the world, it might be called something else, so I thought this might help. In case you’re not familiar with it, it’s paper that’s used to wrap up food in order to freeze it. It’s shiny on one side and dull on the other. As you can tell my box is about 200 years old … I guess I don’t freeze a lot of stuff. :/
Anyway, this method is super easy, just follow the steps below!
SUPPLIES:
- Freezer Paper
- Fabric (I used Canvas Drop Cloth HERE)
- Iron
- Scissors
- Printer
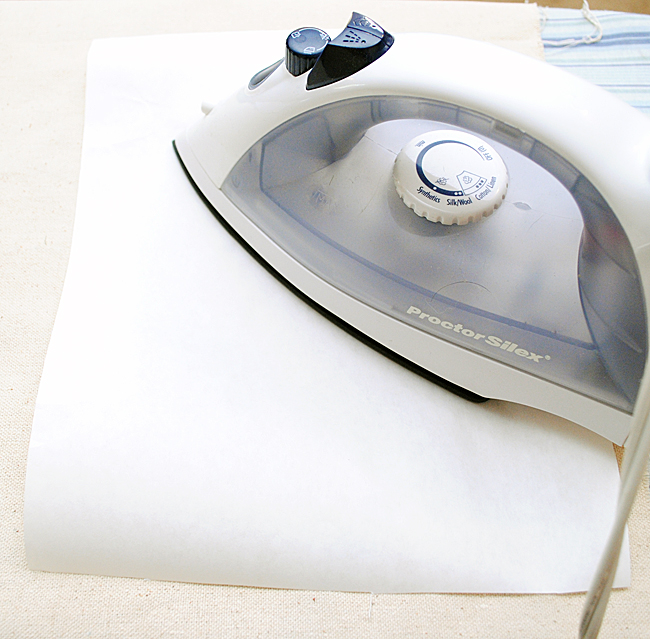
Step 1: Start with a freshly ironed piece of fabric. ( I like to print on Canvas Drop Cloth, because it takes the ink beautifully, and you can get a lot of fabric for the money, it also goes nicely through my printer). Cut out a section of freezer paper, approximately 8 1/2″ by 11″, and iron it (shiny side facing towards the fabric) to the fabric until it adheres nicely.
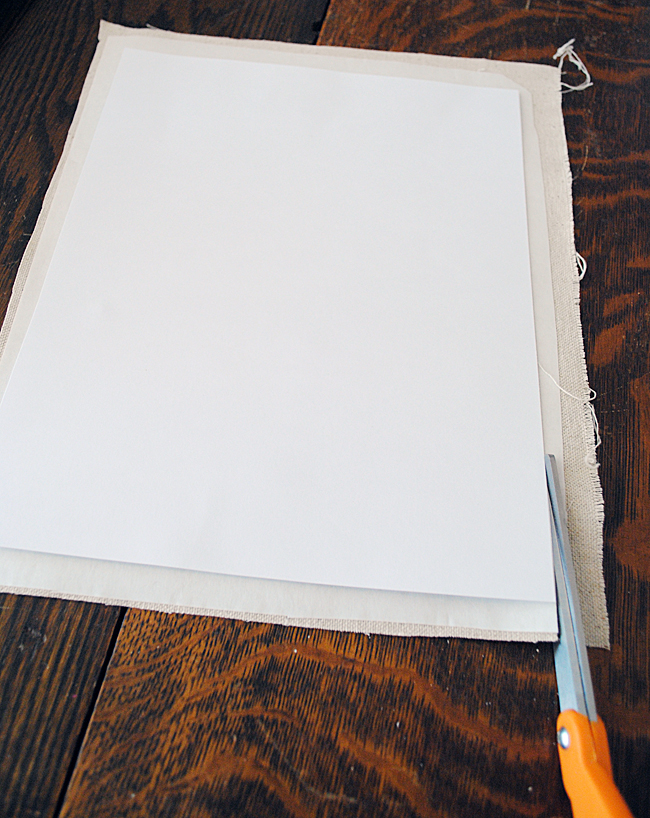
Step 2: Trim up the fabric and Freezer paper to exactly 8 1/2″ by 11″. I use a piece of printer cardstock as a pattern, to make sure the size is exact. You could measure it out and draw lines on it instead. Important: Make sure you don’t have any frayed edges, and that the fabric does not overhang the paper! You don’t wanted it snagging in your printer and getting stuck!
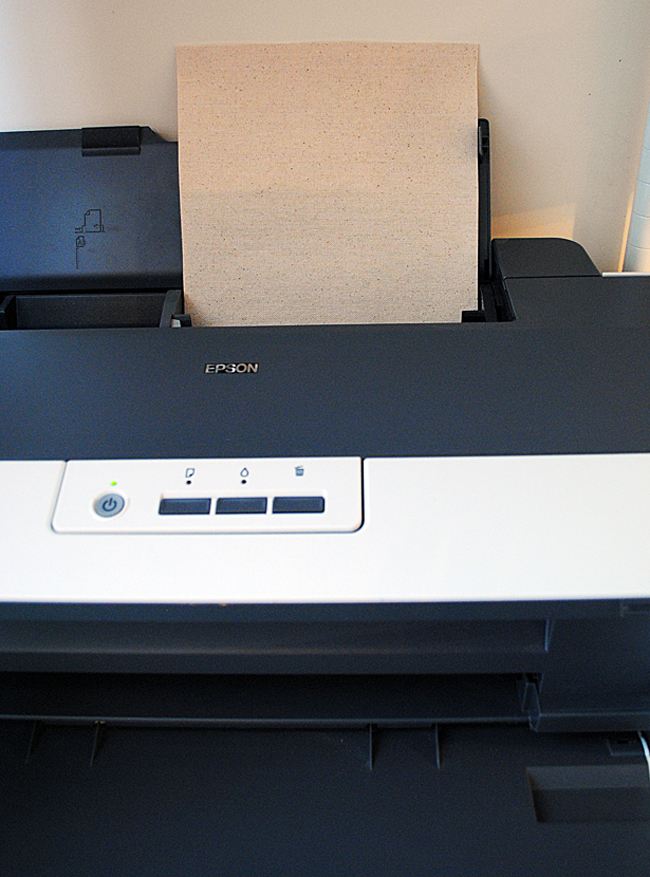
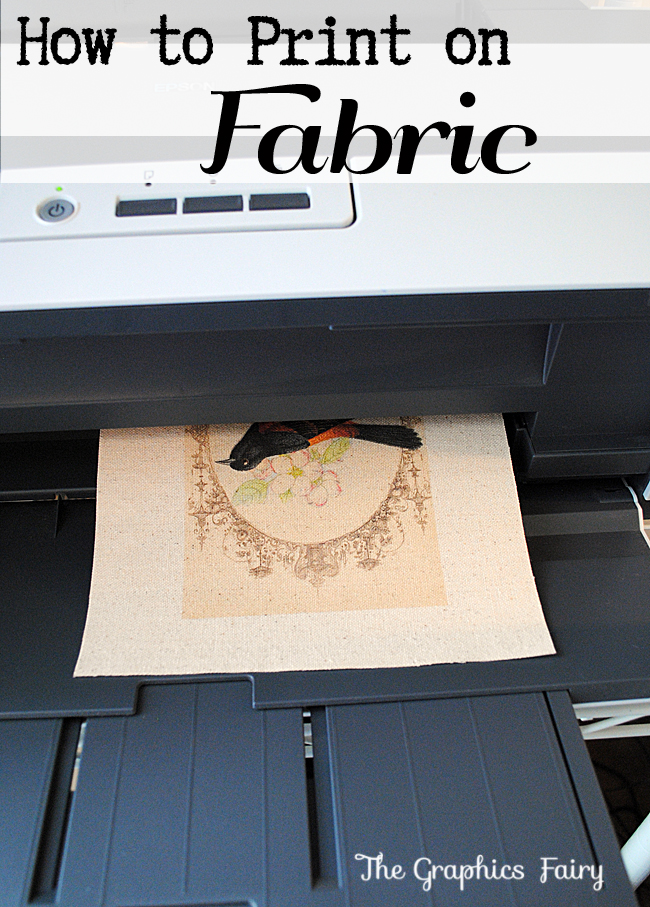
Step 3: Place in your printer. Make sure you have it placed so that the ink prints on the fabric side and not the paper side.
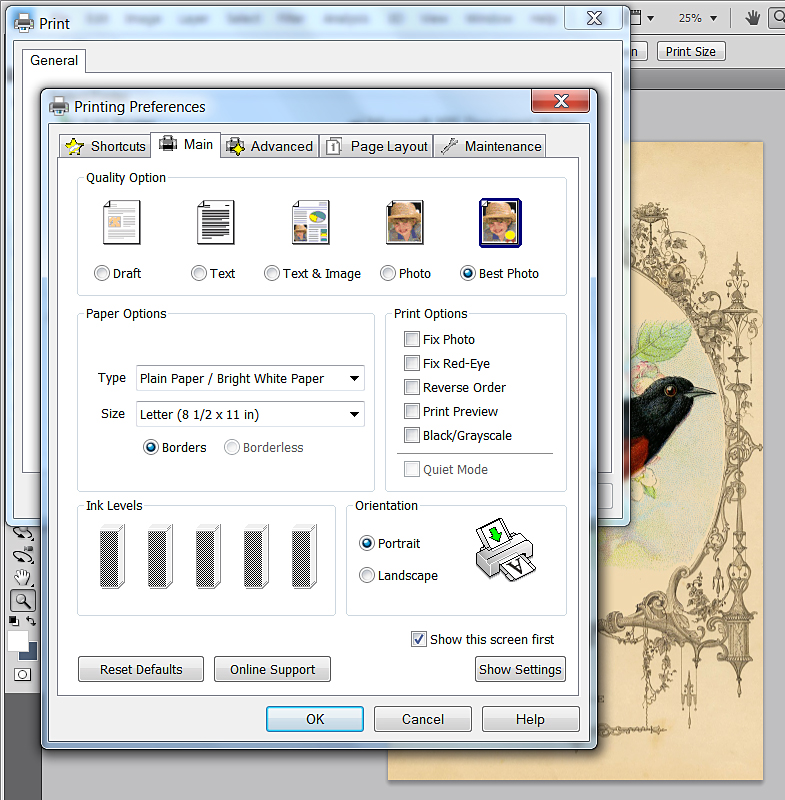
Step 4: Adjust your printer settings. When you hit the print button and get the pop up window, you should have some type of button for “Printer Preferences” click on that and select “Best Photo” and then print. This will put a nice amount of ink on your fabric, for the best quality image.
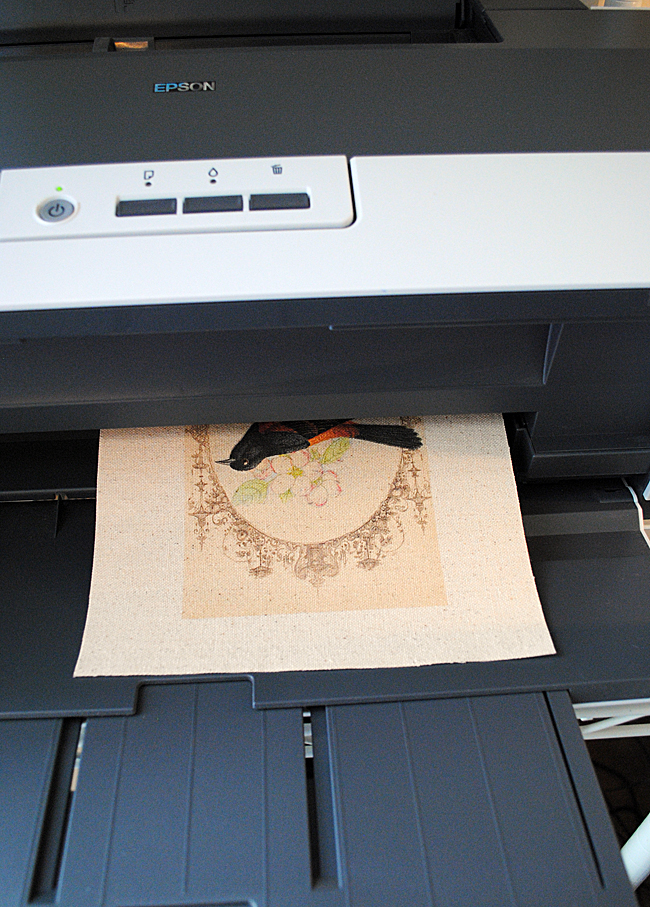
Step 5: Stay right with the printer and guide the fabric through if needed. For some reason it usually takes a few times for my printer to recognize it, it usually sends the fabric through a few times, with out printing, and I have to keep putting it back in until it decides to accept it. I have no idea why and hopefully yours won’t do that!
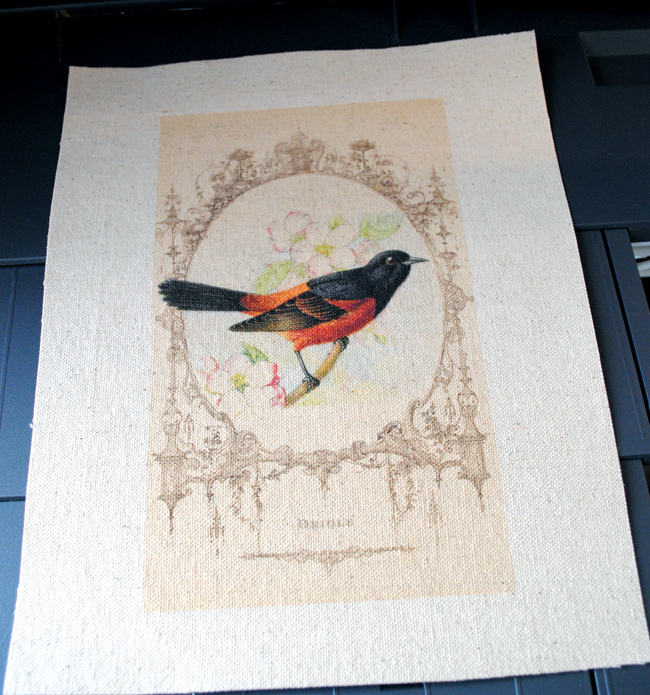
Gorgeous right?!! And so easy! The print is amazingly crisp and clear, I just love doing this! You can peel off your Freezer Paper now (I’m told you can reuse it, up to 10 times, so you can save it and iron it on to another piece of fabric. Yay!). I use an Epson Printer with Pigment ink that’s waterproof. If yours isn’t waterproof, you can try to set it with Vinegar using this Tutorial.
I hope you enjoyed this fun method! If you like the Bird Printable in the photos, you can grab it for free HERE, there’s also a tutorial for a fun project that I made with this!
Oh and in case you missed it… we’ve got more great Printing Tutorials like … How to Print on Tissue Paper! And check out How to Print on Brown Paper Bags as well!
And for even more Fun Fabric Printing techniques, be sure and check out our 6 Ways to Easily Print on Fabric Post HERE!
For more information about what Printers I recommend, see my Best Printers for Crafting Post HERE.
Welcome, I’m so glad you’re here! Browse around to find thousands of Stock Images that you can use in your projects or designs! I post new Vintage images every day, as well as projects and DIY’s too! Need more info about my site? Try my FAQ page.
Laurel says
Have you tried setting your printer to take thick paper/envelopes? It may stop it pulling the fabric through without printing on it. It’s the setting I use when I want to print on thick card.
Karen Watson says
Great idea Laurel! I’ll try that next time!
Aitch says
I never thought of that! I have the same problem with printing thicker things like cardstock and fabric on my Epson printer that Karen has with getting her fabric/freezer paper sandwich to roll through. I will give that a try, thank you.
Linda @ Itsy Bits And Pieces says
Great tutorial, Karen! Thank you!
Mitzie says
Thank you for the tutorial but I think you missed a step or two. I don’t see anything about how the bird pic relates to the freezer paper. Do you copy the bird image onto the freezer paper, or just printing the image? If the latter, what is the freezer paper’s purpose? I’d really like to know because I’ve been wondering how to print images from your awesome website onto fabric. Thank you.
Debbie Knight says
you add the freezer paper to stiffen the fabric to work in the printer. She printed the image right on the fabric.
Andrea D Stevens says
But, if the only purpose is to stiffen the material so that it feeds smoothly through the printer, why also use cardstock? I may have missed something or added, but I read use cardstock as a guide…a guide for feeding into printer, right? So, if I do not have freezer paper but do have cardstock, I can use cardstock as a printer guide and don’t have to do anything to the fabric? Is this correct? Thanks!
Lin says
The only reason for the cardstock is to use it as a ‘pattern’ so you can trace out your sheet of fabric/freezer paper to exactly 8.5 x 11 inches. You don’t actually use the cardstock itself.
Karen Watson says
Mitzie, Yes, what Debbie said. There’s no missing step, you can’t put fabric into your printer without something stiffening it, or it will bunch up in your printer. The freezer paper is there to make it stiff, so that the printer thinks it’s paper and slides it through. I hope that helps!
Carrie says
Hi I know how to on fabric but what if you want to make a larger pillow like the insert for a standard pillow is 13 x 20 is it just what your printer will do?
Karen says
Yes Carrie, it would depend on the largest size paper your printer accepts. Some printers will print on tabloid paper, which is 11″ X 17″. If your printer is a standard one, you might try using a legal paper size piece of fabric, which is 8.5″ X 14″. You might need to do a transfer to larger fabric. We have several methods you can find by clicking “Transfer Methods” in the black menu bar above. I would love to know what you decide and how it works.
lori hemminger says
freezer paper is to give it shape of paper so cloth has consistency. i have done same thing by spraying adhesive on paper, then set on fabric, cut out paper size, print on fabric, peel off paper..
Adi says
This is a real wonderful idea! Thanks for sharing, I’ll have to try this on my future fashion projects!
vegcourtesy.blogspot.com
Penelope says
Fantastic tutorial. I will definitely put this one to use. Thank you.
Debbi says
I have used this method for quite a while and I agree Karen, it is hands down the best and most inexpensive way to print on fabric! The only thing I would add to this is to roll the fabric/paper combo fabric side out just before printing so there are not any curled edges, That way it feeds smoothly through the printer and you won’t pick up toner ink on the edges.
Carolyn says
Will this work with a color laser printer? Thanks!
Karen Watson says
Hi Carolyn, I wish I knew! I don’t own one, but maybe someone that does, and has tried this, will chime in and let us know!
Carolyn says
Thanks! 🙂
Carolyn Tix says
Thank you for sharing this, I have heard of it before, but never did try it. I make MANY gifts for Christmas and this will come in handy and be much less expensive than using the transfer sheets.
Wesley Williams says
You might not want to print this with a laser printer, that style printer uses heated rollers to set the toner onto the paper you are using, it might get hot enough to melt the bond you have with the freezer paper and the fabric, and get caught up in the rollers.
Edwina Beard says
I have read in other discussion groups that laser printing on paper works well. It requires that you print a single sheet at a time. You then put it in a warm, dry location for at least two hours to allow the ink to dry. I plan to try this later today. I will post my results.
graphicsfairy says
Thanks Edwina, we would love to see your results!
Erin says
Yeah! How did it go? I’m having this exact question.
Eloise Erwin says
Hey Karen,
I am a quilter and I really believe in putting little labels on my quilts. I have bought iron on labels and sew on labels and they all come out stiff and yucky. This item was a blessing as I just finished a baby quilt and did not want to hand sew(I have done that) a label on. I tried your method on my husband’s cannon printer and it worked beautifully.
btw, my HPOfficejet 4500 is great and I love it! But it won’t work do this. I don’t know if I am doing it wrong or what. My husband’s works great.
Have a blessed day.
graphicsfairy says
That is wonderful Eloise! I think adding a label makes it all the more special 🙂 Thanks so much for sharing!
connie says
I want to do this for a family quilt but when I asked to buy an Epson printer with pigment ink they thought I was nuts. didn’t know what I was talking about. What exact printer are you using. Thanks
graphicsfairy says
Hi Connie,
Here is a link to my favorite printer for crafting, https://thegraphicsfairy.com/the-best-printers-for-crafting/
The ink I use is,DuraBrite Ultra ink
I hope this helps 🙂 Good luck with your quilt project!
Susan Grier says
Is your a regular printer? Mine is and want to try this
Andrea D Stevens says
Everything I’ve read thus far says ‘no’. For a couple of reasons, 1. A laser printer uses a dry toner, not liquid ink, so it will not absorb into fabric. 2. A laser printer uses a different paper than an inkjet in that it is thinner. This is opposite when transferring photos or printed words onto wood or canvas in that a laser printer is required for the same reasons (i.e. dry toner won’t smear or absorb). I’d love to get a definitive, clear answer and explanation too! Thanks for posting so I could add!
graphicsfairy says
Hi Andrea, I posted how I use this method to print on fabric using my inkjet printer, I use waterproof ink and it works. I am sure there are other ways but this is what I know and what works for me 🙂
Pat C. says
I’ve seen this tutorial before, but never one as easy-to-follow as yours!! I love the screenshot and all of your top-secret, insider tips! Thanks, Karen!! xoxo
Karen Watson says
Thanks Pat!!
Debbie Knight says
Hi, does anyone know if you can buy Swiss batiste, and other very fine fabrics to print on at JoAnn Fabrics? I think that I read Swiss batiste doesn’t ravel and is very thin for very small projects. Any other recommendations for the ease of printing on many other kinds of fabrics? Would anyone have, or know of a chart for this information?
Karen Watson says
Debbie you can find it at sewfancy.com Here’s the link http://www.sewfancy.com/batiste.htm
Debbie Knight says
I have a Xerox Phaser 8560 which uses wax squares for printing instead of ink or toner? It’s a marvelous finish! Has anyone every tried to use this printer to print on fabric? Any and all comments appreciated! Thank you!
Nancy Stone says
Karen: I use Freezer paper frequently in quilting. You do not have to throw out a piece of freezer paper after you use it, as it is reusable. I like to use it when making quilt labels by drawing dark lines on the non shiny side and then ironing muslin to the shiny side. You should be able to see the lines so that you can keep your writing straight on the quilt label. Then the save the freezer paper for the next label.
Karen Watson says
Hi Nancy, So do you mean you can iron it and it will stick again on the next piece of fabric?
Rhissanna says
Yes. I reuse the same piece of paper once it’s cut to size. I’m told it can be reused up to ten times, but I can’t verify that. More than twice, for sure! That huge roll of freezer paper will last quite a while.
Karen Watson says
Oh that’s great!! Thanks to you both for the info!!
Rhissanna says
You’re welcome!
Renee says
Hello, I see you print on fabric for quilts. What type of printer and ink do you use to keep the ink from fading in the wash?
Catina says
Does the picture hold up when washing.
graphicsfairy says
I use waterproof ink so it will hold up to some point. This method is best for things that rarely require washing.
Karen says
This is fantastic!!! I have never tried this. Have tried other transfer methods. Looking around to see what I can print on. Sharing on my FB page this afternoon!
Karen Watson says
Thanks Karen!! I appreciate the share!
Vickie says
Thanks Karen for showing this tutorial. I was always frustrated because most transfers call for a laser printer and I have an inkject printer. Now watch me go:)
gill Colthart says
This might be useful for people in the UK. I used to have Reynold’s Freezer paper sent from the US, but you can now get it from Hobbycraft or some quilters shops. I also hav a tutorial on my blog if it helps
Karen Watson says
Wonderful Gill! Thanks for sharing that resource!
Laurel says
I’m in the U.K too and I’ve bought Reynolds freezer paper on ebay relatively inexpensively.
Alice says
I have wanted to print on my own fabric for so long but the methods for doing so are all so expensive. I can afford this method and will certainly be trying it in the near future. I am excited to finally be able to make something I have only been dreaming of making and it’s all because of your post. Thanks so much for the tutorial.
Kay Nicholls says
Thanks so much Karen for this easy, simple tutorial. I live in Australia, and after alot of searching I’ve found the Reynolds freezer paper is sold in Spotlight stores for $1.50 (AUD) per metre. I hope this is helpful to any of your other Australian followers. 🙂 🙂
Karen Watson says
Thank you Kay! I really appreciate it, I’m sure others will want to know!
Kerrie Marquart says
Wonderful information! Love it!
Rebecca says
Thank you so much for this very easy and affordable option. I have tons of things I’ve been wanting to print on fabric and haven’t found one that wouldnt be so expensive. I love all of your graphics and really dig the projects everyone shares. Thanks!
mj says
you can also use double sided tape on cardstock to hold the fabric in place and then run it thru the printer…very easy and it works great!
Kathy says
Thanks for the tut! can’t wait to try this!!!
Darlene says
Great tip about the canvas drop cloth. Thanks for sharing.
popy says
thanks you very much for sharing…
Yvonne says
Does anyone know if this process works for burlap fabric also
Jo Anne says
Besides the great tutorial that gives us a good image transfer option, those of us in America now realize we have taken freezer paper availability for granted all these years. Interesting comments from the UK and Australia!
Jo says
In the past, I’ve used spray starch to stiffen my fabric (light linen) and it passed through my laser printer with no problems.
Spray with starch, iron dry and repeat about 4 times. It should feel as stiff as paper without the bulk.
Jo
Caite says
Love this!! Thank you for the awesome tutorial! This website is a treasure trove. 🙂
Vickie says
Hi, I have used this method and it works well, but I found one I like even better, I purchased basting spray from the sewing dept at Wal Mart, about $5. Cut out the fabric so it is a little larger than your paper, spray the fabric (make sure it is covered well to the edges) then stick the paper to it and trim the edges to fit the paper, you can smooth it easily, because if you have a wrinkle you just pull up the paper and it sticks right back. When done it just peals off easily. Make sure you have no strings around the edges of the paper. A can should last a long time. I make miniatures and print my own fabric all the time this way. Its faster than the freezer paper.
Julie Blake says
You say ‘the paper’ – do you mean ordinary printer paper?
Thank you.
graphicsfairy says
No Julie, I meant freezer paper 🙂
Carol D. says
Will the freezer paper method work on all fabrics ? What about burlap fabric ?
Brad Maddox says
Trading is the Best Business Ever in the World.. All News updates about Forex Business, Latest Currency news updates, latest forex trading business updates, trading updates, forex trading latest news, forex brokers directory, forex brokers list, Dollars news affairs, Stock Markets, stock market news, stock market analysis, technology news, international forex markets, international forex business news and all updates about Forex Trading
ForexAffairs.Com
Jacquelyn Flora says
Thanks for this great tutorial – I am going to try this. I had one question for you though – I think we have the same printer Epson Workforce 1100 – it is a wide format. I wanted to try to print a larger than 81/2 X 11 piece. Have you tried something larger as long as the freezer paper and card stock are the same size?
Also, I print a lot on card stock and my printer takes forever to take up the sheets – it either doesn’t grab it or it shoots it through like you were mentioning. In my experience having it on thick paper and envelopes doesn’t matter much. I wish I could find a good solution for this. If you ever do please share.
Thanks again.
Amy Hoeh says
Thank you, Karen. Ok… Dumb question alert.
After you’ve printed the letter sized piece of fabric, how do you attach it to a project? I mean… What if you’re project is a table runner? A letter sized piece of fabric would surely look out of place? Or for a shirt? The same holds true. I’m trying to do both of those projects as well as your french typography onto a wooden table. I’m a little overwhelmed with just enough information to get me inspired, but not enough to allow me to get the project started?
Elaine says
I love this!Very Crafty and it sure does come out crisp and clear!
Diane says
Can you print the same on legal size?
Sarah says
This was so useful! I had no idea it was so easy to print onto fabric with my home printer. I used a bit of calico for it and I love the slightly rustic feel it gave the image. Brilliant and easy technique! Thanks so much for posting!
You can see my attempt at printing here 🙂 http://tinyurl.com/paphw7t
Laura says
FYI, to make this even easier, I found pe-cut 8-1/2×11 freezer paper sheets on Amazon made (I assume) for crafters who want to put them through a printer for crafts such as this. Fifty sheets are under $8 plus free shipping with Amazon Prime membership. Just got mine in today as well as a canvas drop cloth. I’m ready to go!
Karen Watson says
Thanks for the tip Laura!
Heidi says
Hi, I’m in Australia but lucky enough to be coming to the USA in January and hoping to buy loads of the freezer paper. Staples have a roll listed of GORDON PAPER- Freezer paper in a massive roll. Is this the same kind of product?
I am going to the heart of New York and then to Beverly Hills and so not sure where I might find the Reynold’s Brand and given the pricing here hope to fill a bag of it for myself and friends here to make some beautiful creations.
Thanks, Heidi
Karen Watson says
Hi Heidi, I haven’t checked Staples, so I’m not sure about that. But you should be able to find freezer paper at any Grocery Store. I hope that helps. Enjoy your trip!
Christina in FL says
Hello Heidi, Butcher paper is different from Freezer paper. Here’s a link from the web to explain.
http://www.oren-intl.com/blog/bid/245015/What-s-the-Difference-Between-Butcher-Paper-and-Freezer-Paper
Jan says
Hi
Can u advise on the fabric printing.
I have been successful and loce the results but is it possible to fix the ink.
Kind Regards
Jan
Karen Watson says
Hi Jan, Try soaking it in White Vinegar for 10 minutes, some people have found that, that tip works to set the ink, it doesn’t work with every printer, but it does work for some, so it’s worth a try!
Teri says
I’ve never done this before and was wondering are you putting the image you want to print in the printer or are you getting off the internet? Can you type a recipe for example and then use this method to print it from word document?
lynda says
Hi. Love the tutorial. I am soooo new at this. I followed your tutorial right up to the printing on the fabric. Do you put the pix you want to print in the scanner and then run your material/freezer paper thru the printer? that is the only way I see to do it. Thanks so much.
Karen Watson says
Hi Lynda, You can use any of the thousands of images on this sight, or you can scan and then save the scan to your computer and then print. I think you will probably want to make some adjustments after you scan your image though, like cropping, straightening, sharpening etc. I hope that helps!
helen says
hi there ,im from uk and cant find freezer paper anywhere (typical). I bought a roll of greaseproof paper as this is the closest thing i thought,but it doesnt stick to the fabric when im ironing it…please help im desperate to give this a go.i have my fabric ready..images ready….a printer…now how to make it stick
Karen Watson says
Hi Helen, Have you tried ordering it online, maybe Amazon? You could also try using a temporary spray adhesive with card stock.
Julie-Ann says
You can just use a regular school glue stick – used for paper. It sticks well enough for printing then peels away.
graphicsfairy says
Thanks Julie-Ann 🙂
DJ says
Tried this, the freezer paper dint really work well for my printer. I experimented a bit and found a way for it to work for me. Thank you! Without this I would have never known it was possible. Did a tutorial on how I did it on my blog with a credit to yours for the original tutorial. Once again, thank you!
Karen Watson says
I’m glad you were able to work it out, thanks for the credit!
Gill Colthart says
Hi Karen, I used to buy the paper from the US but now it is stocked in the U K, in Hobbycraft (this might help someone). Love your graphics and projects
Karen Watson says
Thank you so much Gill! We do get a lot of questions about that!
Maggie says
I have been doing this for many years. You’ll never have a problem if you iron and cut your fabric and paper just right. My printer lets me choose cardstock so fabric goes through just fine. I have copied whole sheets of light colored patterned scrapbook paper, let dry, run back through and copy a black & white image. You can keep copying images as long as you let each layer dry. I make art dolls and copy faces onto the collaged freezer paper/fabric sheets. So much fun. Don’t be afraid to experiment. Iif I copy an image from my flat bed I can adjust the amount of ink to flow on my fabric. More or less ink as I need it. I also make small art quilts and use this method. It works for lots of projects.
Karen Watson says
Thanks for your input Maggie!
Sue says
I think this is an amasing idea and I am going to give it a try. Just one question which I haven’t yet seen asked is how does the colour go when the fabric is washed, does the colour hold or run.
Thank you so much for sharing this idea.
Karen Watson says
Hi Sue, you only want to use this method for non washable projects. It’s great for Sachets, lampshades, Holiday ornaments, things of that nature.
Lisa's Creative Designs says
I have an Epson printer and have washed my printed fabric in the washing machine on cold. I comes out just fine.
K says
Even after several washings???
Romila says
Thank you for the tutorial, it’s been most helpful!
To make printing easier I tell the printer the paper is thicker, usually by telling it to print a photo (photo paper is usually thicker) and Presto! success :o)
Karen Watson says
Thanks for sharing that great tip Romila!
Beth Lewis says
I have had decent luck making the ink washable by pressing the dried image with a hot iron after it has been printed. Never have i washed the item many times but the few times i did it it worked just fine. It would be worth testing first to see if you really needed it to be truly washable.
Karen Watson says
Thanks for the tip Beth!
Darla Harker says
thanks so much! i’m so excited to try this. i print on paper bags all the time and i love doing that for parties. thanks again for sharing.
Karen Watson says
You’re welcome Darla!
Lucy Mellon says
I’m going to use this method for my save the dates for my wedding! We are making strips of fabric with the details on then attaching them to a cotton bobbin and tying them with a ribbon and attaching a Singer sewing machine charm on the ribbon bow! Fingers crossed!! Does anyone have any suggestions of the best way of cutting these to avoid fraying? Many thanks in advance.
Karen Watson says
That sounds so cute Lucy! There is a product that you can get at Fabric or Craft stores that keeps fabric from fraying. Fray check? Something like that. I hope that helps!
Julie says
I have recently found some freezer paper in local Yorkshire Trading Co Shops.
Karen Watson says
Thanks for sharing your source Julie!
Janice says
tried it and it didn’t work. the canvas would not adhere to the freezer paper even using the hottest setting.
Karen Watson says
Janice did you have it on the right side?
Peretel says
Bonjour Karen je suis Francaise et nous n’avons pas de papier congélateur comme ça est ce que le papier sulfurisé pourrait faire l’affaire?
Laura Patel says
Thank you for this great tutorial.
I have spent all day with my new printer trying to attempt this. I have finally mastered getting my printer to recognise the paper but the final print is coming out blotchy, faded & a bit blurry.
I have an Epson Stylus Photo & I have selected Best Print. I’m running out of ideas?
I am printing onto white ploy cotton.
Help pretty please I’m going insane, lol.
Karen Watson says
Hi Laura, This post may help https://thegraphicsfairy.com/top-tip-for-working-with-transfers/ there can definitely be some trial an error. You will probably need to play with the settings (Best print might not be the best setting for this project, so try some of the other settings) and you may want to increase or decrease your wait time with the ink. Keep track of what you do so that you know the correct formula for next time. If all else fails you may want to try one of the other fabric transfer methods found here https://thegraphicsfairy.com/12-easy-image-transfer-methods-for-diy-projects/ the TAP iron on paper is a dream to work with and my favorite choice for fabric transfers!
I hope that helps!
June says
The flaw of the method…the ink runs if it gets wet at all. If you are making a purse, or pillow or quilt, this will not work.
graphicsfairy says
Hi June,
Yes, this method is best for non washable projects, especially if your printer/copier isn’t equipped with waterproof ink. Here is a link to my top tip for working with transfers, https://thegraphicsfairy.com/top-tip-for-working-with-transfers/ .and 12 easy image transfers, https://thegraphicsfairy.com/12-easy-image-transfer-techniques/. I hope these are helpful 🙂
Lisa's Creative Designs says
I make pillows with an Epson printer. I use a hot iron on the printed fabric before I assemble the pillow. I have washed a few of them in the washing machine on cold and never had a problem. 100% cotton fabric absorbs the ink quite well.
graphicsfairy says
Thanks Lisa 🙂
Kati says
WoW! I’m sure I’ll try it! Thanks for this freezer paper photo – I’ll have to find sth like that in Poland ;P
graphicsfairy says
Good luck Kati!!
Judy Bielik says
What kind of fabric can I use that is white, instead of the natural color of canvas?
graphicsfairy says
Judy you can use any light weight fabric in the color of your choice:)
Dee says
Hi! New here! I was wondering why you use the drop cloth canvas rather than say, muslin? I have been wanting to make a memory quilt with the pics that my grandson has made and also his school photos as well… Does it have to be canvas? Just nervous about using fabric in my printer!
Karen Watson says
Hi Dee, you should be able to use Muslin. I like Drop cloth because it’s cheap and I like the weight of it for my projects!
Christa Paulosky says
Hi! I am anxious to try this! Is parchment paper the same as freezer paper?
Christa Paulosky says
Hi. I am anxious to try this. Is parchment paper the same as freezer paper?
graphicsfairy says
Hi Christa,
No, parchment paper is not waxy, it is used to line pans to keep things from sticking to the pan. You will find freezer paper in the same aisle at the store though.
Deborah Koffler says
Hi Karen, I have noticed on several other tutorials that they are using a step where they dip the fabric into water that is mixed with some product that at the moment the name escapes me. I’m assuming this step sets the ink to the fabric. In your tutorial you didn’t show this step is that because you used the waterproof ink? Thanks.
graphicsfairy says
Thanks Deborah, and yes I do use waterproof ink 🙂
Nannette says
This is so cool, I can not wait to try it. Can you use any type of fabric using this method?
graphicsfairy says
Hi Nannette,
It needs to fit through the printer so should not be too flimsy. Burlap, drop cloth fabric… Experiment and enjoy 🙂
Jill says
Just a couple of extra suggestions. Printing on fabric works best on a printer where the paper (or in this case the fabric/freezer paper) runs straight through the printer when printing. In some printers the “paper” wraps around a barrel on the inside and, I believe, comes out upside down. With this type of printer, because it wraps around a barrel, there’s a greater chance of the fabric/freezer paper jamming the printer. Printing on fabric will still work with these printers, there’s just a greater chance of jamming. I hope this makes sense. Also, I believe I remember reading that the freezer paper adheres best with a dry iron on low heat. No steam. Hope these help a bit.
graphicsfairy says
Thanks so much for the very helpful tips Jill 🙂
carole says
After putting paper/fabric in the freezer, do you use it right away to the pinter? Or is it ok if you wait few hours?
graphicsfairy says
Hi Carole,
You use freezer paper for this method. It is a waxy kind of paper that is used to wrap food in that you want to freeze. You can find it in the grocery store with the aluminum foil and ziplock bags, etc. You may want to re-read the post to see how to do this method.
Bernade says
Has anyone tried this on felt?
graphicsfairy says
I have not Bernade.
Bernadette says
Has anyone tried this with felt?
Christina in FL says
I love printing on fabric and this is a great tutorial. Thank you for the link to the canvas.
One suggestion: Use a hot, DRY iron. With my iron, I use the high/cotton/linen setting but have to empty my iron of water because it won’t do high heat without steam.
graphicsfairy says
Thank you, great tip Christina, you are so right!!
Carol says
Will this be color fast?
graphicsfairy says
Only if you use waterproof ink Carol 🙂
Edward says
Where do you buy your freezer paper? Instead of iron can I use my heat press machine?
graphicsfairy says
You can find it in the grocery stores in the U.S. in the same aisle as aluminum foil and kitchen papers. I do not know about using a heat press, I have only used an iron 🙂
Megan says
Hello, please tell me what setting you put the printer on for “paper type”.
I set mine on “matte photo paper” but apparently that was an ill advised choice as the fabric came out pretty smeared.
Do you use just “plain paper” setting?
Any thoughts much appreciated!
THANK YOU!!
graphicsfairy says
Hi Megan,
Just set it to plain paper. If you look at the post, there is a screen shot of my printer options to show you all of the settings I choose so you can copy them to make it easier 🙂 Good luck!
Andrea D Stevens says
Thanks for posting! Great tip regarding the use of the canvas drop cloth, I can’t wait for Home Depot to open in the morning so I can get a couple!
graphicsfairy says
So glad you like it and will give it a try, I think you will love it, good luck!
Angie Winkler says
Hi Karen! I just joined your site today and it’s so exciting! I am wanting to print a funny poem on some kitchen Flour Bag towels (is that the right term?) and knew it could be done with freezer paper, but had no clue how to do it. After Googling my question, your site was the one that caught my eye. Your tutorial above is really clear and funny. You are a hoot! Thanks for all the free stuff too. Can’t wait to get started! xo Angie W.
graphicsfairy says
Thanks so much Angie! Have fun and create away!
Tisa M says
Thank you❗️
Loving the unique name choice too! ????
graphicsfairy says
Ha ha, thanks Tisa 🙂
Mel says
Hi,
Do you ever find your printer is printing with horizontal lines after one fabric print?
graphicsfairy says
No, I can’t say I have Mel, so sorry you are having printer issues. Have you checked your cartridges to make sure they aren’t running low?
Brenda says
Great tutorial. I have used this method before. However I keep running into the problem of air pockets because of the freezer paper not ironing on properly. What setting are you using on your iron? Do you press and hold, or press and move the iron around? Does the type of holes in the iron make a difference. I am trying to print picture squares for an attic windows quilt. Thank you for your help.
graphicsfairy says
Thanks Brenda, you should use a lower setting and move it around slowly. Maybe try practicing on scrap pieces until you have it down? I always recommend this on all projects 🙂 Good luck!
Brenda says
Thank you. I will try that.
Tammy says
Just thought of another possibility…what about using a fusible fabric product ( ie Pellon Wonder Under Transfer Web) in place of the freezer paper? Then if you have a Cricut or Silhouette, you can make the design a”Print & Cut”. Then the design prints on the fabric, Cricut cuts it out and then you can iron it on your project. May still need to do the vinegar rinse if the item will be laundered.
I’m going to try it right after I finish about 10 other projects. lol
graphicsfairy says
Very interesting idea Tammy, let us know when you’ve tried it how it worked out 🙂