How to Print on Fabric
Today I’m sharing a fun way and economical way to print on fabric, using your home Inkjet Computer! I think this is probably the cheapest method of all. I call it the Freezer Paper Method because … it uses Freezer Paper … and also because … I’m super creative like that when it comes to thinking up names for various craft methods. 😉
{This post contains affiliate links}
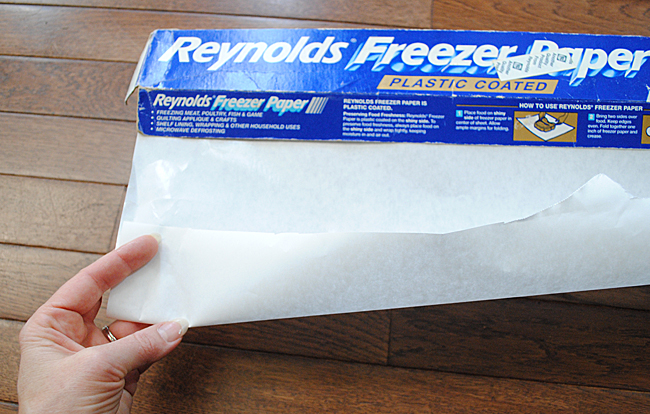
I thought I would show you a photo of the Freezer Paper, because I know in other parts of the world, it might be called something else, so I thought this might help. In case you’re not familiar with it, it’s paper that’s used to wrap up food in order to freeze it. It’s shiny on one side and dull on the other. As you can tell my box is about 200 years old … I guess I don’t freeze a lot of stuff. :/
Anyway, this method is super easy, just follow the steps below!
SUPPLIES:
- Freezer Paper
- Fabric (I used Canvas Drop Cloth HERE)
- Iron
- Scissors
- Printer
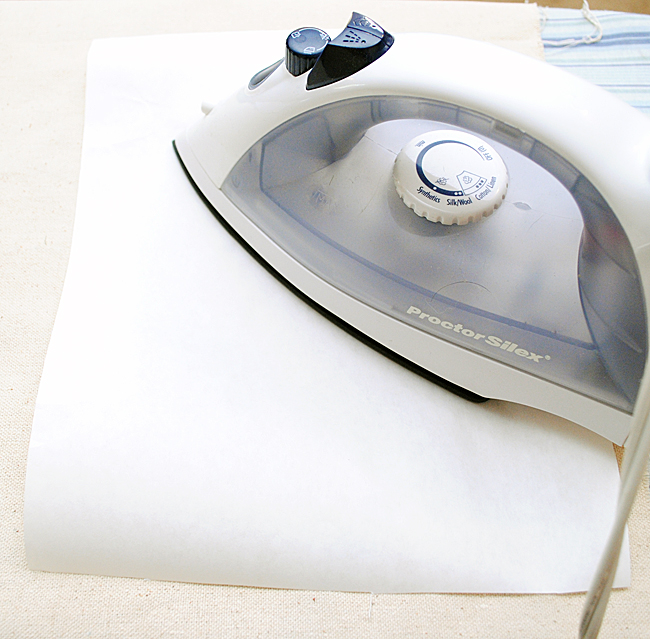
Step 1: Start with a freshly ironed piece of fabric. ( I like to print on Canvas Drop Cloth, because it takes the ink beautifully, and you can get a lot of fabric for the money, it also goes nicely through my printer). Cut out a section of freezer paper, approximately 8 1/2″ by 11″, and iron it (shiny side facing towards the fabric) to the fabric until it adheres nicely.
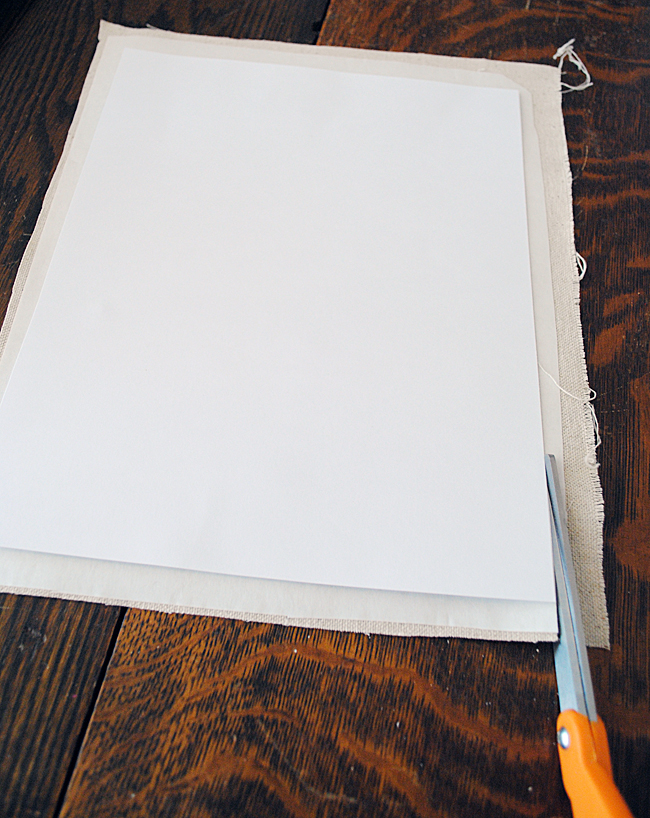
Step 2: Trim up the fabric and Freezer paper to exactly 8 1/2″ by 11″. I use a piece of printer cardstock as a pattern, to make sure the size is exact. You could measure it out and draw lines on it instead. Important: Make sure you don’t have any frayed edges, and that the fabric does not overhang the paper! You don’t wanted it snagging in your printer and getting stuck!
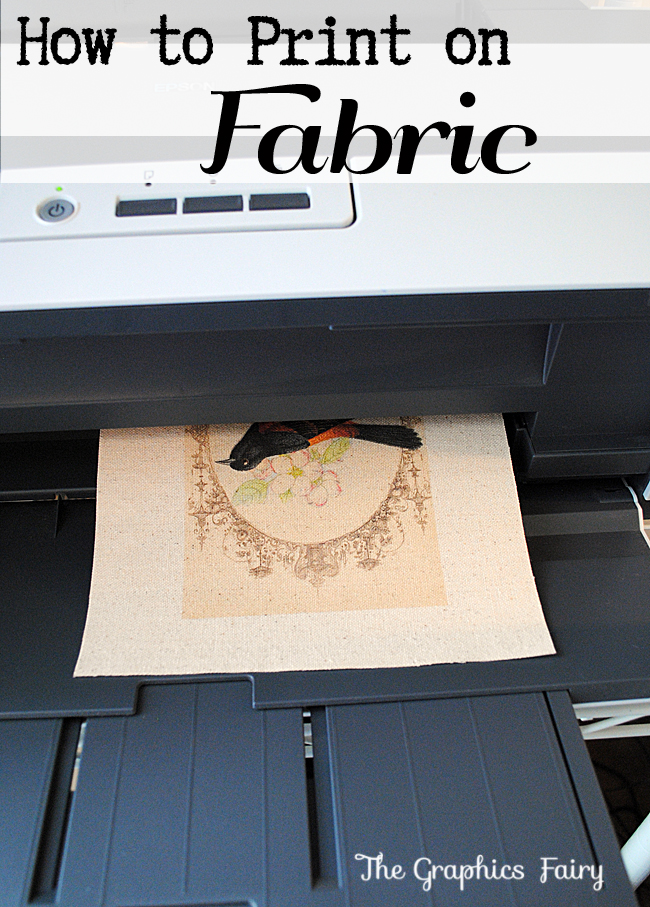
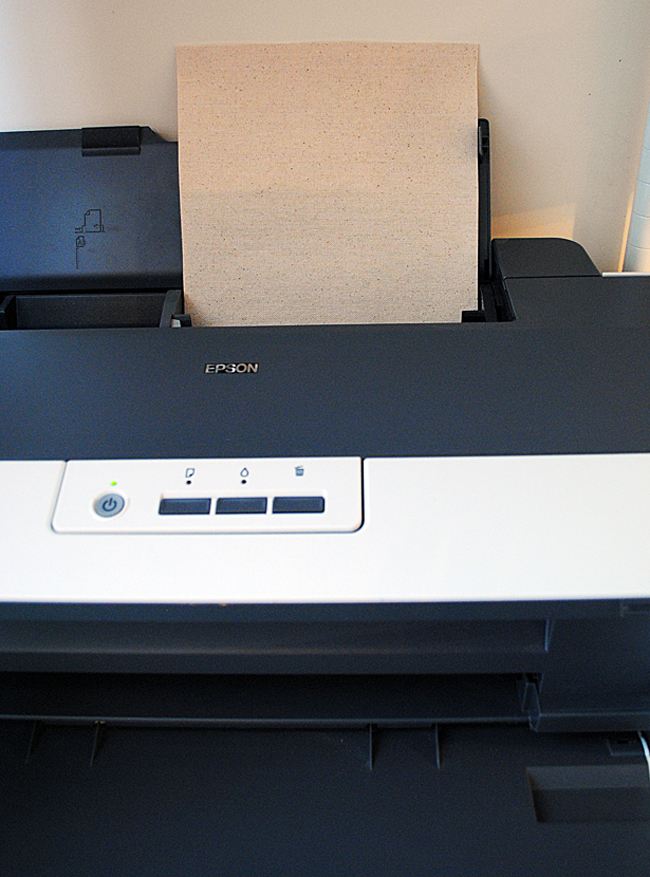
Step 3: Place in your printer. Make sure you have it placed so that the ink prints on the fabric side and not the paper side.
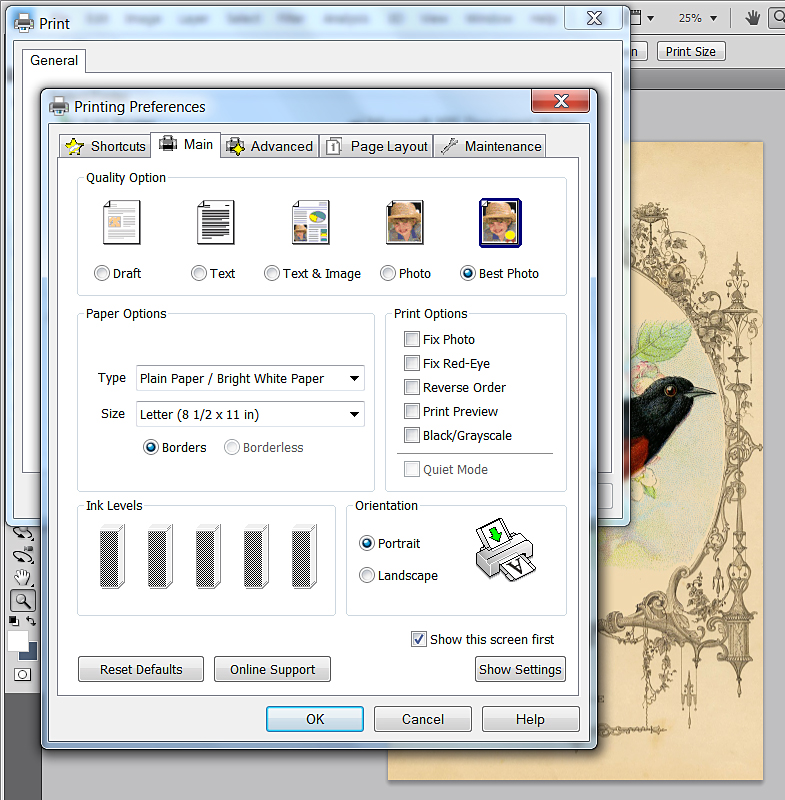
Step 4: Adjust your printer settings. When you hit the print button and get the pop up window, you should have some type of button for “Printer Preferences” click on that and select “Best Photo” and then print. This will put a nice amount of ink on your fabric, for the best quality image.
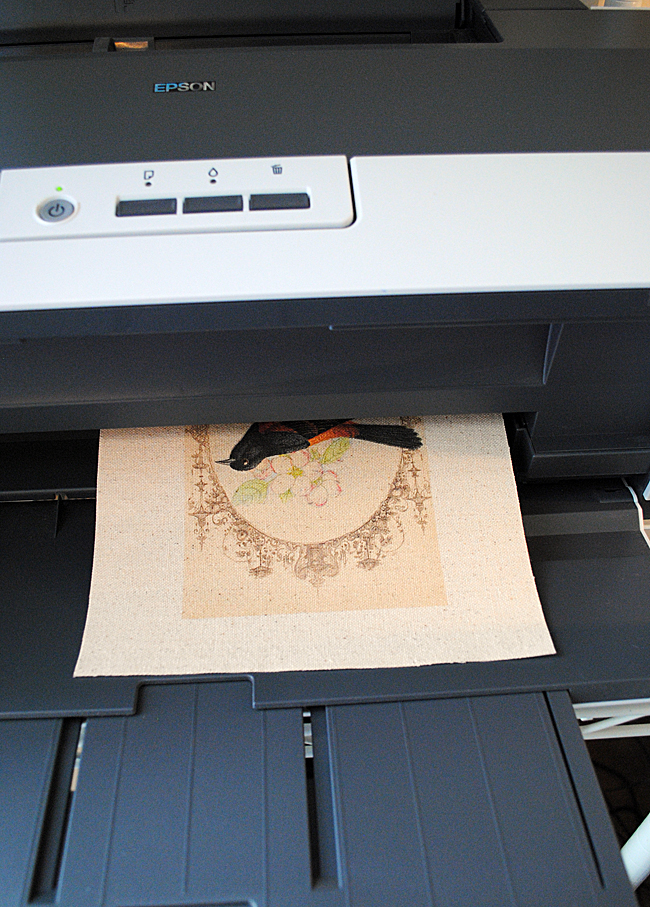
Step 5: Stay right with the printer and guide the fabric through if needed. For some reason it usually takes a few times for my printer to recognize it, it usually sends the fabric through a few times, with out printing, and I have to keep putting it back in until it decides to accept it. I have no idea why and hopefully yours won’t do that!
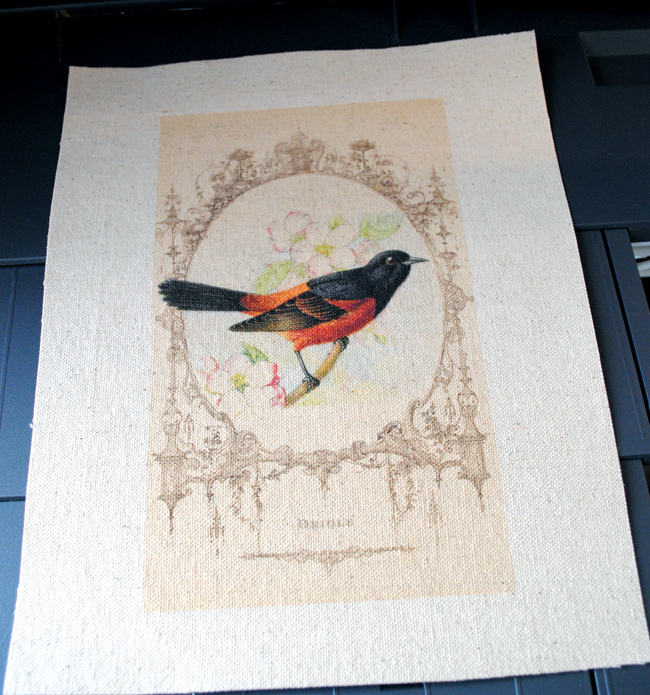
Gorgeous right?!! And so easy! The print is amazingly crisp and clear, I just love doing this! You can peel off your Freezer Paper now (I’m told you can reuse it, up to 10 times, so you can save it and iron it on to another piece of fabric. Yay!). I use an Epson Printer with Pigment ink that’s waterproof. If yours isn’t waterproof, you can try to set it with Vinegar using this Tutorial.
I hope you enjoyed this fun method! If you like the Bird Printable in the photos, you can grab it for free HERE, there’s also a tutorial for a fun project that I made with this!
Oh and in case you missed it… we’ve got more great Printing Tutorials like … How to Print on Tissue Paper! And check out How to Print on Brown Paper Bags as well!
And for even more Fun Fabric Printing techniques, be sure and check out our 6 Ways to Easily Print on Fabric Post HERE!
For more information about what Printers I recommend, see my Best Printers for Crafting Post HERE.
Welcome, I’m so glad you’re here! Browse around to find thousands of Stock Images that you can use in your projects or designs! I post new Vintage images every day, as well as projects and DIY’s too! Need more info about my site? Try my FAQ page.




Romila says
Thank you for the tutorial, it’s been most helpful!
To make printing easier I tell the printer the paper is thicker, usually by telling it to print a photo (photo paper is usually thicker) and Presto! success :o)
Karen Watson says
Thanks for sharing that great tip Romila!
Sue says
I think this is an amasing idea and I am going to give it a try. Just one question which I haven’t yet seen asked is how does the colour go when the fabric is washed, does the colour hold or run.
Thank you so much for sharing this idea.
Karen Watson says
Hi Sue, you only want to use this method for non washable projects. It’s great for Sachets, lampshades, Holiday ornaments, things of that nature.
Lisa's Creative Designs says
I have an Epson printer and have washed my printed fabric in the washing machine on cold. I comes out just fine.
K says
Even after several washings???
Maggie says
I have been doing this for many years. You’ll never have a problem if you iron and cut your fabric and paper just right. My printer lets me choose cardstock so fabric goes through just fine. I have copied whole sheets of light colored patterned scrapbook paper, let dry, run back through and copy a black & white image. You can keep copying images as long as you let each layer dry. I make art dolls and copy faces onto the collaged freezer paper/fabric sheets. So much fun. Don’t be afraid to experiment. Iif I copy an image from my flat bed I can adjust the amount of ink to flow on my fabric. More or less ink as I need it. I also make small art quilts and use this method. It works for lots of projects.
Karen Watson says
Thanks for your input Maggie!
Gill Colthart says
Hi Karen, I used to buy the paper from the US but now it is stocked in the U K, in Hobbycraft (this might help someone). Love your graphics and projects
Karen Watson says
Thank you so much Gill! We do get a lot of questions about that!
DJ says
Tried this, the freezer paper dint really work well for my printer. I experimented a bit and found a way for it to work for me. Thank you! Without this I would have never known it was possible. Did a tutorial on how I did it on my blog with a credit to yours for the original tutorial. Once again, thank you!
Karen Watson says
I’m glad you were able to work it out, thanks for the credit!
helen says
hi there ,im from uk and cant find freezer paper anywhere (typical). I bought a roll of greaseproof paper as this is the closest thing i thought,but it doesnt stick to the fabric when im ironing it…please help im desperate to give this a go.i have my fabric ready..images ready….a printer…now how to make it stick
Karen Watson says
Hi Helen, Have you tried ordering it online, maybe Amazon? You could also try using a temporary spray adhesive with card stock.
Julie-Ann says
You can just use a regular school glue stick – used for paper. It sticks well enough for printing then peels away.
graphicsfairy says
Thanks Julie-Ann 🙂
lynda says
Hi. Love the tutorial. I am soooo new at this. I followed your tutorial right up to the printing on the fabric. Do you put the pix you want to print in the scanner and then run your material/freezer paper thru the printer? that is the only way I see to do it. Thanks so much.
Karen Watson says
Hi Lynda, You can use any of the thousands of images on this sight, or you can scan and then save the scan to your computer and then print. I think you will probably want to make some adjustments after you scan your image though, like cropping, straightening, sharpening etc. I hope that helps!
Teri says
I’ve never done this before and was wondering are you putting the image you want to print in the printer or are you getting off the internet? Can you type a recipe for example and then use this method to print it from word document?
Jan says
Hi
Can u advise on the fabric printing.
I have been successful and loce the results but is it possible to fix the ink.
Kind Regards
Jan
Karen Watson says
Hi Jan, Try soaking it in White Vinegar for 10 minutes, some people have found that, that tip works to set the ink, it doesn’t work with every printer, but it does work for some, so it’s worth a try!
Heidi says
Hi, I’m in Australia but lucky enough to be coming to the USA in January and hoping to buy loads of the freezer paper. Staples have a roll listed of GORDON PAPER- Freezer paper in a massive roll. Is this the same kind of product?
I am going to the heart of New York and then to Beverly Hills and so not sure where I might find the Reynold’s Brand and given the pricing here hope to fill a bag of it for myself and friends here to make some beautiful creations.
Thanks, Heidi
Karen Watson says
Hi Heidi, I haven’t checked Staples, so I’m not sure about that. But you should be able to find freezer paper at any Grocery Store. I hope that helps. Enjoy your trip!
Christina in FL says
Hello Heidi, Butcher paper is different from Freezer paper. Here’s a link from the web to explain.
http://www.oren-intl.com/blog/bid/245015/What-s-the-Difference-Between-Butcher-Paper-and-Freezer-Paper
Laura says
FYI, to make this even easier, I found pe-cut 8-1/2×11 freezer paper sheets on Amazon made (I assume) for crafters who want to put them through a printer for crafts such as this. Fifty sheets are under $8 plus free shipping with Amazon Prime membership. Just got mine in today as well as a canvas drop cloth. I’m ready to go!
Karen Watson says
Thanks for the tip Laura!
Sarah says
This was so useful! I had no idea it was so easy to print onto fabric with my home printer. I used a bit of calico for it and I love the slightly rustic feel it gave the image. Brilliant and easy technique! Thanks so much for posting!
You can see my attempt at printing here 🙂 http://tinyurl.com/paphw7t
Diane says
Can you print the same on legal size?
Elaine says
I love this!Very Crafty and it sure does come out crisp and clear!
Amy Hoeh says
Thank you, Karen. Ok… Dumb question alert.
After you’ve printed the letter sized piece of fabric, how do you attach it to a project? I mean… What if you’re project is a table runner? A letter sized piece of fabric would surely look out of place? Or for a shirt? The same holds true. I’m trying to do both of those projects as well as your french typography onto a wooden table. I’m a little overwhelmed with just enough information to get me inspired, but not enough to allow me to get the project started?