How to Print on Fabric
Today I’m sharing a fun way and economical way to print on fabric, using your home Inkjet Computer! I think this is probably the cheapest method of all. I call it the Freezer Paper Method because … it uses Freezer Paper … and also because … I’m super creative like that when it comes to thinking up names for various craft methods. 😉
{This post contains affiliate links}
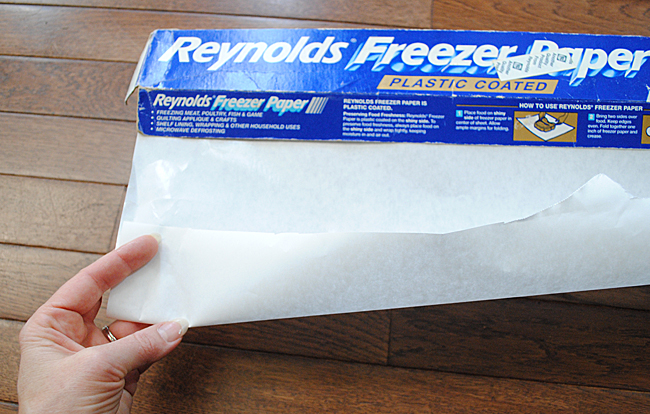
I thought I would show you a photo of the Freezer Paper, because I know in other parts of the world, it might be called something else, so I thought this might help. In case you’re not familiar with it, it’s paper that’s used to wrap up food in order to freeze it. It’s shiny on one side and dull on the other. As you can tell my box is about 200 years old … I guess I don’t freeze a lot of stuff. :/
Anyway, this method is super easy, just follow the steps below!
SUPPLIES:
- Freezer Paper
- Fabric (I used Canvas Drop Cloth HERE)
- Iron
- Scissors
- Printer
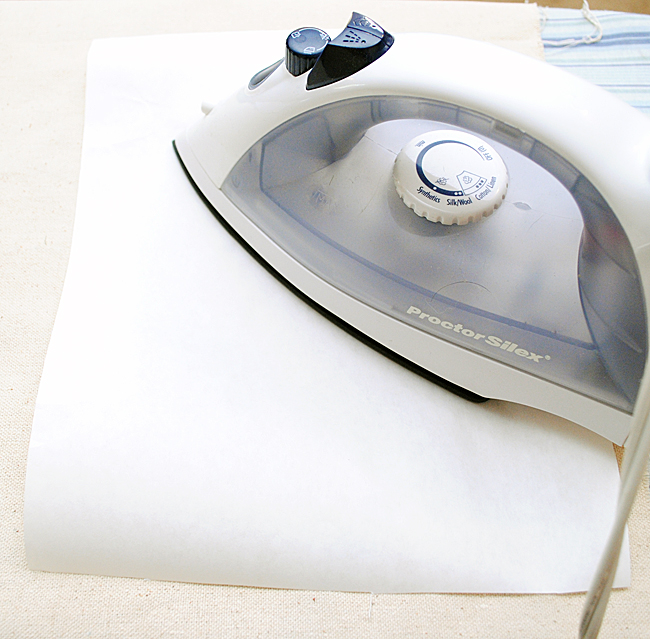
Step 1: Start with a freshly ironed piece of fabric. ( I like to print on Canvas Drop Cloth, because it takes the ink beautifully, and you can get a lot of fabric for the money, it also goes nicely through my printer). Cut out a section of freezer paper, approximately 8 1/2″ by 11″, and iron it (shiny side facing towards the fabric) to the fabric until it adheres nicely.
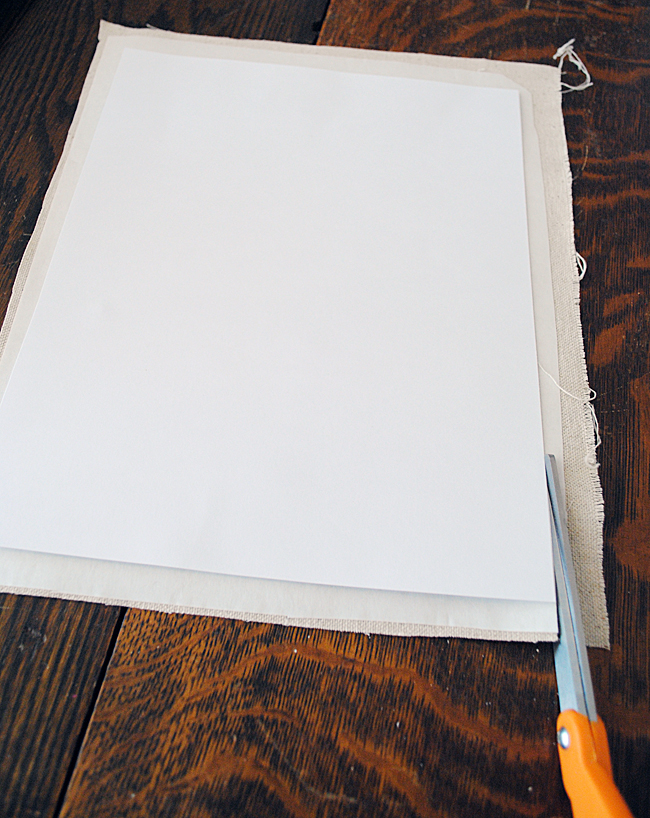
Step 2: Trim up the fabric and Freezer paper to exactly 8 1/2″ by 11″. I use a piece of printer cardstock as a pattern, to make sure the size is exact. You could measure it out and draw lines on it instead. Important: Make sure you don’t have any frayed edges, and that the fabric does not overhang the paper! You don’t wanted it snagging in your printer and getting stuck!
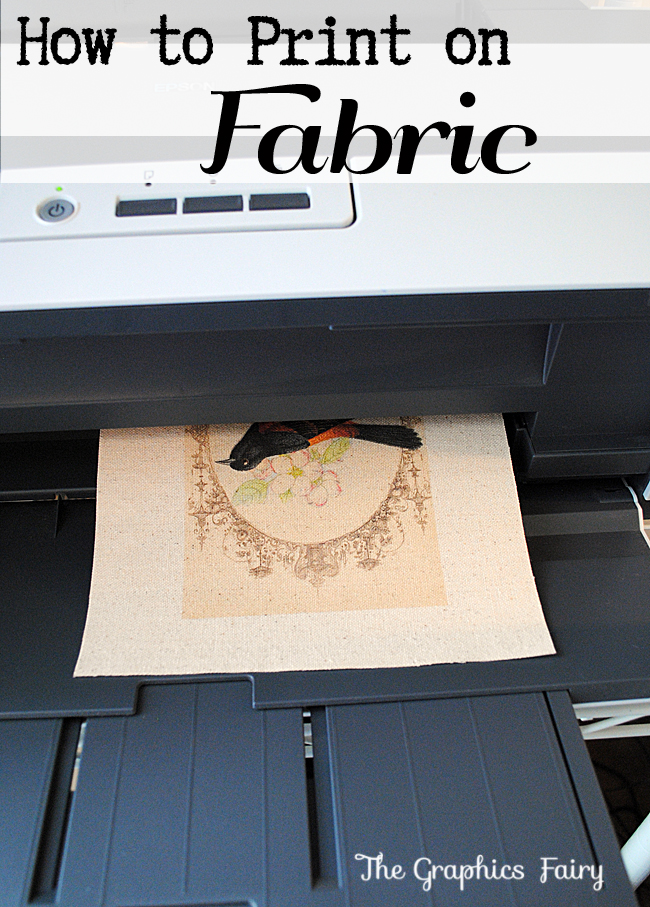
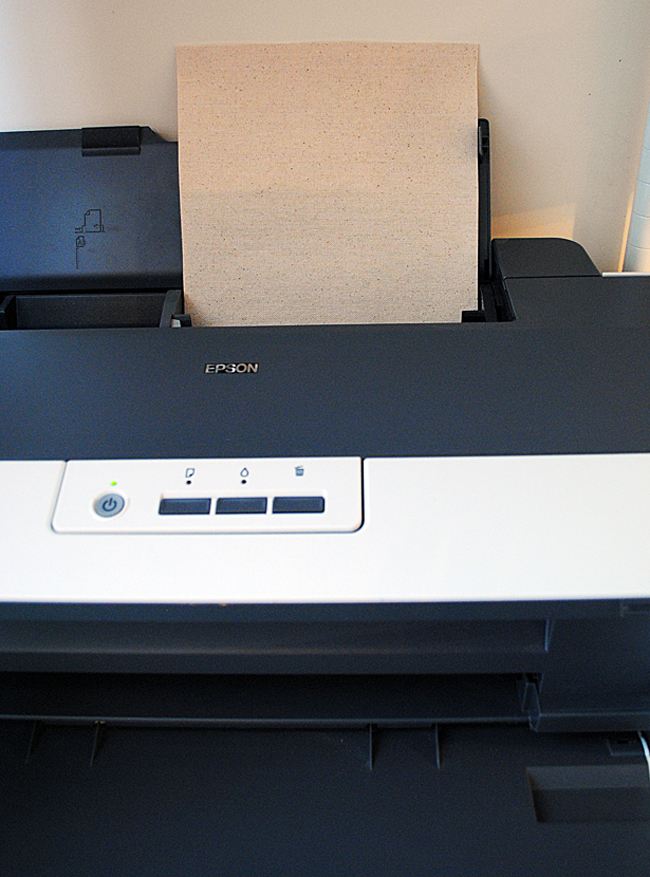
Step 3: Place in your printer. Make sure you have it placed so that the ink prints on the fabric side and not the paper side.
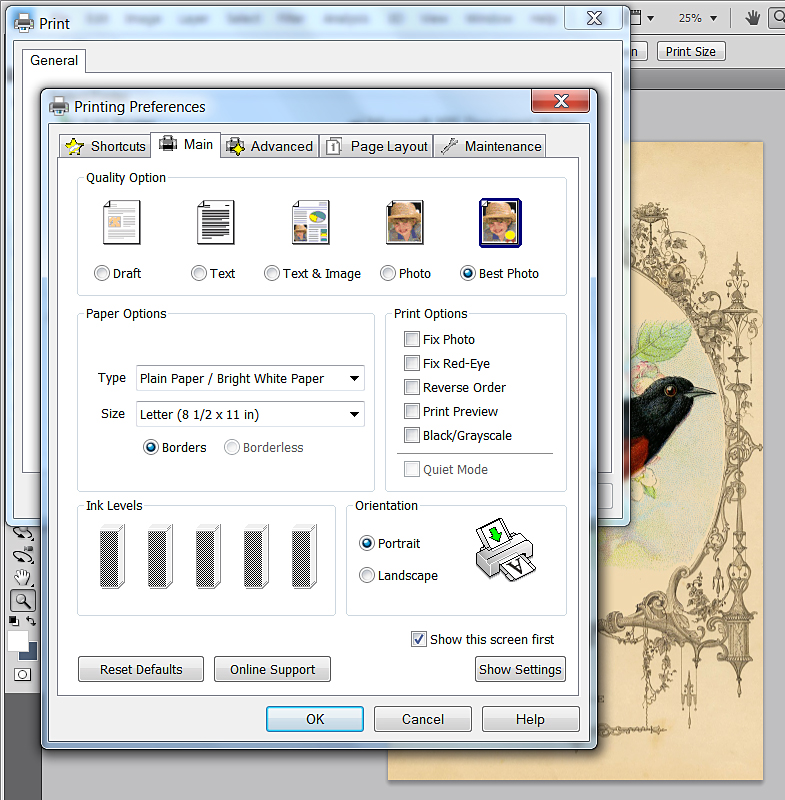
Step 4: Adjust your printer settings. When you hit the print button and get the pop up window, you should have some type of button for “Printer Preferences” click on that and select “Best Photo” and then print. This will put a nice amount of ink on your fabric, for the best quality image.
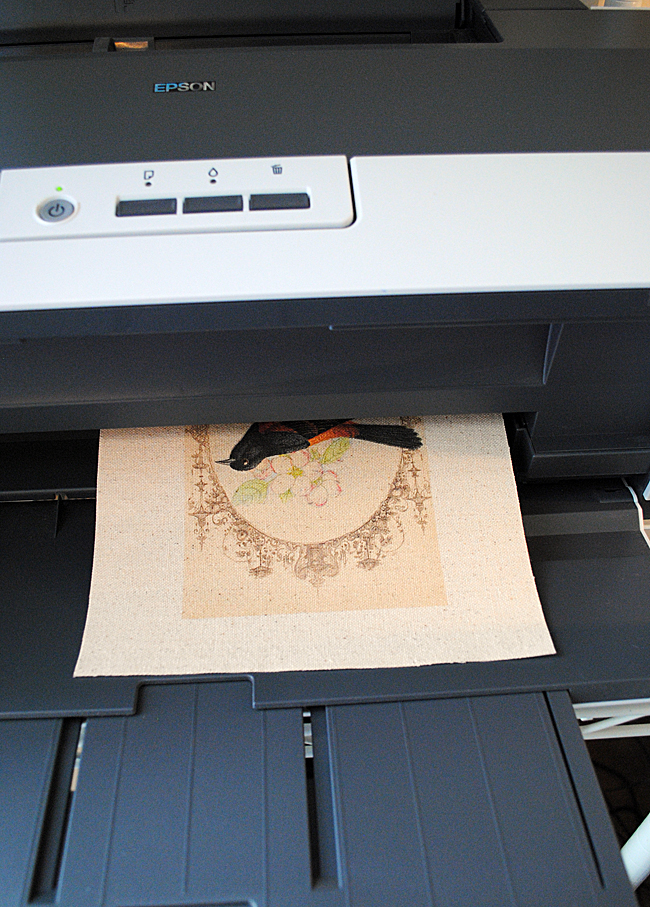
Step 5: Stay right with the printer and guide the fabric through if needed. For some reason it usually takes a few times for my printer to recognize it, it usually sends the fabric through a few times, with out printing, and I have to keep putting it back in until it decides to accept it. I have no idea why and hopefully yours won’t do that!
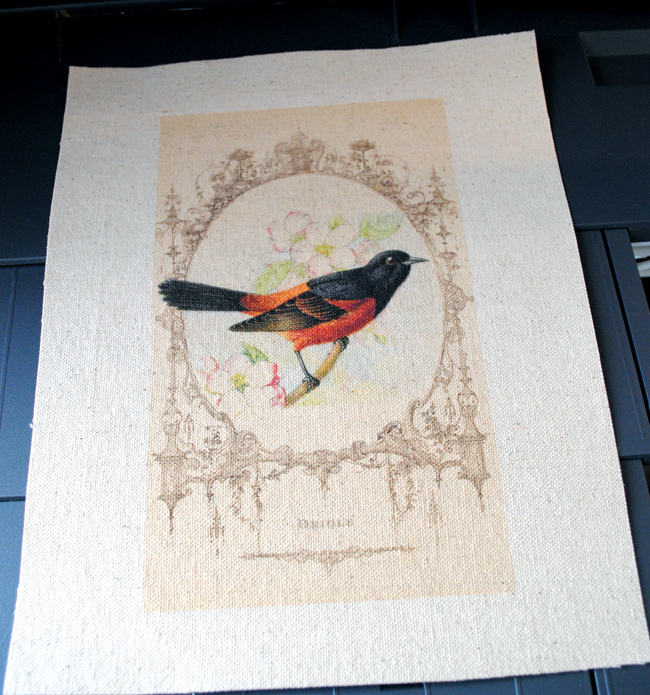
Gorgeous right?!! And so easy! The print is amazingly crisp and clear, I just love doing this! You can peel off your Freezer Paper now (I’m told you can reuse it, up to 10 times, so you can save it and iron it on to another piece of fabric. Yay!). I use an Epson Printer with Pigment ink that’s waterproof. If yours isn’t waterproof, you can try to set it with Vinegar using this Tutorial.
I hope you enjoyed this fun method! If you like the Bird Printable in the photos, you can grab it for free HERE, there’s also a tutorial for a fun project that I made with this!
Oh and in case you missed it… we’ve got more great Printing Tutorials like … How to Print on Tissue Paper! And check out How to Print on Brown Paper Bags as well!
And for even more Fun Fabric Printing techniques, be sure and check out our 6 Ways to Easily Print on Fabric Post HERE!
For more information about what Printers I recommend, see my Best Printers for Crafting Post HERE.
Welcome, I’m so glad you’re here! Browse around to find thousands of Stock Images that you can use in your projects or designs! I post new Vintage images every day, as well as projects and DIY’s too! Need more info about my site? Try my FAQ page.



Nannette says
This is so cool, I can not wait to try it. Can you use any type of fabric using this method?
graphicsfairy says
Hi Nannette,
It needs to fit through the printer so should not be too flimsy. Burlap, drop cloth fabric… Experiment and enjoy 🙂
Deborah Koffler says
Hi Karen, I have noticed on several other tutorials that they are using a step where they dip the fabric into water that is mixed with some product that at the moment the name escapes me. I’m assuming this step sets the ink to the fabric. In your tutorial you didn’t show this step is that because you used the waterproof ink? Thanks.
graphicsfairy says
Thanks Deborah, and yes I do use waterproof ink 🙂
Christa Paulosky says
Hi. I am anxious to try this. Is parchment paper the same as freezer paper?
graphicsfairy says
Hi Christa,
No, parchment paper is not waxy, it is used to line pans to keep things from sticking to the pan. You will find freezer paper in the same aisle at the store though.
Christa Paulosky says
Hi! I am anxious to try this! Is parchment paper the same as freezer paper?
Dee says
Hi! New here! I was wondering why you use the drop cloth canvas rather than say, muslin? I have been wanting to make a memory quilt with the pics that my grandson has made and also his school photos as well… Does it have to be canvas? Just nervous about using fabric in my printer!
Karen Watson says
Hi Dee, you should be able to use Muslin. I like Drop cloth because it’s cheap and I like the weight of it for my projects!
Judy Bielik says
What kind of fabric can I use that is white, instead of the natural color of canvas?
graphicsfairy says
Judy you can use any light weight fabric in the color of your choice:)
Kati says
WoW! I’m sure I’ll try it! Thanks for this freezer paper photo – I’ll have to find sth like that in Poland ;P
graphicsfairy says
Good luck Kati!!
June says
The flaw of the method…the ink runs if it gets wet at all. If you are making a purse, or pillow or quilt, this will not work.
graphicsfairy says
Hi June,
Yes, this method is best for non washable projects, especially if your printer/copier isn’t equipped with waterproof ink. Here is a link to my top tip for working with transfers, https://thegraphicsfairy.com/top-tip-for-working-with-transfers/ .and 12 easy image transfers, https://thegraphicsfairy.com/12-easy-image-transfer-techniques/. I hope these are helpful 🙂
Lisa's Creative Designs says
I make pillows with an Epson printer. I use a hot iron on the printed fabric before I assemble the pillow. I have washed a few of them in the washing machine on cold and never had a problem. 100% cotton fabric absorbs the ink quite well.
graphicsfairy says
Thanks Lisa 🙂
Laura Patel says
Thank you for this great tutorial.
I have spent all day with my new printer trying to attempt this. I have finally mastered getting my printer to recognise the paper but the final print is coming out blotchy, faded & a bit blurry.
I have an Epson Stylus Photo & I have selected Best Print. I’m running out of ideas?
I am printing onto white ploy cotton.
Help pretty please I’m going insane, lol.
Karen Watson says
Hi Laura, This post may help https://thegraphicsfairy.com/top-tip-for-working-with-transfers/ there can definitely be some trial an error. You will probably need to play with the settings (Best print might not be the best setting for this project, so try some of the other settings) and you may want to increase or decrease your wait time with the ink. Keep track of what you do so that you know the correct formula for next time. If all else fails you may want to try one of the other fabric transfer methods found here https://thegraphicsfairy.com/12-easy-image-transfer-methods-for-diy-projects/ the TAP iron on paper is a dream to work with and my favorite choice for fabric transfers!
I hope that helps!
Peretel says
Bonjour Karen je suis Francaise et nous n’avons pas de papier congélateur comme ça est ce que le papier sulfurisé pourrait faire l’affaire?
Janice says
tried it and it didn’t work. the canvas would not adhere to the freezer paper even using the hottest setting.
Karen Watson says
Janice did you have it on the right side?
Julie says
I have recently found some freezer paper in local Yorkshire Trading Co Shops.
Karen Watson says
Thanks for sharing your source Julie!
Lucy Mellon says
I’m going to use this method for my save the dates for my wedding! We are making strips of fabric with the details on then attaching them to a cotton bobbin and tying them with a ribbon and attaching a Singer sewing machine charm on the ribbon bow! Fingers crossed!! Does anyone have any suggestions of the best way of cutting these to avoid fraying? Many thanks in advance.
Karen Watson says
That sounds so cute Lucy! There is a product that you can get at Fabric or Craft stores that keeps fabric from fraying. Fray check? Something like that. I hope that helps!
Darla Harker says
thanks so much! i’m so excited to try this. i print on paper bags all the time and i love doing that for parties. thanks again for sharing.
Karen Watson says
You’re welcome Darla!
Beth Lewis says
I have had decent luck making the ink washable by pressing the dried image with a hot iron after it has been printed. Never have i washed the item many times but the few times i did it it worked just fine. It would be worth testing first to see if you really needed it to be truly washable.
Karen Watson says
Thanks for the tip Beth!