How to Print on Fabric
Today I’m sharing a fun way and economical way to print on fabric, using your home Inkjet Computer! I think this is probably the cheapest method of all. I call it the Freezer Paper Method because … it uses Freezer Paper … and also because … I’m super creative like that when it comes to thinking up names for various craft methods. 😉
{This post contains affiliate links}
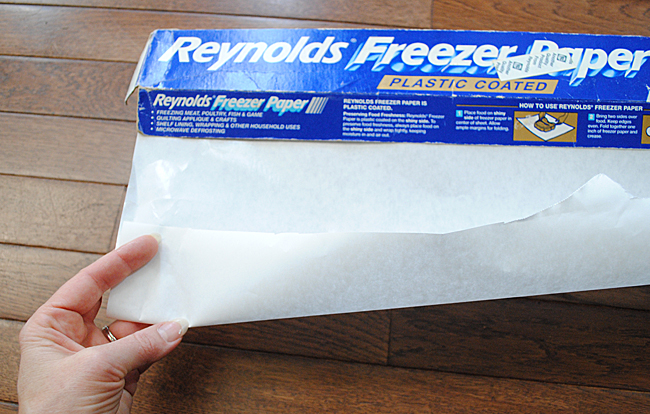
I thought I would show you a photo of the Freezer Paper, because I know in other parts of the world, it might be called something else, so I thought this might help. In case you’re not familiar with it, it’s paper that’s used to wrap up food in order to freeze it. It’s shiny on one side and dull on the other. As you can tell my box is about 200 years old … I guess I don’t freeze a lot of stuff. :/
Anyway, this method is super easy, just follow the steps below!
SUPPLIES:
- Freezer Paper
- Fabric (I used Canvas Drop Cloth HERE)
- Iron
- Scissors
- Printer
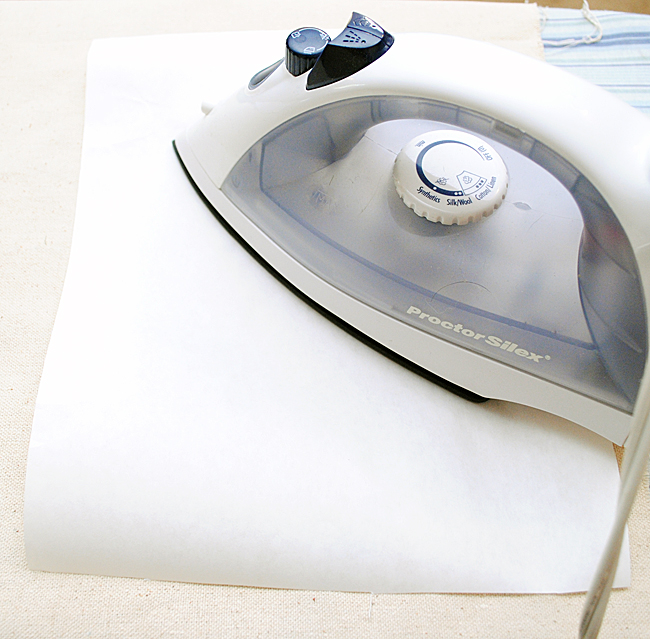
Step 1: Start with a freshly ironed piece of fabric. ( I like to print on Canvas Drop Cloth, because it takes the ink beautifully, and you can get a lot of fabric for the money, it also goes nicely through my printer). Cut out a section of freezer paper, approximately 8 1/2″ by 11″, and iron it (shiny side facing towards the fabric) to the fabric until it adheres nicely.
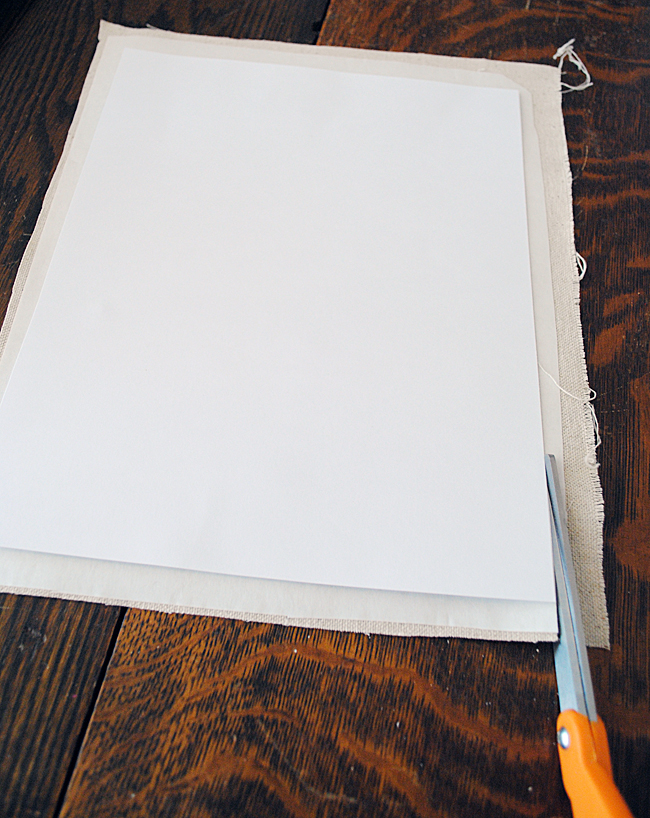
Step 2: Trim up the fabric and Freezer paper to exactly 8 1/2″ by 11″. I use a piece of printer cardstock as a pattern, to make sure the size is exact. You could measure it out and draw lines on it instead. Important: Make sure you don’t have any frayed edges, and that the fabric does not overhang the paper! You don’t wanted it snagging in your printer and getting stuck!
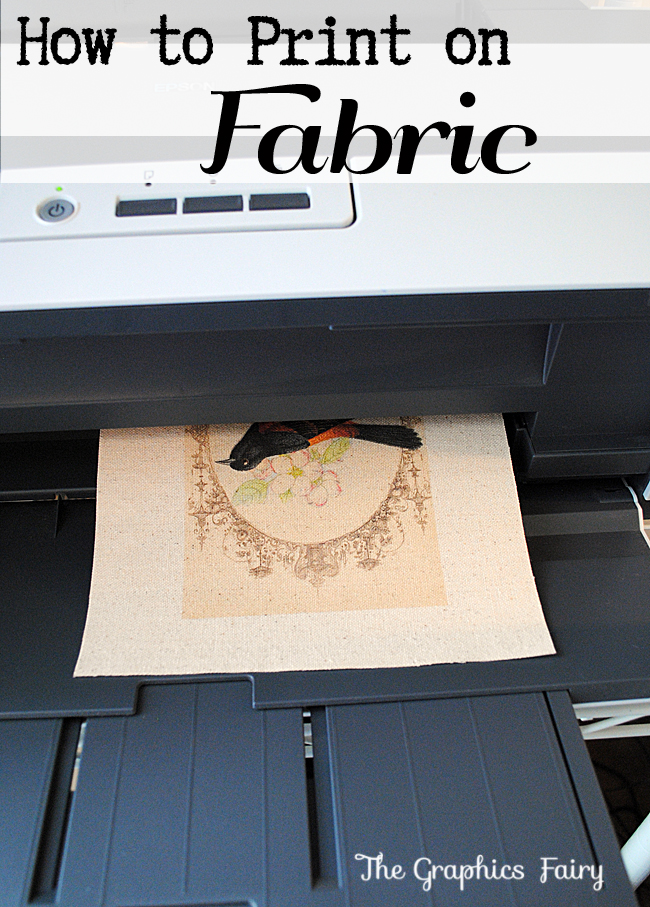
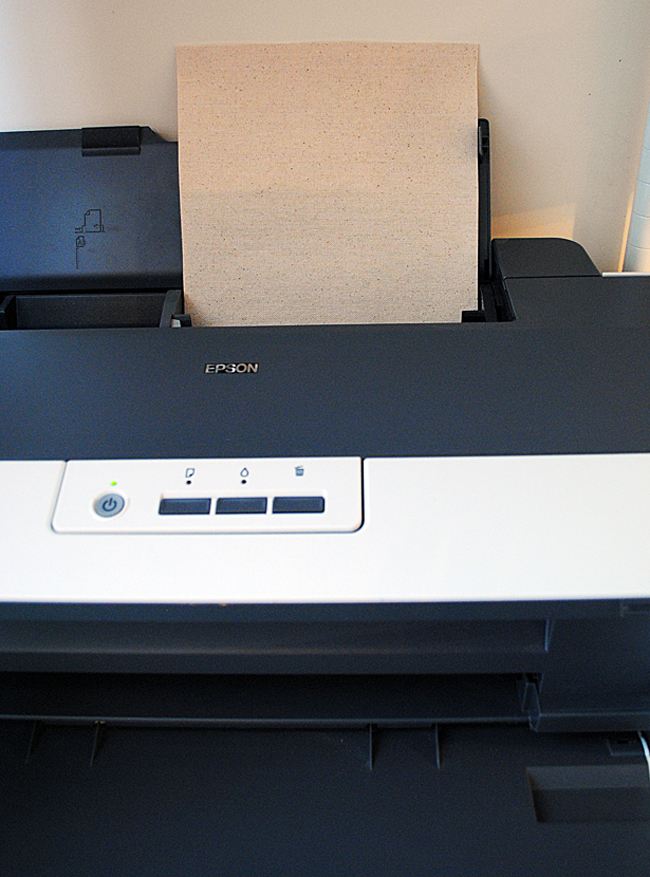
Step 3: Place in your printer. Make sure you have it placed so that the ink prints on the fabric side and not the paper side.
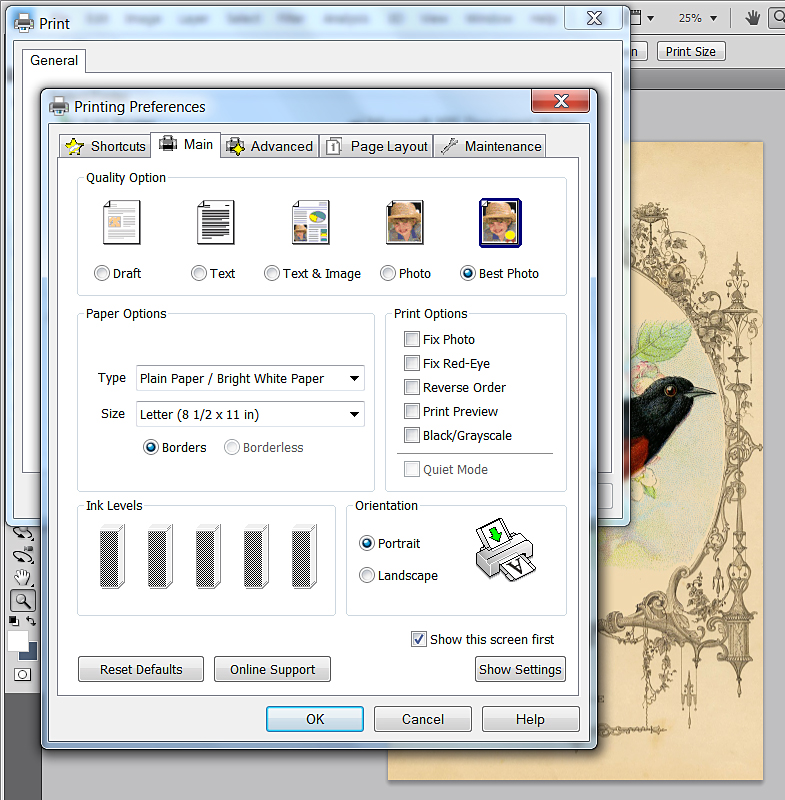
Step 4: Adjust your printer settings. When you hit the print button and get the pop up window, you should have some type of button for “Printer Preferences” click on that and select “Best Photo” and then print. This will put a nice amount of ink on your fabric, for the best quality image.
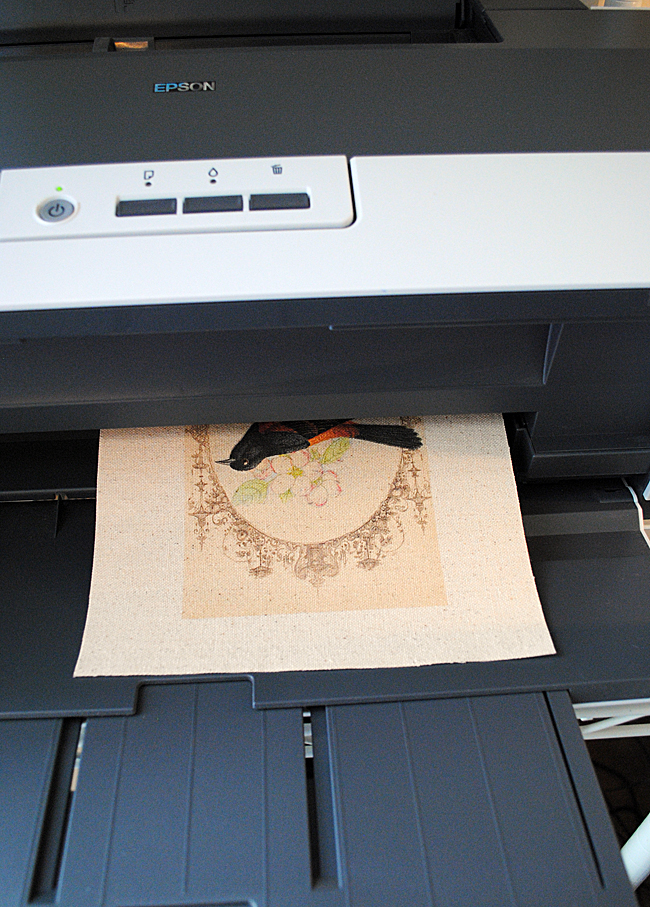
Step 5: Stay right with the printer and guide the fabric through if needed. For some reason it usually takes a few times for my printer to recognize it, it usually sends the fabric through a few times, with out printing, and I have to keep putting it back in until it decides to accept it. I have no idea why and hopefully yours won’t do that!
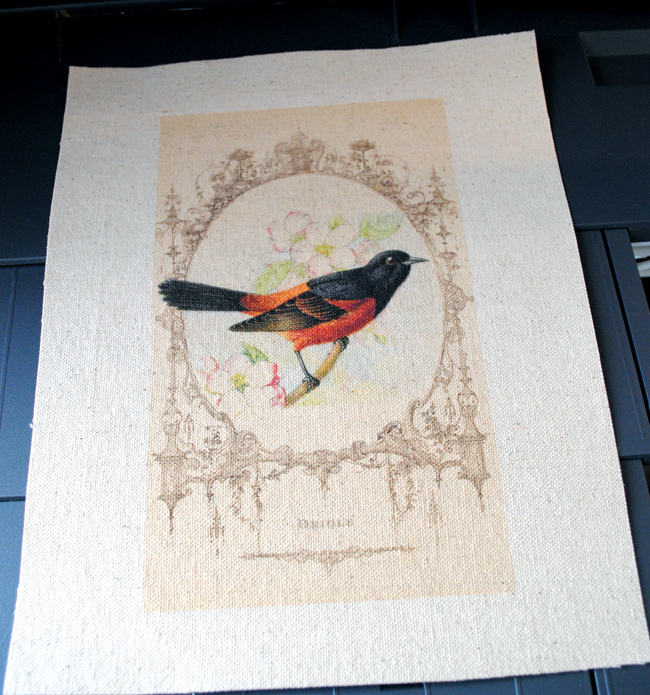
Gorgeous right?!! And so easy! The print is amazingly crisp and clear, I just love doing this! You can peel off your Freezer Paper now (I’m told you can reuse it, up to 10 times, so you can save it and iron it on to another piece of fabric. Yay!). I use an Epson Printer with Pigment ink that’s waterproof. If yours isn’t waterproof, you can try to set it with Vinegar using this Tutorial.
I hope you enjoyed this fun method! If you like the Bird Printable in the photos, you can grab it for free HERE, there’s also a tutorial for a fun project that I made with this!
Oh and in case you missed it… we’ve got more great Printing Tutorials like … How to Print on Tissue Paper! And check out How to Print on Brown Paper Bags as well!
And for even more Fun Fabric Printing techniques, be sure and check out our 6 Ways to Easily Print on Fabric Post HERE!
For more information about what Printers I recommend, see my Best Printers for Crafting Post HERE.
Welcome, I’m so glad you’re here! Browse around to find thousands of Stock Images that you can use in your projects or designs! I post new Vintage images every day, as well as projects and DIY’s too! Need more info about my site? Try my FAQ page.



Tammy says
Just thought of another possibility…what about using a fusible fabric product ( ie Pellon Wonder Under Transfer Web) in place of the freezer paper? Then if you have a Cricut or Silhouette, you can make the design a”Print & Cut”. Then the design prints on the fabric, Cricut cuts it out and then you can iron it on your project. May still need to do the vinegar rinse if the item will be laundered.
I’m going to try it right after I finish about 10 other projects. lol
graphicsfairy says
Very interesting idea Tammy, let us know when you’ve tried it how it worked out 🙂
Brenda says
Great tutorial. I have used this method before. However I keep running into the problem of air pockets because of the freezer paper not ironing on properly. What setting are you using on your iron? Do you press and hold, or press and move the iron around? Does the type of holes in the iron make a difference. I am trying to print picture squares for an attic windows quilt. Thank you for your help.
graphicsfairy says
Thanks Brenda, you should use a lower setting and move it around slowly. Maybe try practicing on scrap pieces until you have it down? I always recommend this on all projects 🙂 Good luck!
Brenda says
Thank you. I will try that.
Mel says
Hi,
Do you ever find your printer is printing with horizontal lines after one fabric print?
graphicsfairy says
No, I can’t say I have Mel, so sorry you are having printer issues. Have you checked your cartridges to make sure they aren’t running low?
Tisa M says
Thank you❗️
Loving the unique name choice too! ????
graphicsfairy says
Ha ha, thanks Tisa 🙂
Angie Winkler says
Hi Karen! I just joined your site today and it’s so exciting! I am wanting to print a funny poem on some kitchen Flour Bag towels (is that the right term?) and knew it could be done with freezer paper, but had no clue how to do it. After Googling my question, your site was the one that caught my eye. Your tutorial above is really clear and funny. You are a hoot! Thanks for all the free stuff too. Can’t wait to get started! xo Angie W.
graphicsfairy says
Thanks so much Angie! Have fun and create away!
Andrea D Stevens says
Thanks for posting! Great tip regarding the use of the canvas drop cloth, I can’t wait for Home Depot to open in the morning so I can get a couple!
graphicsfairy says
So glad you like it and will give it a try, I think you will love it, good luck!
Megan says
Hello, please tell me what setting you put the printer on for “paper type”.
I set mine on “matte photo paper” but apparently that was an ill advised choice as the fabric came out pretty smeared.
Do you use just “plain paper” setting?
Any thoughts much appreciated!
THANK YOU!!
graphicsfairy says
Hi Megan,
Just set it to plain paper. If you look at the post, there is a screen shot of my printer options to show you all of the settings I choose so you can copy them to make it easier 🙂 Good luck!
Edward says
Where do you buy your freezer paper? Instead of iron can I use my heat press machine?
graphicsfairy says
You can find it in the grocery stores in the U.S. in the same aisle as aluminum foil and kitchen papers. I do not know about using a heat press, I have only used an iron 🙂
Carol says
Will this be color fast?
graphicsfairy says
Only if you use waterproof ink Carol 🙂
Christina in FL says
I love printing on fabric and this is a great tutorial. Thank you for the link to the canvas.
One suggestion: Use a hot, DRY iron. With my iron, I use the high/cotton/linen setting but have to empty my iron of water because it won’t do high heat without steam.
graphicsfairy says
Thank you, great tip Christina, you are so right!!
Bernadette says
Has anyone tried this with felt?
carole says
After putting paper/fabric in the freezer, do you use it right away to the pinter? Or is it ok if you wait few hours?
graphicsfairy says
Hi Carole,
You use freezer paper for this method. It is a waxy kind of paper that is used to wrap food in that you want to freeze. You can find it in the grocery store with the aluminum foil and ziplock bags, etc. You may want to re-read the post to see how to do this method.
Bernade says
Has anyone tried this on felt?
graphicsfairy says
I have not Bernade.
Jill says
Just a couple of extra suggestions. Printing on fabric works best on a printer where the paper (or in this case the fabric/freezer paper) runs straight through the printer when printing. In some printers the “paper” wraps around a barrel on the inside and, I believe, comes out upside down. With this type of printer, because it wraps around a barrel, there’s a greater chance of the fabric/freezer paper jamming the printer. Printing on fabric will still work with these printers, there’s just a greater chance of jamming. I hope this makes sense. Also, I believe I remember reading that the freezer paper adheres best with a dry iron on low heat. No steam. Hope these help a bit.
graphicsfairy says
Thanks so much for the very helpful tips Jill 🙂