{This post contains affiliate links}
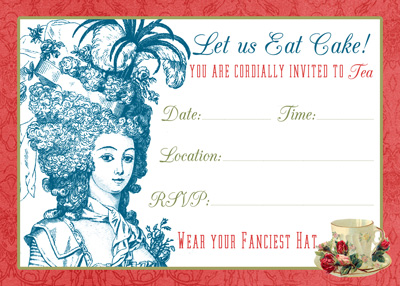
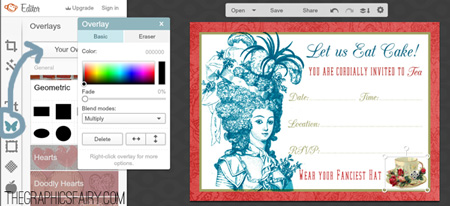
Today we have a Tea Party Invite Printable & Tutorial for you! With spring already here and Mother’s Day just around the corner, I thought it might be cute to create a tea party invite. When I found this Marie Antoinette style image with a huge hat, I knew I had to make something with her!
You can download the 5″x7″ invitation image below by clicking on it and saving it. Read on if you’re interested in learning how I made this invite using PicMonkey!
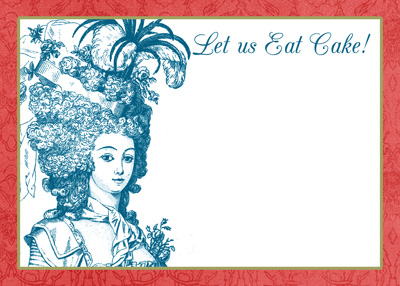
Here’s a blank version of the image if you want to use it for a different type of event.
************PICMONKEY TUTORIAL************
Now I’ll show you how I made this invite in PicMonkey!
Resources: woman, tea cup, pink background paper The fonts used on the invitation were CAC Champagne and Dalle. If you want those exact fonts, you will need to download & install them prior to opening PicMonkey. If you’re not a member over at The Graphics Fairy Membership site, this antique end paper is a nice background too.
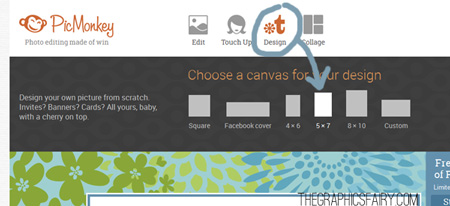
Create center graphic. Let’s start by making the inner portion of the invite. Go to PicMonkey, and select Design > Custom and enter the dimensions 1875 pixels x 1275 pixels (6.25″ wide x 4.25″ high).
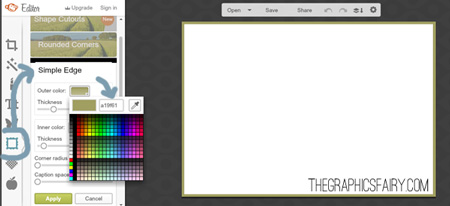
Add a frame. To add a simple line border, click the Frame icon and choose Simple Edge. Set the thickness (I chose 15) and click on the outer color to select a color value (I chose a19f61). Click apply.
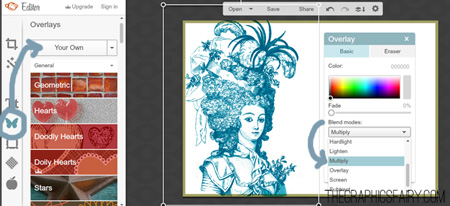
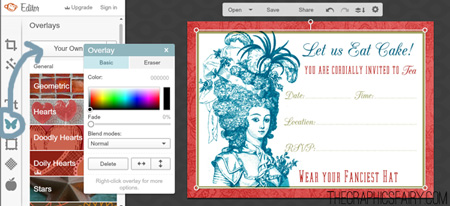
Add the image. Click the Overlays icon (butterfly), select “Your Own” and choose the image. Drag the corners of the image to resize, and place on the image on the left. If the image’s white background is covering portions of the frame, you can set the blend mode to Multiply.
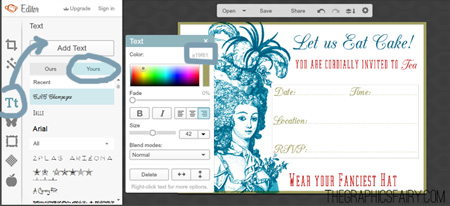
Add text. Choose the Text Tool and click Add Text. You can either use PicMonkey’s fonts or your own. I chose “Yours” and used CAC Champagne and Dalle. To change the text color, click on a color in the color box, or type in the color’s value. Color valued used: c12927 (pink), 136989 (blue), and a19f61 (green). Text sizes used: 185 (blue header), 115 (pink words), 100 (information section), and 40 (dots in information section).The header was about
Save the graphic. When finished, click the “Save” button at the top.
Create the invitation. Now we’re going to create the full size 5″x7″ invitation, so we can add the first graphic we made to it. Go to PicMonkey and click on Design > 5×7. Since the image will come in as a vertical invite, we need to rotate it. To do this, click on the Basic Edits menu (box icon), select Rotate, and choose the arrow moving to the right. Click Apply
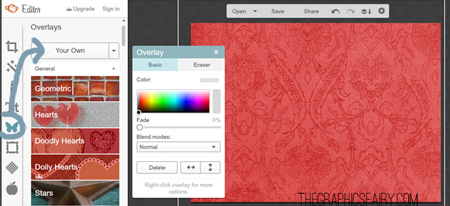
Add a background paper. Click the Overlays icon (butterfly) and select “Your Own” and select a background paper or pattern. Pull the sides to resize & reposition. Tip: if you have a neat pattern in a non-coordinating color, click on the color rainbow to try out different colors & recolor the background paper!
Add the center image. Click the Overlays icon (butterfly) and select “Your Own” and select the image with the woman and text you just made. Pull the sides to resize & reposition.
Add the tea cup image. Click the Overlays icon (butterfly) and select “Your Own” and select the tea cup image. Pull the sides to resize & reposition to the lower right hand corner.
Save the image. Click the Save button at the top when you are satisfied!
*************************************************************************************
We’ve done many PicMonkey tutorials on the site, including basic edits and DIY projects. To check out the list, click here.
I hope you enjoyed learning how to create an invitation in PicMonkey.
Emily
********************
Hello! Are you new to The Graphics Fairy?
Welcome, I’m so glad you’re here! Browse around to find thousands of Stock Images that you can use in your projects or designs! I post new Vintage images every day. Need more info about my site? Try my FAQ page.
