How to Print on Fabric
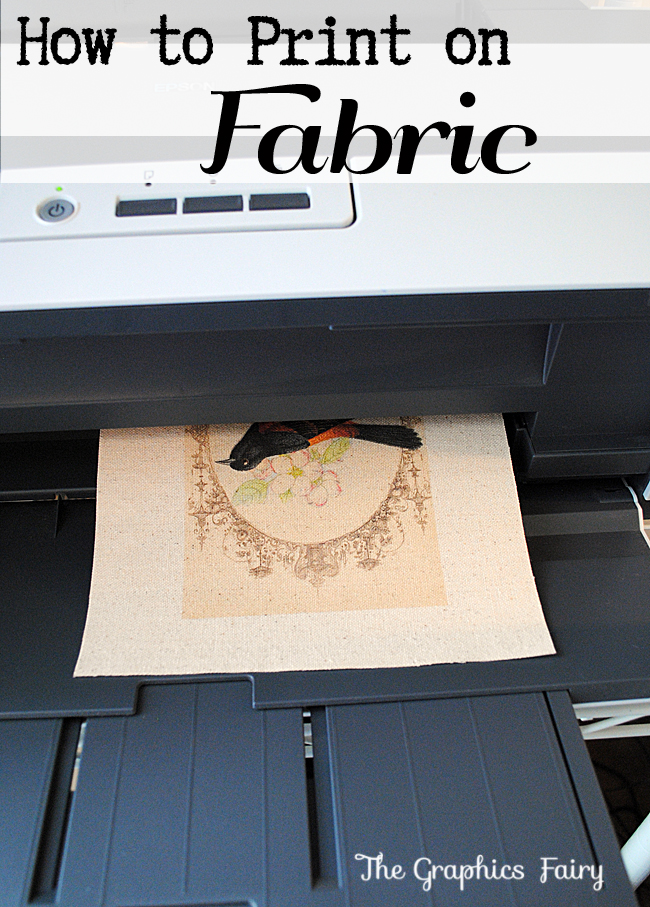
Today I’m sharing a fun way and economical way to print on fabric, using your home Inkjet Computer! I think this is probably the cheapest method of all. I call it the Freezer Paper Method because … it uses Freezer Paper … and also because … I’m super creative like that when it comes to thinking up names for various craft methods. 😉
{This post contains affiliate links}
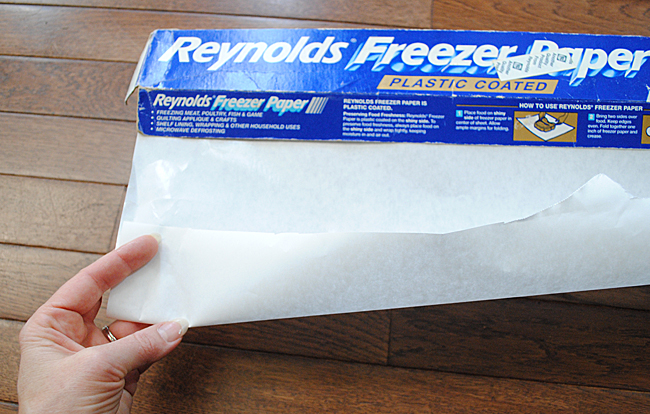
I thought I would show you a photo of the Freezer Paper, because I know in other parts of the world, it might be called something else, so I thought this might help. In case you’re not familiar with it, it’s paper that’s used to wrap up food in order to freeze it. It’s shiny on one side and dull on the other. As you can tell my box is about 200 years old … I guess I don’t freeze a lot of stuff. :/
Anyway, this method is super easy, just follow the steps below!
SUPPLIES:
- Freezer Paper
- Fabric (I used Canvas Drop Cloth HERE)
- Iron
- Scissors
- Printer
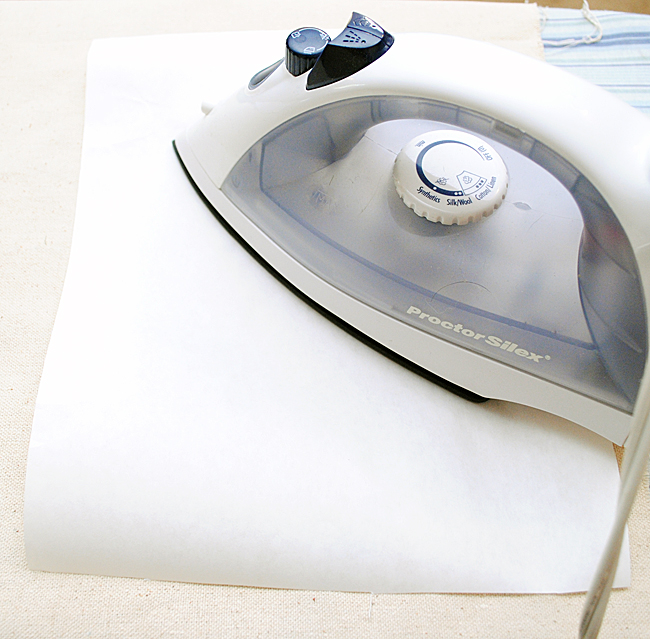
Step 1: Start with a freshly ironed piece of fabric. ( I like to print on Canvas Drop Cloth, because it takes the ink beautifully, and you can get a lot of fabric for the money, it also goes nicely through my printer). Cut out a section of freezer paper, approximately 8 1/2″ by 11″, and iron it (shiny side facing towards the fabric) to the fabric until it adheres nicely.
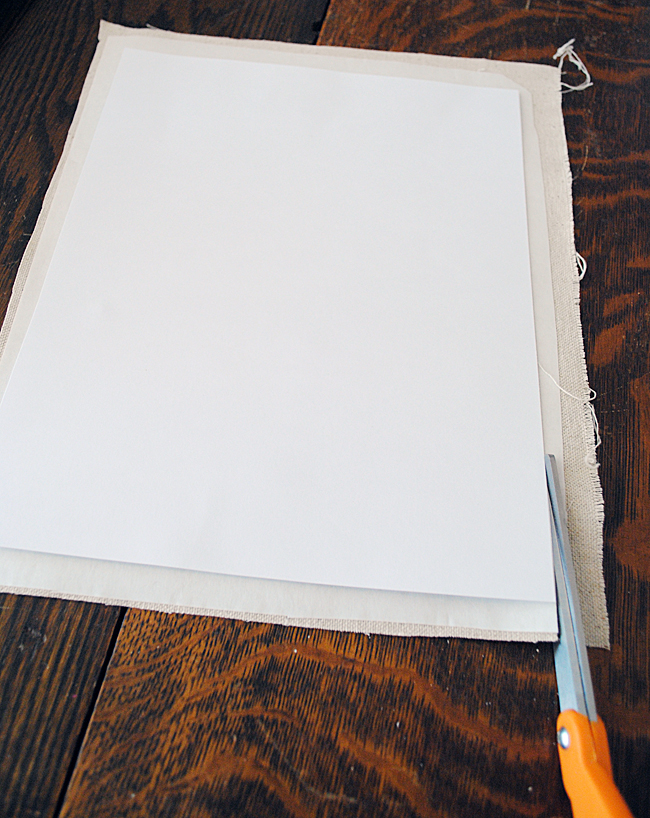
Step 2: Trim up the fabric and Freezer paper to exactly 8 1/2″ by 11″. I use a piece of printer cardstock as a pattern, to make sure the size is exact. You could measure it out and draw lines on it instead. Important: Make sure you don’t have any frayed edges, and that the fabric does not overhang the paper! You don’t wanted it snagging in your printer and getting stuck!
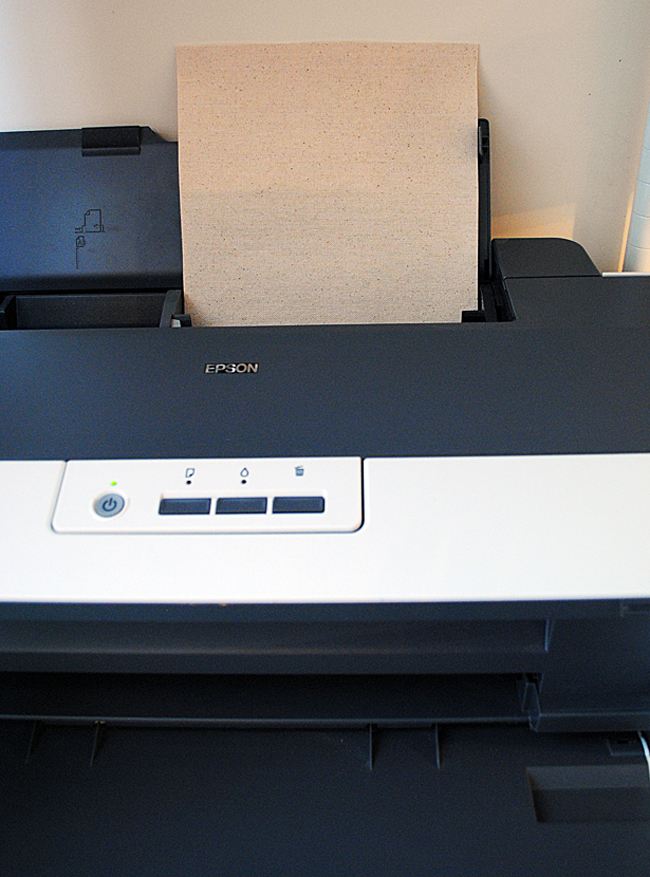
Step 3: Place in your printer. Make sure you have it placed so that the ink prints on the fabric side and not the paper side.
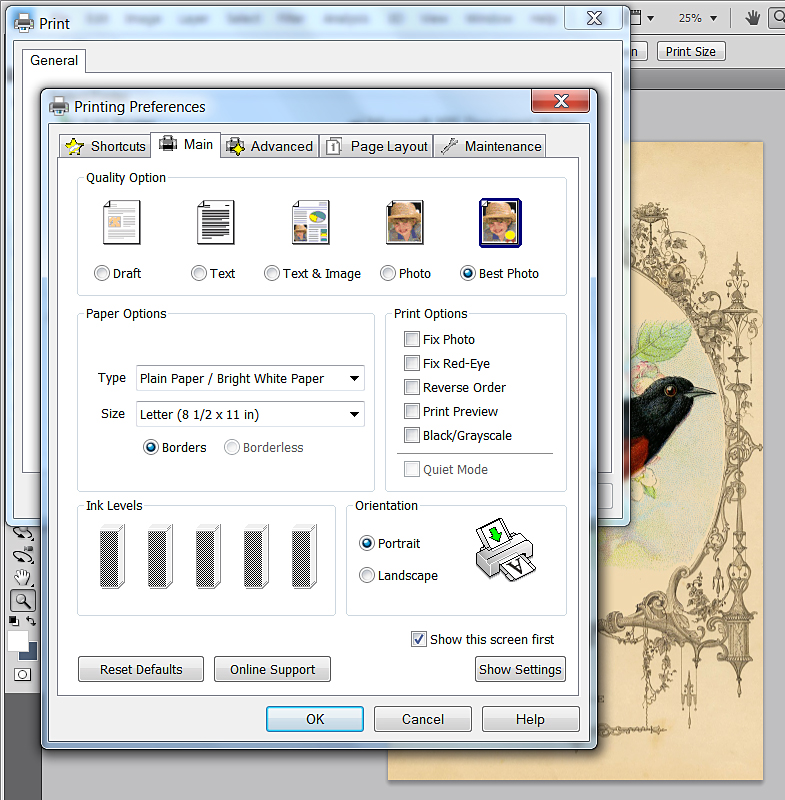
Step 4: Adjust your printer settings. When you hit the print button and get the pop up window, you should have some type of button for “Printer Preferences” click on that and select “Best Photo” and then print. This will put a nice amount of ink on your fabric, for the best quality image.
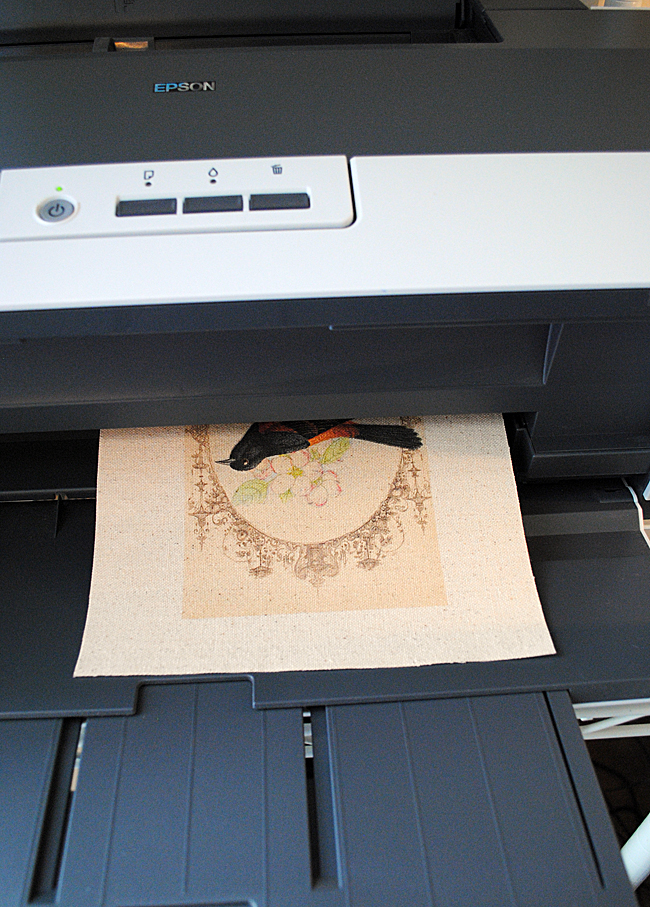
Step 5: Stay right with the printer and guide the fabric through if needed. For some reason it usually takes a few times for my printer to recognize it, it usually sends the fabric through a few times, with out printing, and I have to keep putting it back in until it decides to accept it. I have no idea why and hopefully yours won’t do that!
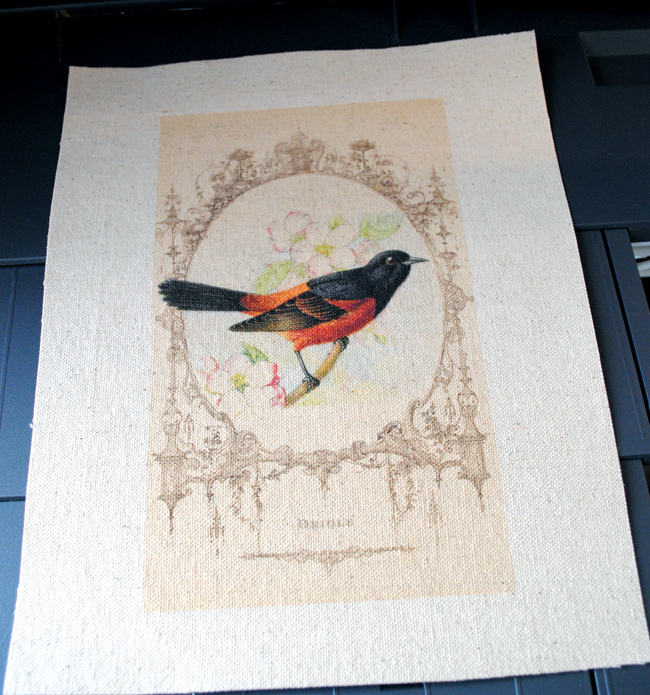
Gorgeous right?!! And so easy! The print is amazingly crisp and clear, I just love doing this! You can peel off your Freezer Paper now (I’m told you can reuse it, up to 10 times, so you can save it and iron it on to another piece of fabric. Yay!). I use an Epson Printer with Pigment ink that’s waterproof. If yours isn’t waterproof, you can try to set it with Vinegar using this Tutorial.
I hope you enjoyed this fun method! If you like the Bird Printable in the photos, you can grab it for free HERE, there’s also a tutorial for a fun project that I made with this!
Oh and in case you missed it… we’ve got more great Printing Tutorials like … How to Print on Tissue Paper! And check out How to Print on Brown Paper Bags as well!
And for even more Fun Fabric Printing techniques, be sure and check out our 6 Ways to Easily Print on Fabric Post HERE!
For more information about what Printers I recommend, see my Best Printers for Crafting Post HERE.
Welcome, I’m so glad you’re here! Browse around to find thousands of Stock Images that you can use in your projects or designs! I post new Vintage images every day, as well as projects and DIY’s too! Need more info about my site? Try my FAQ page.




Jacquelyn Flora says
Thanks for this great tutorial – I am going to try this. I had one question for you though – I think we have the same printer Epson Workforce 1100 – it is a wide format. I wanted to try to print a larger than 81/2 X 11 piece. Have you tried something larger as long as the freezer paper and card stock are the same size?
Also, I print a lot on card stock and my printer takes forever to take up the sheets – it either doesn’t grab it or it shoots it through like you were mentioning. In my experience having it on thick paper and envelopes doesn’t matter much. I wish I could find a good solution for this. If you ever do please share.
Thanks again.
Brad Maddox says
Trading is the Best Business Ever in the World.. All News updates about Forex Business, Latest Currency news updates, latest forex trading business updates, trading updates, forex trading latest news, forex brokers directory, forex brokers list, Dollars news affairs, Stock Markets, stock market news, stock market analysis, technology news, international forex markets, international forex business news and all updates about Forex Trading
ForexAffairs.Com
Carol D. says
Will the freezer paper method work on all fabrics ? What about burlap fabric ?
Vickie says
Hi, I have used this method and it works well, but I found one I like even better, I purchased basting spray from the sewing dept at Wal Mart, about $5. Cut out the fabric so it is a little larger than your paper, spray the fabric (make sure it is covered well to the edges) then stick the paper to it and trim the edges to fit the paper, you can smooth it easily, because if you have a wrinkle you just pull up the paper and it sticks right back. When done it just peals off easily. Make sure you have no strings around the edges of the paper. A can should last a long time. I make miniatures and print my own fabric all the time this way. Its faster than the freezer paper.
Julie Blake says
You say ‘the paper’ – do you mean ordinary printer paper?
Thank you.
graphicsfairy says
No Julie, I meant freezer paper 🙂
Caite says
Love this!! Thank you for the awesome tutorial! This website is a treasure trove. 🙂
Jo says
In the past, I’ve used spray starch to stiffen my fabric (light linen) and it passed through my laser printer with no problems.
Spray with starch, iron dry and repeat about 4 times. It should feel as stiff as paper without the bulk.
Jo
Jo Anne says
Besides the great tutorial that gives us a good image transfer option, those of us in America now realize we have taken freezer paper availability for granted all these years. Interesting comments from the UK and Australia!
Yvonne says
Does anyone know if this process works for burlap fabric also
popy says
thanks you very much for sharing…
Darlene says
Great tip about the canvas drop cloth. Thanks for sharing.
Kathy says
Thanks for the tut! can’t wait to try this!!!
mj says
you can also use double sided tape on cardstock to hold the fabric in place and then run it thru the printer…very easy and it works great!
Rebecca says
Thank you so much for this very easy and affordable option. I have tons of things I’ve been wanting to print on fabric and haven’t found one that wouldnt be so expensive. I love all of your graphics and really dig the projects everyone shares. Thanks!
Kerrie Marquart says
Wonderful information! Love it!
Kay Nicholls says
Thanks so much Karen for this easy, simple tutorial. I live in Australia, and after alot of searching I’ve found the Reynolds freezer paper is sold in Spotlight stores for $1.50 (AUD) per metre. I hope this is helpful to any of your other Australian followers. 🙂 🙂
Karen Watson says
Thank you Kay! I really appreciate it, I’m sure others will want to know!